Contact Us


We offer historical Asiatic archery products, including fitted thumb rings customized to the individual archer. We also offer a variety of accessories, tools, and exotic replicas. 

10 - rX5mR4JEDITED.jpg

Blog

Stay abreast of the latest sales, discounts, news, product releases, projects, and guides here on our blog. 

Product Introduction: New Ring Material

Silent Thunder Ordnance

Just a small sampling of the different rings we have available in this new standard polymer: metallic gold. 

Just a small sampling of the different rings we have available in this new standard polymer: metallic gold. 

We've offered metallic silver as one of our standard polymer colors for quite some time. Now though we're adding metallic gold. As the name implies, it is a metallic fleck material with a gold hue. It is available now as an option across all our standard polymer ring styles. 

New Material: Biocomposite!

Silent Thunder Ordnance

Our Manchu ring (thick variant) in biocomposite 

Our Manchu ring (thick variant) in biocomposite 

The introduction to our biocomposite material, long overdue, is here. We developed this material as part of the design process on our Nubian rings, seen below. The historical Nubian samples had a very nice internal texture, and the ability to absorb some moisture keeping the ring grippy as the thumb naturally produces sweat. We wanted to replicate this, and ended up with this material as our preferred option. It has great internal texture, grippy without being abrasive, and the ability to wick away some moisture from the thumb. Because the ability to absorb things is a double edged sword, we finish the outside of each of these rings with our special beeswax citrus oil blend to seal, protect, and add a beautiful lustre. 

Why biocomposite? In short because it accurately describes the material, and because cellulosic lignin biopolymer composite is a bit of a mouthful. To be perfectly clear, this material bears no relationship to the biocomposite used by Csaba Grozer. This is a fantastic material though, in fact we liked it so much we expanded it over to our Exotic Manchu rings where it also performs extremely well. 

Our three styles of Nubian rings, based on measurements of the originals. 

Our three styles of Nubian rings, based on measurements of the originals. 

Power is back!

Silent Thunder Ordnance

Our Hybrid ring seen here in Sterling silver. 

Our Hybrid ring seen here in Sterling silver. 

The storm left us without power or service for a week, but as of today, 11/6/17, we are fully back up and running. Thank you everyone for your patience, and apologies to those whose orders were delayed or inquiries were not responded to in a timely fashion. 

UPDATE 11/1/17

Silent Thunder Ordnance

Korean XL fletching, Hwarang bow, Sterling Silver Hybrid ring. 

Korean XL fletching, Hwarang bow, Sterling Silver Hybrid ring. 

To our valued friends and customers. Sunday night (10/29/17) a major storm slammed into New England. This took out trees and power lines throughout the northeast. We've been without grid power or internet since then, and mobile data is unreliable at best. We're currently running on emergency backup generators. Because of this our ability to respond to inquiries, manufacture products, and ship orders has been severely negatively impacted. If you placed an order and it hasn't shipped, or you sent us a question which hasn't been answered, please know you're not being ignored we've simply been unable to respond. 

Service is supposed to be restored by November 4th, and on emergency generators we've been slowly working our way through orders. Orders may still be placed, and will be filled as soon as possible but likely a couple days behind schedule. 

Bulbous Nocks - A Mike Loades Project (part 2)

Silent Thunder Ordnance

Our MikeL Bulbous Nocks on carbon shaft inserts, seen here with one of our Ottoman rings and a complete Ottoman arrow. 

Our MikeL Bulbous Nocks on carbon shaft inserts, seen here with one of our Ottoman rings and a complete Ottoman arrow. 

So lets start this off with a big thank you to Mike Loades for supplying images, dimensions, arrows, and ultimately the impetus for this entire project. To that end, we've been working on Mughal style bulbous nocks, but made for modern arrows and strings. Mike's stated goals for this project were to create a modern interpretation of a Mughal bulbous nock to aid in mounted archery speed shooting. 

To be clear, before someone nitpicks historical inaccuracies of this project, no these nocks are not nor were meant to be perfect replicas. Furthermore, we've been modifying dimensions and tuning the design for Mike Loades' specific application, rather than aiming at the general public. As the project evolved, to achieve functionality and its ultimate ends, we've drifted further and further from the design's historical roots. 

So last we left off the project was a success, why the update? Well credit where it is due, another archery historian, Alexander Stover approached us to purchase some of these nocks for experimentation. He wanted them for carbon arrows though, and offered a simple solution: aluminum inserts which offer a conversion to standard 11 degree taper. It wasn't until we'd finished manufacturing them it occurred to anyone that he had just inadvertently solved a problem we'd wrestled with months earlier. Who would have guessed that such inserts are commercially available and fairly reasonably priced? 

Korean Target Fletching

Silent Thunder Ordnance

Possibly the most iconic image of asiatic archery of all time? While there is a lot to dissect in the image, what caught our eye were the feathers. Very long and low profile, we're not aware of anything like them on the market available today. We wanted to add a feather cutting jig to our lineup that'd allow accurate reproductions of this style. This image alone wasn't enough though, so we also pulled dimensions from a number of examples in the Grayson Collection to come up with "average dimensions" of the style. 

Our Korean Target design seen here with our Hybrid ring in sterling silver and a Hwarang Korean bow

Our Korean Target design seen here with our Hybrid ring in sterling silver and a Hwarang Korean bow

The results, as can be seen above, make a beautiful addition to our lineup. The best part is they're available now, in left and right wing. The question should be asked though: how well do these ultra low profile Korean Target designs work when stabilizing an arrow? The answer is quite well. With good technique, and a properly set up bow, one ought be able to shoot fletchless arrows. The feathers then act as minimalistic stabilizers and have very low drag optimized for shooting at distance.

All 7 of our jig styles: Korean XL, Korean Target, Ottoman Military, Turkish Flight, Japanese, Manchu, and Manchu Mini. 

All 7 of our jig styles: Korean XL, Korean Target, Ottoman Military, Turkish Flight, Japanese, Manchu, and Manchu Mini. 

Bow Performance Project - JZW Manchu (part 2)

Silent Thunder Ordnance

20170710_093802EDITED.jpg

Lets start off with a huge thank you to Tiger Tail Archery for supplying this bow for assessment. The rumor mill has it that this is the best of the breed, the Manchu replica to rule them all, the benchmark. What better place to start then?

In part 1, we did the force-draw analysis and general impressions. Here the rubber meets the road, and we spit 1111 grain arrows through the chrono with this beast. I want to note quickly that this is one of my favorite bows. While third favorite doesn't sound all that impressive, only beaten by my two birchbark backed Korean bows, it should be. The more I shoot this bow, the more I like it. The hard wearing ray skin accents in particular are an extremely nice touch, which I liked so much I started applying them to other bows

JZW Manchu bow, Manchu arrows with feathers off our jig (see the associated project), and our Manchu thumb ring. 

JZW Manchu bow, Manchu arrows with feathers off our jig (see the associated project), and our Manchu thumb ring. 

We used a 1111 grain arrow, yes it really ended up being precisely that, shot repeatedly. This is as opposed to our standard testing set, which is neither long enough nor meets the minimum GPP of this bow. 

Chrono data

Chrono data

So how did it do? Do my earlier subjective comments regarding arrow velocity stand up? The short answer seems to be an emphatic YES! At a whopping 18.8 grains per pound, this bow managed a maximum of over 155FPS, which translates to 60 foot pounds of energy. 71% efficiency, particularly for a bow this large and heavy is nothing to sniff at, in spite of the high GPP, but by far the most impressive number is the output energy over poundage; near as makes no difference it is 100%. This is possible due to high early draw weight, a very long draw, and a very flat force-draw curve. If you store 1.4 foot pounds of energy for every pound of draw weight, you only need 71% output/stored efficiency to spit an arrow back out with 1 foot pound of energy for every pound of draw weight. 

Perhaps more interesting though is the comparison to other bows. Note that, in terms of poundage, this bow is in 5th place (not counting the Hwarang). Despite that, it has the highest kinetic energy output of any bow we've yet tested and by a reasonably comfortable margin, 9% more than the AF Tatar which is second best and 5 pounds heavier. So there it is, the Manchu bow living up to its name. Hopefully this'll be the first of the breed we test, rather than the last. 

Arrow Pass Repair

Silent Thunder Ordnance

A lucky alignment of light filtering through  the trees in the wind created this snap. I couldn't have set it up like this had I wanted to. Seen here with our Hybrid ring in solid sterling silver and our semi-ottoman arrows of a project by the …

A lucky alignment of light filtering through  the trees in the wind created this snap. I couldn't have set it up like this had I wanted to. Seen here with our Hybrid ring in solid sterling silver and our semi-ottoman arrows of a project by the same name. 

We've all been there, worn through the arrow pass on our bow. Inevitable right? Well instead of replacing it with another thin strip of leather, quick to be worn through once again, how about something harder, better, longer wearing? Stingray skin is the obvious answer. 

We've all seen stingray skin, but what is it really? Ray skin, used in these applications anyway, has little calcified nodules somewhat like teeth. As a result is is extremely hard wearing. The white pattern so often associated with ray skin is accomplished by selective dying in some cases, or sanding of dyed leather in others. It is worth noting that, if like me you prefer an aggressive texture, ray skin will make an absolutely stunning grip wrap as well. 

Some pieces of stingray skin I had laying around, as well as the offending bow. 

Some pieces of stingray skin I had laying around, as well as the offending bow. 

To work! First off, we can see above the arrow pass one one of my favorite Korean bows. Clearly it is worn, but you can also see where the leather has finally developed a hole through to the birch bark. On this bow, rather than being a replaceable pad, it is a complete wrap. Not convinced I wanted to redo the entire wrap, I thought a pad replacement would be a good solution. 

Paper here serves as the basis for the template. 

Paper here serves as the basis for the template. 

The key to all good work is preparation and planning, the less skill necessary the better. To that end, rather than eyeball it or cut oversize and trim to fit, I figured a pattern would be in order. Paper is a good analogue here as it represents the relative lack of stretch of ray skin, while being cheap and easy to cut. I decided to go with a pad which blend with the existing wrap somewhat. Had this been a bow with a thread binding, I'd have probably opted for a more sculpted shape which stood out. 

Line up and mark carefully from the visible side.....

Line up and mark carefully from the visible side.....

...to the back side, from which you have to cut with ray skin. A hammer and chisel deliver the sharp blows necessary for clean accurate cuts. 

...to the back side, from which you have to cut with ray skin. A hammer and chisel deliver the sharp blows necessary for clean accurate cuts. 

The secret to cutting stingray skin is to go from the back, and use sharp impacts. You can't cut this stuff with a knife, at least not easily, and you'll do some evil to whatever blade you use. In this case I went with an inexpensive chisel which had to be reground anyway. Lay out the pattern on the front, so you have the area/look you want, and mark the corners so you can transfer the pattern to the back. Then cut away. It is worth noting I favored the larger pearls of the center, for purely aesthetic reasons. Because these will all experience wear, the white of the pearls will become visible wherever the arrow passes irrespective of what started sanded. 

Surface prep is key to successful bonding, a little sanding of the leather to even it out and ready the surface was necessary. 

Surface prep is key to successful bonding, a little sanding of the leather to even it out and ready the surface was necessary. 

The key to any good adhesive application is surface prep. So I carefully marked out where the ray skin would cover, and sanded to match. Adhesion can be accomplished with natural protein glues, cyanoacrylate, or contact cement. Because this application doesn't require significant flexibility post-bonding, I reached for my go-to high-toughness high-viscosity hobby grade CA adhesive. 

Effective clamping is also necessary, even with "instant tack" adhesives, the mating surfaces need to be held firmly until things have fully cured for maximum strength. 

Effective clamping is also necessary, even with "instant tack" adhesives, the mating surfaces need to be held firmly until things have fully cured for maximum strength. 

First contact is a fraught moment, from Star Trek to adhesives, so no picture of the Titanic moment. After applying the adhesive and carefully cleaning up any excess, I quickly wrapped the whole thing in painter's tape. If you've never used good painter's tape, you should go out and buy one of the name-brand spendy roles. For masking and other release applications like this, the real deal really is worth the price. You don't want to leave sticky behind, and you don't want the tape bonding to your project, so while nothing is perfect in my estimation the good stuff is worth it. My 2c anyway. 

Another stark snap showing the beautiful ray skin pass, one of our rings in solid sterling silver, and custom house-made arrows. (also a project posted here) 

Another stark snap showing the beautiful ray skin pass, one of our rings in solid sterling silver, and custom house-made arrows. (also a project posted here) 

24 hours later the adhesive has cured, and I removed the tape to find this. Beautiful. Of course beauty is nothing without function, so I took it for a quick 50 arrow test drive. Works beautifully, and barely visible wear, so I'm labeling this one as a success!

Out of Office

Silent Thunder Ordnance

We're out of the office until August 4th, during which time email inquiries may not be responded to in a timely fashion and some orders may be delayed. We apologize for any inconvenience this may cause. Because of this we're offering a 5% site-wide discount. Enter the coupon code 91G1HUI at checkout. 

Bow Performance Project - JZW Manchu

Silent Thunder Ordnance

Jia Zhiwei's Manchu bow with house made arrows and our Manchu ring. 

Jia Zhiwei's Manchu bow with house made arrows and our Manchu ring. 

Lets start off with a huge thank you to Tiger Tail Archery for supplying this bow for assessment. The rumor mill has it that this is the best of the breed, the Manchu replica to rule them all, the benchmark. What better place to start then? 

First impressions upon release are, actually, pretty underwhelming. Given that you're shooting 1200 grain spear shafts, borrowed from our Manchu Arrow Project, out of a massive bow you're expecting armageddon. Instead, the release is clean, free of handshock, and the spears zip down range apparently unaware that they're about three times the mass of a normal arrow. Seriously. The arrows don't slowly trundle along, you're not desperately fighting form to prevent fishtailing, and there is no handshock. Granted these arrows are 40", and we all know forward mass helps with flight, at ~20GPP there is mass to spare to keep handshock at bay. The big surprise, and the one I still can't get over, is just how fast it is. How can arrows this heavy possibly fly this fast out of a bow this childishly light weight? The flight is beautiful and shots are easy to control. Lets talk more in-depth qualitatively and quantitatively about the bow, and how it accomplishes this. 

The thick walled version of our Manchu ring, seen here in it's jade-like incarnation. Next to it are some of our Manchu arrows and Jia Zhiwei's Manchu bow with house made arrows and our Manchu ring.

The thick walled version of our Manchu ring, seen here in it's jade-like incarnation. Next to it are some of our Manchu arrows and Jia Zhiwei's Manchu bow with house made arrows and our Manchu ring.

Straight out of the gate, this bow is physically heavy compared to the shorter Asiatic bows we're used to, .830 kilos to be exact. That is a lot next to a .365 kilo Hwarang that draws >100 pounds. Amusingly though, it's reflex is such that when unstrung it isn't terribly long. A Hwarang is 42" unstrung, a Kaya 39.5", and a Grozer Turkish 37". This JZW Manchu is only 53.5" tip to tip when unstrung, due to pretty aggressive reflex. If one were to place the tips of an unstrung bow on the ground and measure from the ground to the belly side of the handle as a standard for unstrung reflex, this bow ranks quite highly. An AF Turkish is 7.5", Hwarang 10", AF Tatar 10.25", Grozer Turkish 12", and the JZW Manchu a whopping 13.75" of reflex. The other thing to note is the sheer thickness and poundage of the limbs. While the Grozer gains its visually large limbs through a covering of very very thick leather, the JZW uses far thinner leather and simply has massive limbs. Pulling them below the siyahs, you'd expect them to belong to a bow easily in excess of 100 pounds. Puts the use of those big levers into perspective. 

Details seemed to matter to the bowyer. There are a lot of nice little details. The two colors of leather on the limbs, the tip inserts masked for different finishes, the obvious roughing for surface prep under the string bridges, the ray skin above and below the grip, thicker than normal serving, perfect fit of all the different leather pieces, and the double serving on the string at high wear points just to name a few. One nit to pick though if I may, and I must, is the serving around the arrow. It is symmetrical, centered, which is fine but there simply isn't enough of it. Shooting 1100 grain 1/2" diameter nocks, the nocking point is almost off the end of the serving. Over time, the lack of serving above the point means serving will inevitably drift upward, and of course it means I'll be handling unserved string above the arrow with my index finger. Could be just a fluke on this string, and re-serving a string is hardly the end of the world, but on a bow where so many of the details were clearly noticed and mattered to the bowyer, it is a bit out of place. 

Jia Zhiwei's Manchu bow with house made arrows and our Manchu ring. 

Jia Zhiwei's Manchu bow with house made arrows and our Manchu ring. 

first draw was a little scary, because of crackling sounds. It isn't uncommon for bows to make a few cracking sounds the first time they're drawn, and I suspect this was from glue used in the addition of the leather limb coverings, but staring up at that massive siyah as you haul the bow back to 36" and hear crackling is sobering. Blissfully, it was a first-draw-only phenomenon, and the bow now silently, and impossibly smoothly, reaches 36" as the limbs go parallel with your arm. The siyahs are also noticeably further forward at brace, and generally run a more aggressive forward angle, than any other replica I've seen so far. This likely contributes to high early draw weight and late draw smoothness. The two metrics we use for that are percentage poundage gain of the last 2", and the slope of the last 2". Higher poundage bows necessarily have a steeper slope, but at 59#s full draw we're right in the middle of the pack so a slope of 1.5 is still quite good next to second best, the much lower poundage AF Tatar of 2.5. Gaining only 6% of it's total poundage in the last two inches of draw is also quite good, next to the second best AF Turkish which gains 10%. There is another interesting element to this though mentioned by the imitable Peter Dekker, in THIS article:

"Manchu bows are unique in that they have the highest initial tension of all bows, and thus are harder to pull at a given high draw weight than other types of bows. They typically are at 75% of their max draw weight at 20" pull already, where a longbow would pull around 45% of it's max draw weight there."

So how does this bow match up, given significantly less reflex than a horn-sinew composite? No dramatic buildup, it manages a respectable ~61%. That said, most of the bows we've tested were in the mid 50s, the AF Tatar being as high as 59%. While I'm out on a limb here, I'd posit that the Mughal bow, the other long siyah-extreme reflex design out there, might well also manage comparable high early draw weights. It is worth noting here that every bowyer places their point for draw length a little differently. We measure it as if it were an arrow, so 31" draw means a 31" arrow could be drawn this far. (middle of the handle) Given that this bow was sold as 55#s, I suspect the bowyer measures from the back of the bow.

With a minimum of 12GPP, notably 1 less than the Mariner, and a recommended 15GPP, this bow is overtly not for normal arrows.... even long normal arrows. 885 grains is more akin to a small spear than a typical arrow. 

Force-Draw Curve

The Force Draw Curve yielded just about what one would expect, or maybe even better. The first 10" aren't terribly remarkable, the pack is all too bunched up to tell the difference and it is muddled by varying brace heights, but from 13 to 17 inches draw force is as high or higher than all the other bows excluding the 106# Hwarang. Given that the Gukgungwon is going to finish 12 pounds higher 4 inches sooner, that seems pretty remarkable. The slope from 17 to 35 inches is a meager 1.39, which is not only remarkably flat and smooth, convincingly makes the argument that this bow really doesn't stack given that the slope the last 2" is only 1.5. All good things. How does this compare to other Manchu bows? I don't know, we'll have to get others in to find out. The closest we have is an under-drawn example, once again pulled from Peter Dekker's website, which at a maximum of  82 pounds at 32" has a slope of 1.93. Lets remember though that higher poundage bows necessarily have steeper slopes, and if that slope were held the 35" draw weight would be a ~88 pound bow. 

Stored Energy Curve

The Stored Energy Curve again yielded good results, allegedly typical of the breed, storing over 82 foot pounds of energy, the second highest of any bow here, again despite a poundage disadvantage. The closest in poundage is the AF Turk, at just 1 pound more, which stores a 25% less energy by full draw. 

Stored Energy/Poundage Curve

Now we get to the fun part though, Stored Energy over Poundage. All bows are rendered equal, irrespective of draw weight, under this measurement. Here that high early draw weight, after a slow start, begins to make the bow shine and from 23 inches onward it solidly leads the pack. Even if you were to under-draw the bow to 31 inches, you'd be storing 1.28 foot pounds of energy for every pound draw weight, about 15% better than the next best bow. By full draw though it is storing almost 1.4 foot pounds per pound , which is about a 30% advantage over most of the other bows tested. 

This post has dragged on long enough, so catch us next time for results off the chrono. 

Manchu Arrow Project (part 4)

Silent Thunder Ordnance

Our Manchu arrows seen here with our exotic Manchu ring and JZW bow. 

Our Manchu arrows seen here with our exotic Manchu ring and JZW bow. 

The major shortcomings in part 3 of the Manchu Arrow Project were points and nocks. At 1200 grains, we'd achieved war arrow weights, but the hand-trimmed 7" fletching and IDFK what points of dubious Asian retailer origin left something to be desired. Enter part four. 

Our Manchu arrows seen here with our exotic Manchu ring, rather jade like in appearance. 

Our Manchu arrows seen here with our exotic Manchu ring, rather jade like in appearance. 

Our semi-ottoman flight arrow project was a real inspiration. Our house-made ivory points not only looked great, but were functional and durable for target shooting. Why not apply the same tech to make some nice Manchu target points? So that is what we did. 

20170629_110833EDITED.jpg

Next up, of course, was the fletching. We used our new fletching jigs to cut big 10" Manchu style feathers. 10" is a bit short next to some examples you say? True, however 10" is also about as long as you can get from most popular full length processed turkey feathers. We actually offer an 8" Manchu Mini as even 10" is a bit long in some cases. How do they work? We recommend a large rotary knife (they cost about 10$), or an air-bleeding-sharp knife with a curved blade. Place the quill in the corresponding groove on the jig, and align the feather front and back. Starting at the distal end of the feather (the end where the quill is thinnest) cut, allowing the jig to guide the blade. If you're using a curved knife, rather than a rotary knife, use a rocking motion, don't slide the blade. 

20170629_114507EDITED.jpg

After a little practice, it becomes easier and more natural and you can quickly knock out dozens of feathers. So now you have 10" feathers, but what do you do with them? No fletching jig clamp is long enough. There are two paths here. The first is to make your own fletching clamp. This is easier than it sounds, but beyond the scope of this article. There is another trick to this though: fletching tape. Rather than a glue which has to be clamped, held, and is relatively irreversible, tape offers instant adhesion and a little wiggle room to adjust if necessary. Plan things out, mark your arrows where you want the top of the fletch to start and the end where you want it to terminate. Clamp your arrow shaft in a soft jaw vice, or similar. Then apply the tape to the quill, and grasping it firmly by the ends, pull it taught and lay it on the arrow using the markings for the ends you made previously. Once laid down, run your fingernail along the quill to firmly press the feather onto the adhesive. 

20170607_073528.jpg

From there, it is the same process as seen in our Turkish Flight Arrow Inspired Project to wrap the fronts, and we're done. (this can be done manually, a lathe is just faster) 

Our Manchu arrows seen here with our exotic Manchu ring and JZW bow. 

Our Manchu arrows seen here with our exotic Manchu ring and JZW bow. 

Fletching Cutting Jigs - Product Introduction

Silent Thunder Ordnance

JZW Manchu Bow, Manchu Thumb Ring, Manchu arrows w/ fletching cut on Manchu jig. 

JZW Manchu Bow, Manchu Thumb Ring, Manchu arrows w/ fletching cut on Manchu jig. 

Our Manchu Arrow Project left off with the only major concession being the fletching. At 7" long, and free-hand trimmed, it was both too short and not quite the right shape. Similar can be said of our Turkish Flight Arrow Inspired Project, nocks, points, tapers, the full spicy enchalada, but we were short in the fletching department. No longer. We're proud to introduce a series of Fletching Cutting Jigs, allowing everyone to easily access modestly priced historical fletching designs. We're starting off with what we believe will be the most popular styles: Turkish Flight, Ottoman Military, Manchu, Manchu Small, Korean, and Japanese. 

Copper Ottoman ring. Ottoman flight arrows w/ fletching cut on Ottoman Flight Arrow Jig. 

Copper Ottoman ring. Ottoman flight arrows w/ fletching cut on Ottoman Flight Arrow Jig. 

The six styles we currently offer, available in both left and right wing, in order from top to bottom: Korean XL, Manchu Mini, Manchu, Ottoman Military, Japanese, and Turkish Flight. 

The six styles we currently offer, available in both left and right wing, in order from top to bottom: Korean XL, Manchu Mini, Manchu, Ottoman Military, Japanese, and Turkish Flight. 

How do they work you ask? Align the quill in the groove, and cutting from the back (thin end of the quill) forward, use a rotary knife to trace the perimeter of the jig. It is as quick and easy as that. Rotary knives are available online for approximately 10$. An exquisitely sharp knife with a curved blade, paired with a rocking, motion can with a little practice substitute a rotary knife. 

20170629_110833EDITED.jpg
20170629_114507EDITED.jpg

Arrow Shaft Sanding Block Project

Silent Thunder Ordnance

Completed sanding block being used on a massive Manchu shaft. 

Completed sanding block being used on a massive Manchu shaft. 

This project is a quick and easy way to make a useful tool for both hand and power sanding of arrow shafts. We had a couple questions about this pertaining to our Manchu Arrow Project, so decided a quick illustrated guide would be a good addition. Why use this tool rather than simply holding the abrasive paper with your bare hand? A couple reasons. First is arrow precision. A raw spun shaft isn't perfectly straight and smooth, and hand sanding isn't perfect. Using a straight block will both even out the shaft and prevent you from hand sanding new high and low points into the arrow. This isn't a new technology, grooved stones used for the manufacture of arrows like this have been used for thousands of years. Second, it makes it much easier to add in precision tapers. Third is heat. Both manual and power sanding generate a lot of it, and this provides some good insulation to your hand allowing you to go harder and longer. Fourth, and finally, this reduces catch-failures. A plain piece of sandpaper has a tendency to wrap around arrow shafting, gripping it more tightly, and potentially breaking it or injuring the operator. A block such as this prevents that from happening by providing structure. 

Drilling the blocks

Drilling the blocks

First step is simple, cut a piece of scrap wood to length and square it. Then longitudinally bore it in a diameter slightly larger than your arrow shafting. How much larger? At minimum the diameter of your arrow shaft plus twice the thickness of whatever abrasive you're going to use. For Manchu arrows, half an inch in diameter, spade bits provide an economical way to bore large diameter and very deep holes. Their minimal mass and thin shaft also improve chip clearance and reduce friction and re-cut. For this project, we went with two different sizes, [insert sizes here]

Sander belts make for long lasting coarse abrasives 

Sander belts make for long lasting coarse abrasives 

Cut the holes longitudinally, we used a table saw but a hand saw would work just as well. And we're ready to add abrasives. In this case, each half provides one sanding block. The coarsest abrasive will see the most use, so for longevity, aggressiveness of cut, and convenience we went with some pieces of expended sander belt. These will last a long time, but are quite stiff so will have to be glued into place rather than held by hand. This is perfect though because we'll have one half of each block for use with normal sandpaper, and one with ultra coarse sander belt for the initial cutting and tapering. 

Clamping the abrasive in the blocks as the adhesive cures

Clamping the abrasive in the blocks as the adhesive cures

Gluing in rigid abrasives like cloth backed sander belt requires some force. Discard arrow shafting can readily provide said force and, conveniently, imparts the required radius. 

Completed sanding block being used on a massive Manchu shaft. 

Completed sanding block being used on a massive Manchu shaft. 

The glued blocks provide the first coarse step, the empty grooves allow you to simply hold a piece of sandpaper in them, pinching at the sides, for all the finer steps. Keep in mind the first coarse stage does the lion's share of material removal, particularly if you're installing tapers. 

Bronze Sword - Mirror Polishing

Silent Thunder Ordnance

Finished sword

Finished sword

This one is pretty simple. Initially, on this project, I had gone for a 1200 grit finish. Seemed reasonable, looked good, etc. At some point though I changed my mind, and decided I wanted a mirror finish. So over to the buffing wheel we went. Pretty simple, the images can tell the story. Masked off the handle to keep buffing compound off of it, loaded the wheel with some fresh jeweler's rouge, and being careful not to lose any fingers off I went. There is an image below which I feel really captures the contrast between 1200 grit and buffed, showing 50/50. 

Turkish Flight Arrow Inspired Project

Silent Thunder Ordnance

20170607_095333EDITED.jpg

So, arrows, we all use them, we all lose them, we all break them. This project has been an extremely long time in coming, but we've been chipping away at it in free time/off hours for.... gosh could it really be two years now? Anyway, I hope everyone enjoys a look at the build process, maybe even is inspired to make arrows for themselves. Fair warning though, this isn't a route to cheap and cheerful arrows. This has to be a labor of love, because by the time you're done these arrows will not be particularly cheap and a lot of TLC will have gone into them. Then again, are any of us really in archery for any reason other than love? 

Rough sawn boards ready to be cut to blank length. (three per board in this case) 

Rough sawn boards ready to be cut to blank length. (three per board in this case) 

Wood arrows all start from the carcasses of dead trees in one way or another. In this case we went with the delicious smelling corpse of a red cedar, rough sawn to 1" nominal. 1" nominal seems to be getting thinner and thinner by the year, these boards were 3/4" and a whisker, but such are the times. You're looking for as straight, tight grained, and knot free as you can find. The whiter (sapwood in this species?) yields lighter arrows, while the darker (heartwood?) yields stronger ones. We'll use all of it. My god have cedar prices gone up, while you're looking at enough for ~100 arrow blanks, granted at 100% yield which never happens, it was also almost 100$ worth of lumber. We're on the chop saw here to cut each board to rough length. Why we do this before ripping will become obvious in the next slide. 

Planing the boards to align one side with the grain. This results in arrows with longitudinal grain, which is stronger, as wood arrows tend to fail along grain boundaries. 

Planing the boards to align one side with the grain. This results in arrows with longitudinal grain, which is stronger, as wood arrows tend to fail along grain boundaries. 

So here it is, the reason to cut it into blank length first: each board must now be planed so that the grain runs close to longitudinally in the arrow as possible. If this were done to the whole board at once, your losses at one end would be massive and would be much more work. Ergo blank length first. My personal rule of thumb, which I'm sure a master fletcher would dispute, is that so long as  a single grain line runs at least 1/2 the length of the finished arrow, you're okay.

Sawing blanks on the table saw

Sawing blanks on the table saw

From here we head over to the tablesaw. In a perfect world we'd be using a thin kerf ripping blade, so your losses go from 1/8" to 3/32" or even 1/16" in some extreme cases. But it isn't a perfect world, so 1/8" loss per cut it is. Each blank has to be sawn twice, once to get it out of the board and a second time rotated 90 degrees, to achieve a square 5/16". This process makes absolute mountains of sawdust by the way. Not as much as the next step though. 

Spinning blanks into shafting on the lathe. This produces immense quantities of chips. 

Spinning blanks into shafting on the lathe. This produces immense quantities of chips. 

Next we take the square blanks to the wood lathe and spin them round. Simple enough concept. This is a fairly stressful process in the life of an arrow, so typically any arrows weak or with flaws die here long before they can blow up on your bow. This only results in a straight shaft though, not the sexy double taper we're looking for, we'll add those in later. 

I wasn't kidding when I said mountains of shavings. 

I wasn't kidding when I said mountains of shavings. 

Rough shafting

Rough shafting

Using a sharp knife, rolled along the ouside of a shaft, to quickly and easily cut it to length. 

Using a sharp knife, rolled along the ouside of a shaft, to quickly and easily cut it to length. 

The resultant cut, quite clean. 

The resultant cut, quite clean. 

From here we cut arrows to length. Easily done, without splitting, by rolling a sharp knife on the arrow shaft. 

The super professional looking taper cutter, built to generate adjustable tapers on a wide variety of arrows. 

The super professional looking taper cutter, built to generate adjustable tapers on a wide variety of arrows. 

We've designed special nocks and points in house, just for this application. The nocks are actually a derivative of the Bulbous Nock Project we did with Mike Loades, these offering a longer nock with deeper string groove. Both go on a taper, so over to the taper cutter we go to cut one on both ends. 

Point glued on. Using the lathe and abrasive papers to apply the longer front taper as well as finish sanding, up to 1200 grit. We went with our ivory polymer, in Ottoman flight arrow style, to produce a light weight and durable point. 

Point glued on. Using the lathe and abrasive papers to apply the longer front taper as well as finish sanding, up to 1200 grit. We went with our ivory polymer, in Ottoman flight arrow style, to produce a light weight and durable point. 

Using the points and nocks as a rough guide, we apply first the long taper from the point end then the shorter taper from the nock end. The shaft is then sanded to final finish, 1200 grit, and a thin layer of varnish applied. Turkish inspired, we went for ivory colored polymer. This is the same stuff we use in our rings, and a testament to it's durability not only is the nock fully functional the point is as well. Some members of this set were excluded for abusive testing to see what it all could take. Aside from becoming a little less shiny, nocks and points survived just fine.

Whoops...... 

Whoops...... 

Occasionally things get exciting. If your abrasive paper catches and wraps itself around the shaft as you sand, it'll pop one of these shafts before you know what has happened. And by pop I really mean mini-explosion pop. You'll be finding splinters in places you didn't even know you had and you'll never find enough to even pretend piece the shaft back together. Good demo of the longitudinal grain though allowing the shaft to fail more at random than along a single longitudinal grain boundary. 

Finished shaft, from the point end. 

Finished shaft, from the point end. 

Finished shaft, from the nock end. 

Finished shaft, from the nock end. 

Arrow with varnish applied. No need for heavy coats here, these arrows are to be light more than all-weather. 

Fletching.... the before shot. 

Fletching.... the before shot. 

Time for fletching. This can easily be done by hand or with one of a myriad of different jigs. In this case we used Bohning fletch-tape. If you've never used it before, it is a product that allows incredibly fast fletching, but comparatively poor adhesion. For heavy use applications I'd recommend either another product, or to wrap both ends of the quill. 

Using the machine lathe and a friction tool to wrap the front of the quill. This improves fletching durability/retention, protects your thumb, and adds quite a nice visual appeal. Also purple is the color of warriors, bite me. 

Using the machine lathe and a friction tool to wrap the front of the quill. This improves fletching durability/retention, protects your thumb, and adds quite a nice visual appeal. Also purple is the color of warriors, bite me. 

Speak of the devil. We went over to the metal lathe, with it's lower spindle RPMs, and using a tool to apply constant tension wound thread onto the front of each quill. A dab of glue to secure the thread end, and that is it. Done. Ready for prime time. 

All done. Three lighter cedar arrows against three darker ones. Seen here, anachronistically, against two Korean style bows and our Byzantine style ring. The bright outdoor light really makes the ivory points and nocks pop. 

All done. Three lighter cedar arrows against three darker ones. Seen here, anachronistically, against two Korean style bows and our Byzantine style ring. The bright outdoor light really makes the ivory points and nocks pop. 

A few concessions were made in this project for the sake of usability. For one thing, the nocks could have been made even lighter and more delicate. The points, and really the whole point end, could have also been given a much more aggressive taper. Goodness knows the Turkish versions were more aggressively barrel tapered, shorter too for use with a siper. These are much longer, 33.25" tip to tip, giving 32.75 inches of solid draw length. The lighter sapwood shafts are 380 grains, give or take, while the darker heartwood shafts are 410 grains. All in all, I'm very pleased with how this project came out. There is also plenty of unused shafting for further projects. 

Manchu Arrow Project (part 3)

Silent Thunder Ordnance

The finished product in use. God these things hit hard. 

The finished product in use. God these things hit hard. 

So here we wrap up the first batch of these increasingly semi-Manchu arrows. (find part 2 here) Perhaps heavy war arrows would be an increasingly accurate name? I digress. We are offering these shafts, with without nocks, for sale by the way. Not a standard item listed, but if you'd like to purchase some feel free to message us. They come rough-finished, and still require sanding, straightening, lacquering, fletching, etc. 

Our super fancy professional taper cutting tool. 

Our super fancy professional taper cutting tool. 

So, nocks first. Start with a standard 11 degree taper. Nobody, to my knowlege, makes a pencil-sharpener-style taper cutter for arrows this large. Could have bought one, and maybe adapted it, but in this case it was easier to just build a jig for the disc sander. Worked like a charm. 

Top was an experimantal bulbous shallow nock, middle is the final nock design, and bottom is a normal arrow for comparison. 

Top was an experimantal bulbous shallow nock, middle is the final nock design, and bottom is a normal arrow for comparison. 

We custom designed nocks for these arrows. Initially we wanted to use a bulbous design based off a project we were doing with Mike Loades. It quickly became apparent however that any design increasing the diameter over that of the shaft looked ridiculous, particularly in light of the comparatively spidery modern strings we use. The other problem is string angle. The wider your arrow, the deeper the nock need be. 

So we opted for something a little more practical which, hopefully, doesn't look comical. In the process of testing this though, a woopsies happened. That arrow blew straight through the backer, which stops normal arrows, and stuck itself in the concrete wall. Normally, when a screwup like this happens, you break or blow the nock straight off the arrow. Not this monster though, still just like new. Even the shaft survived undamaged. The point seated itself a little too far on the shaft, and was a right **** to get out of the wall, but with a new point you could shorten the arrow a tad and you'd be back in business. Shot was taken at 16 yards. 

Those feathers look gnarly. Going to require trimming before use. 

Those feathers look gnarly. Going to require trimming before use. 

Manchu arrows exhibit a great diversity of fletching length. None of it would be described as short however. The longest we had on hand were some goose feathers which, while extremely long by normal standards, are still at the short end for Manchu arrows. The next problem was that there are no fletching jigs for arrows this large in diameter or feathers this long. We could have built one, probably, but wanted this build-along to be reasonably accessible to regular people. So, with the help of Bohning fletching tape whose instant-bond allows you to manually lay down fletching quickly and accurately, we did it by hand. Wrapped the front in some waxed thread as well to help keep the tips from coming up and to be easier on the thumb as the arrow goes by. Still in desperate need of a trim though, my god do those look ugly. 

Finished arrows. They shoot well, fly beautifully, and strike with IMMENSE power. 

Finished arrows. They shoot well, fly beautifully, and strike with IMMENSE power. 

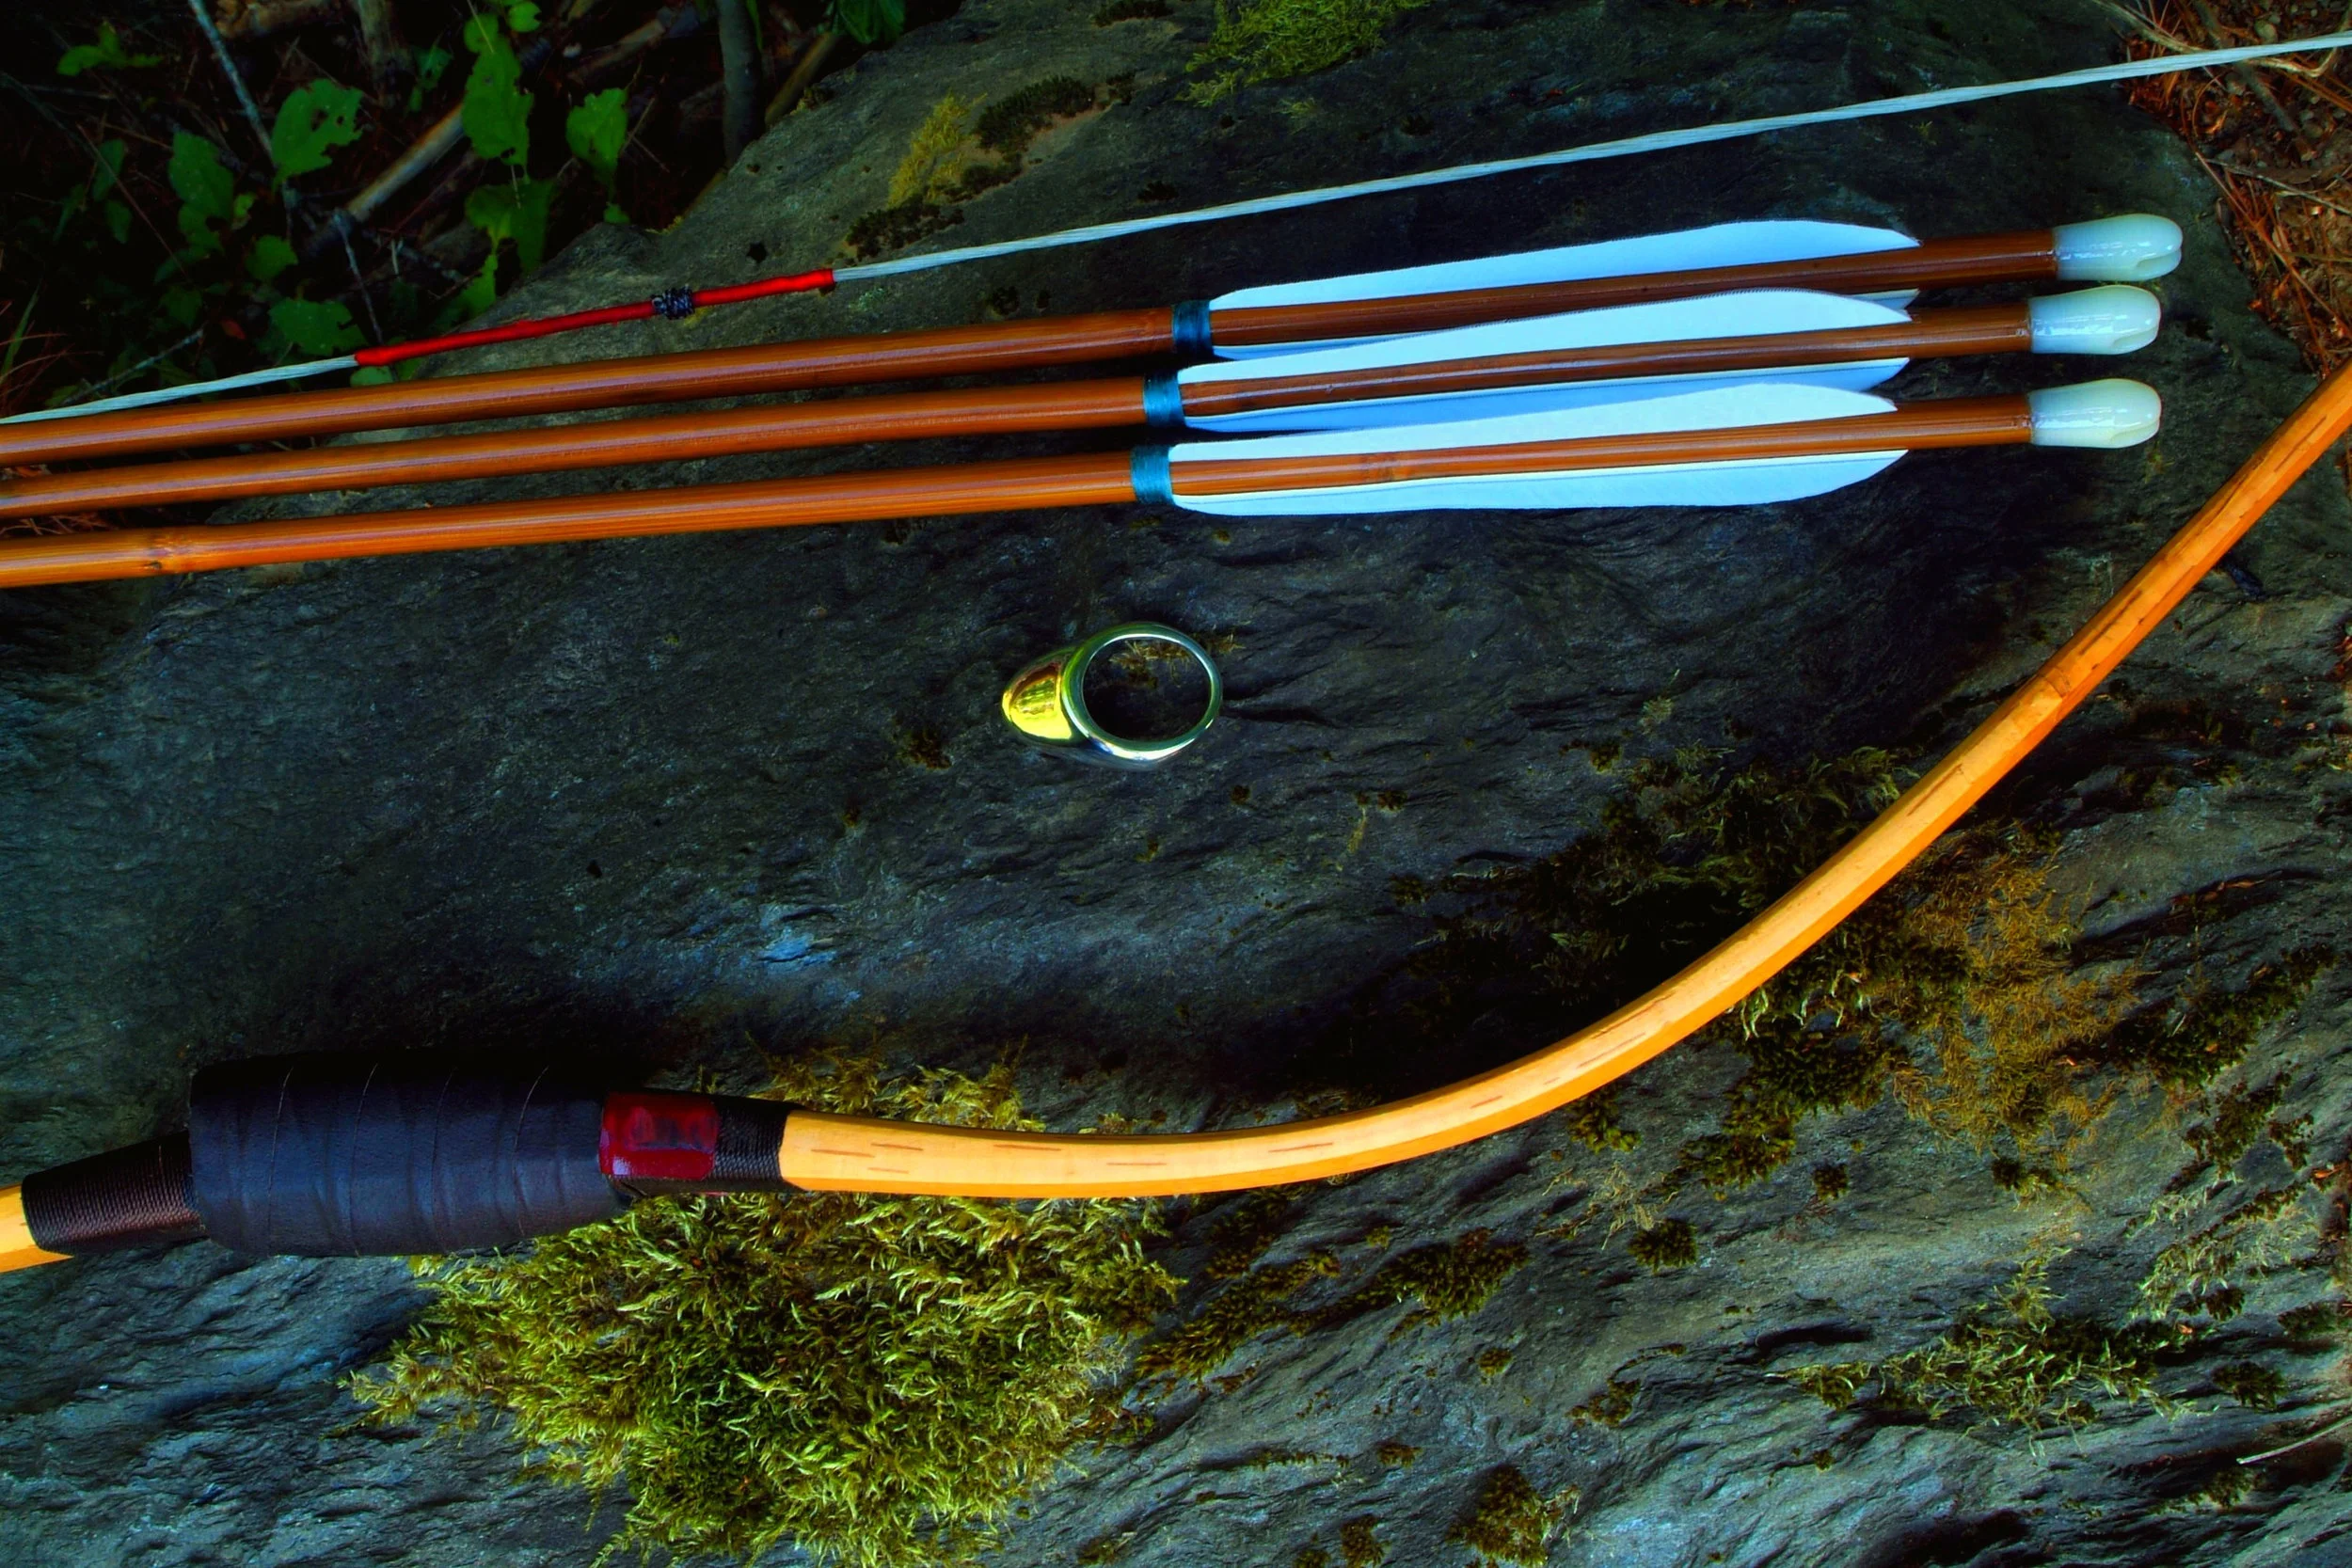
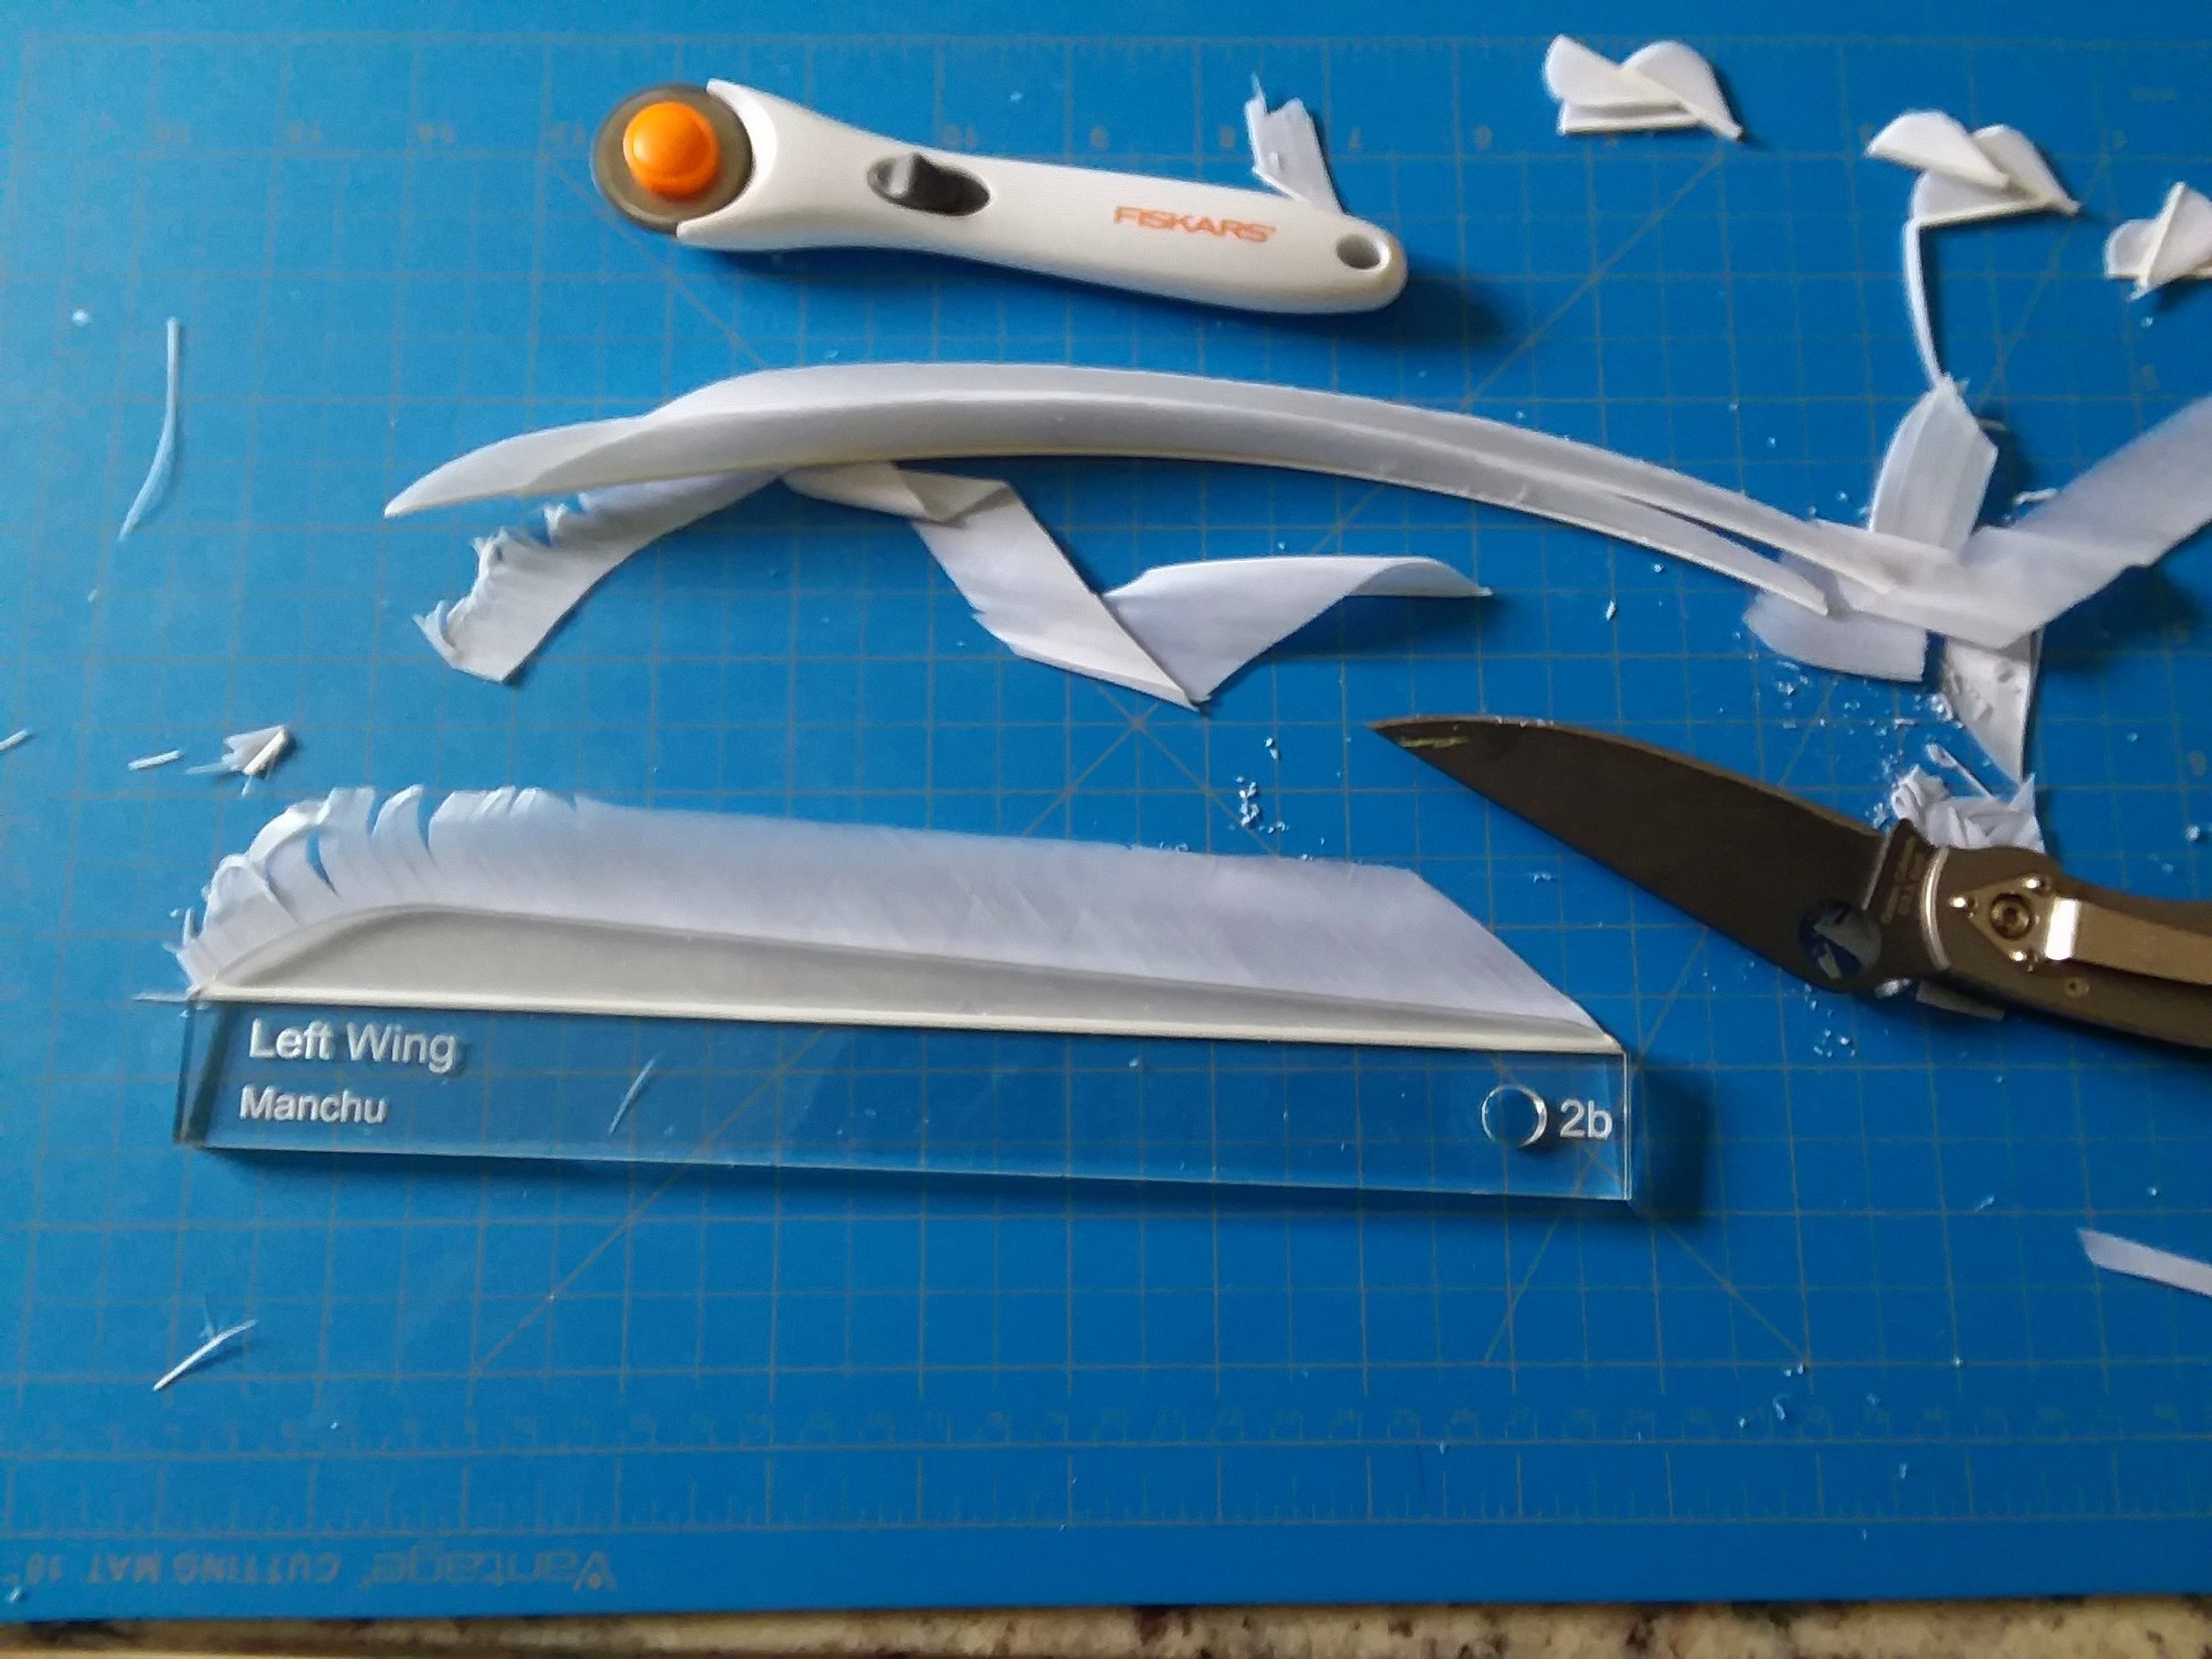
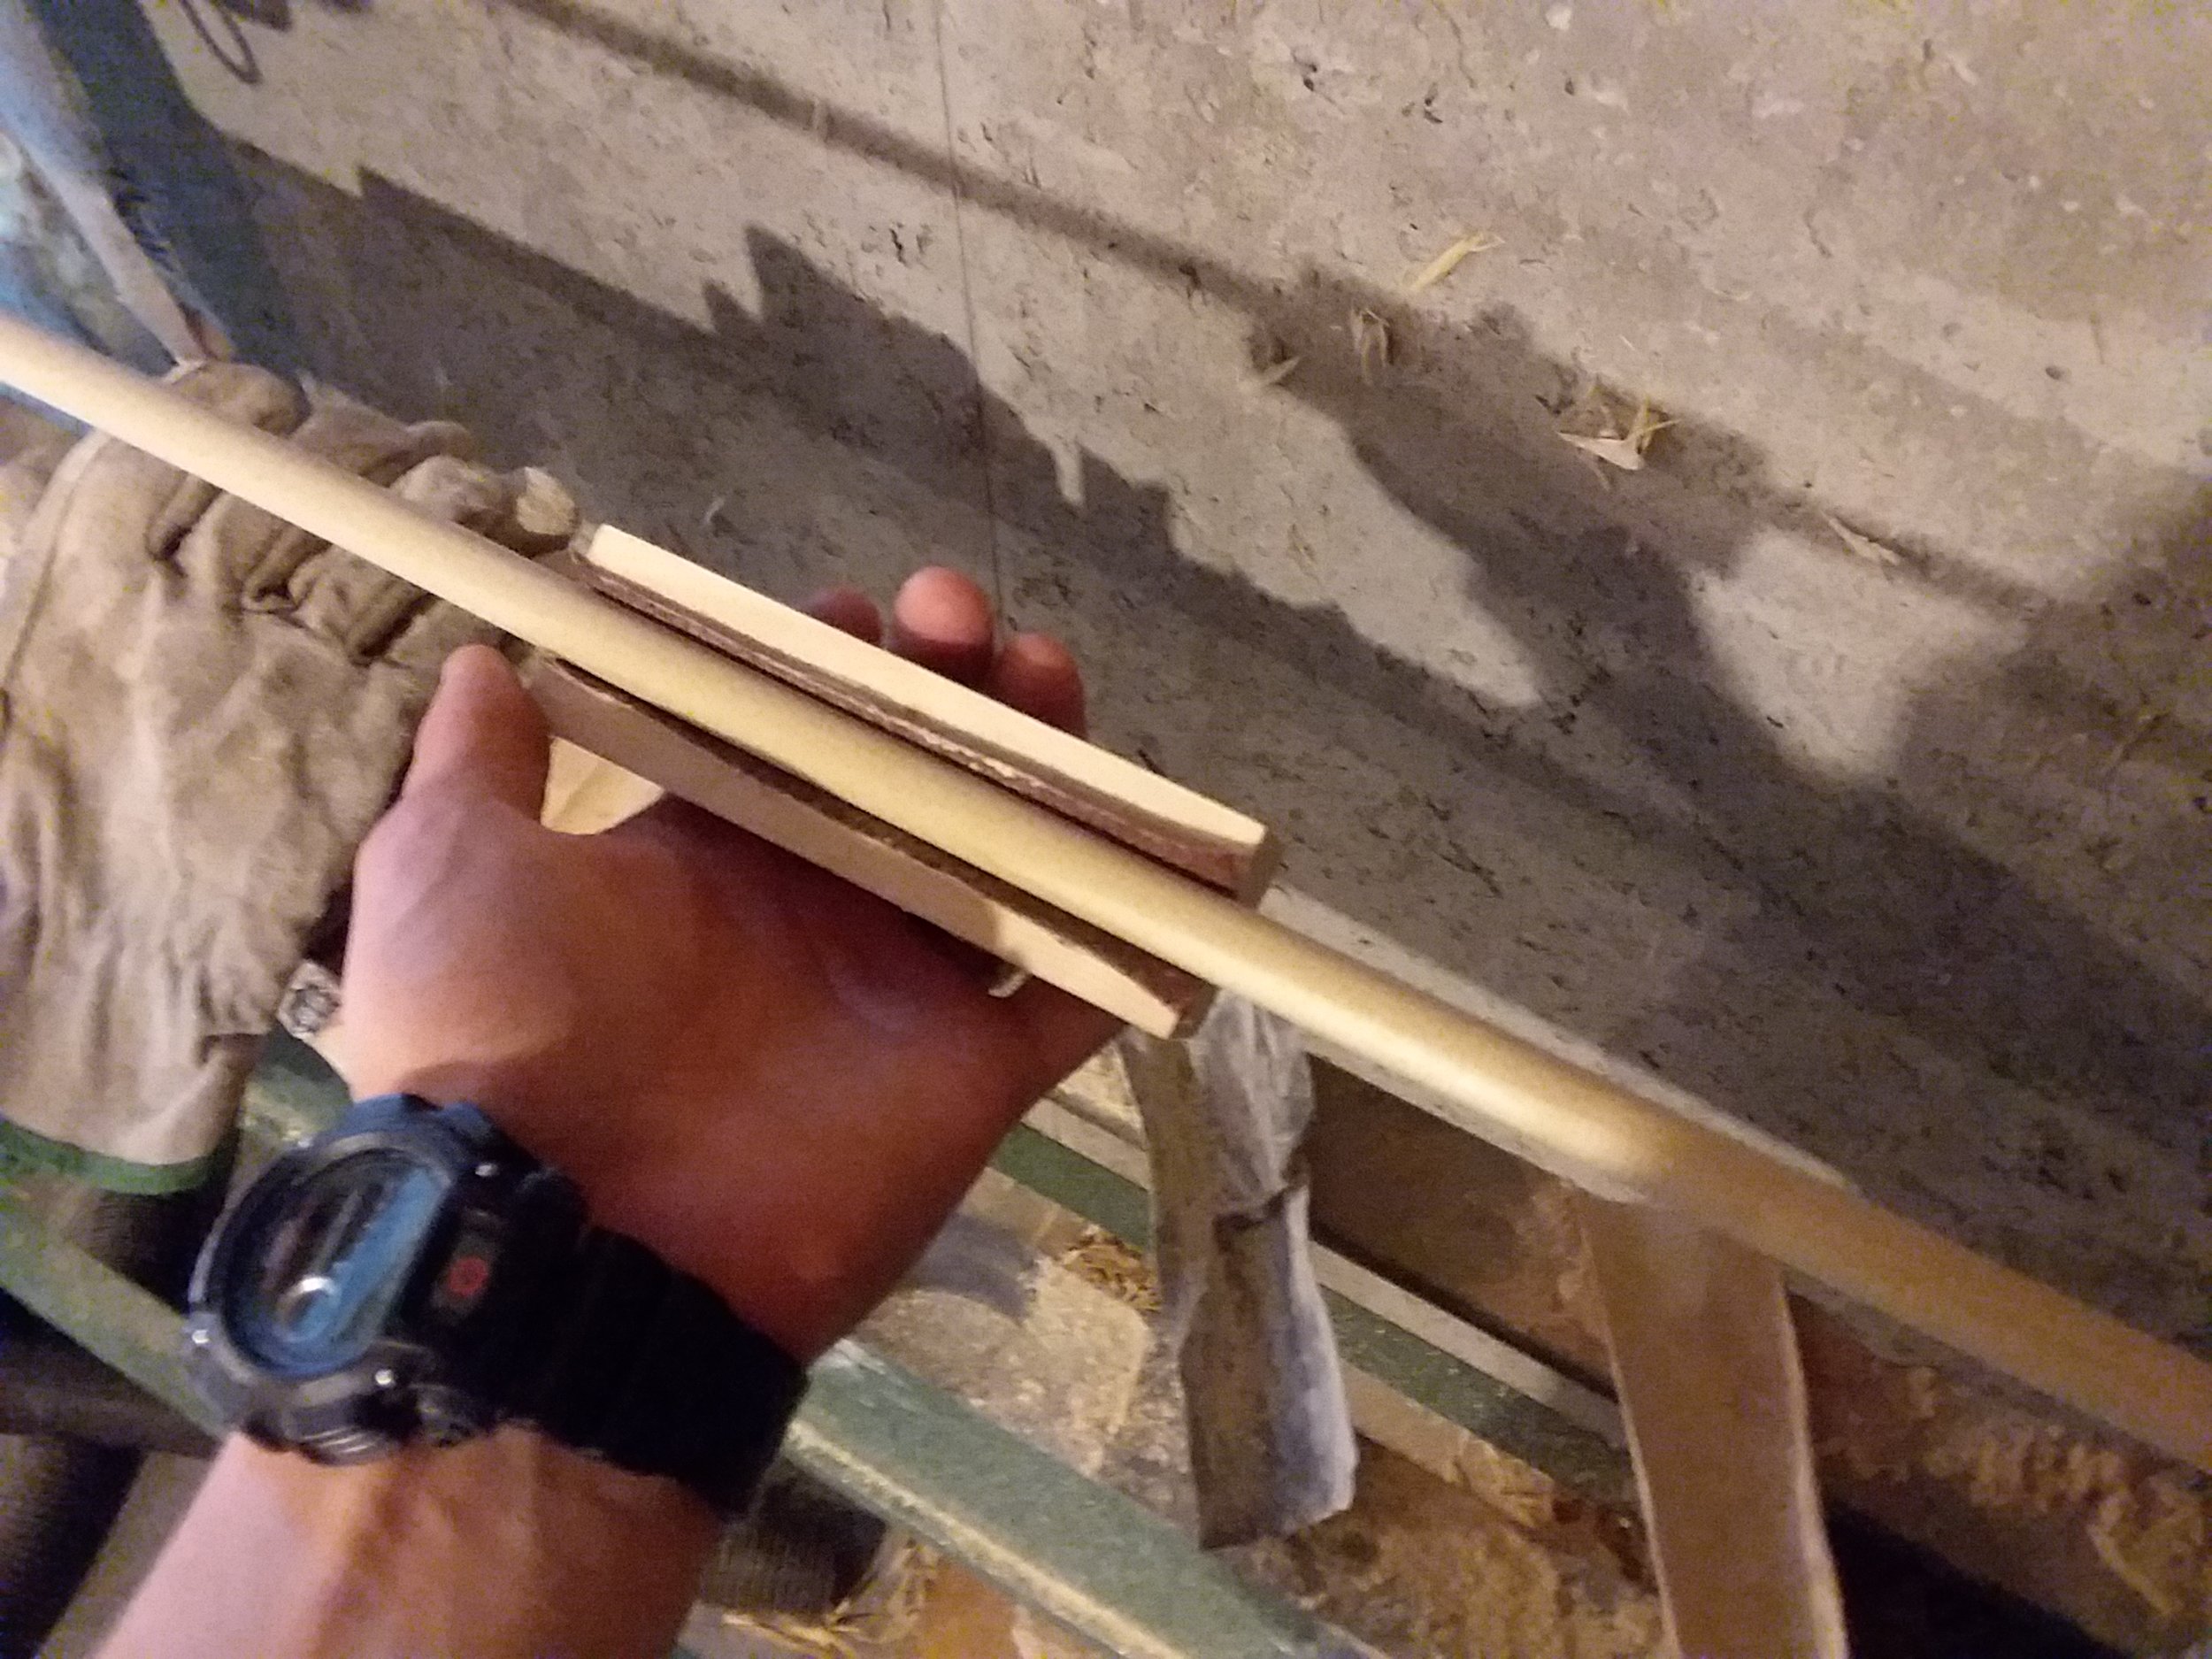
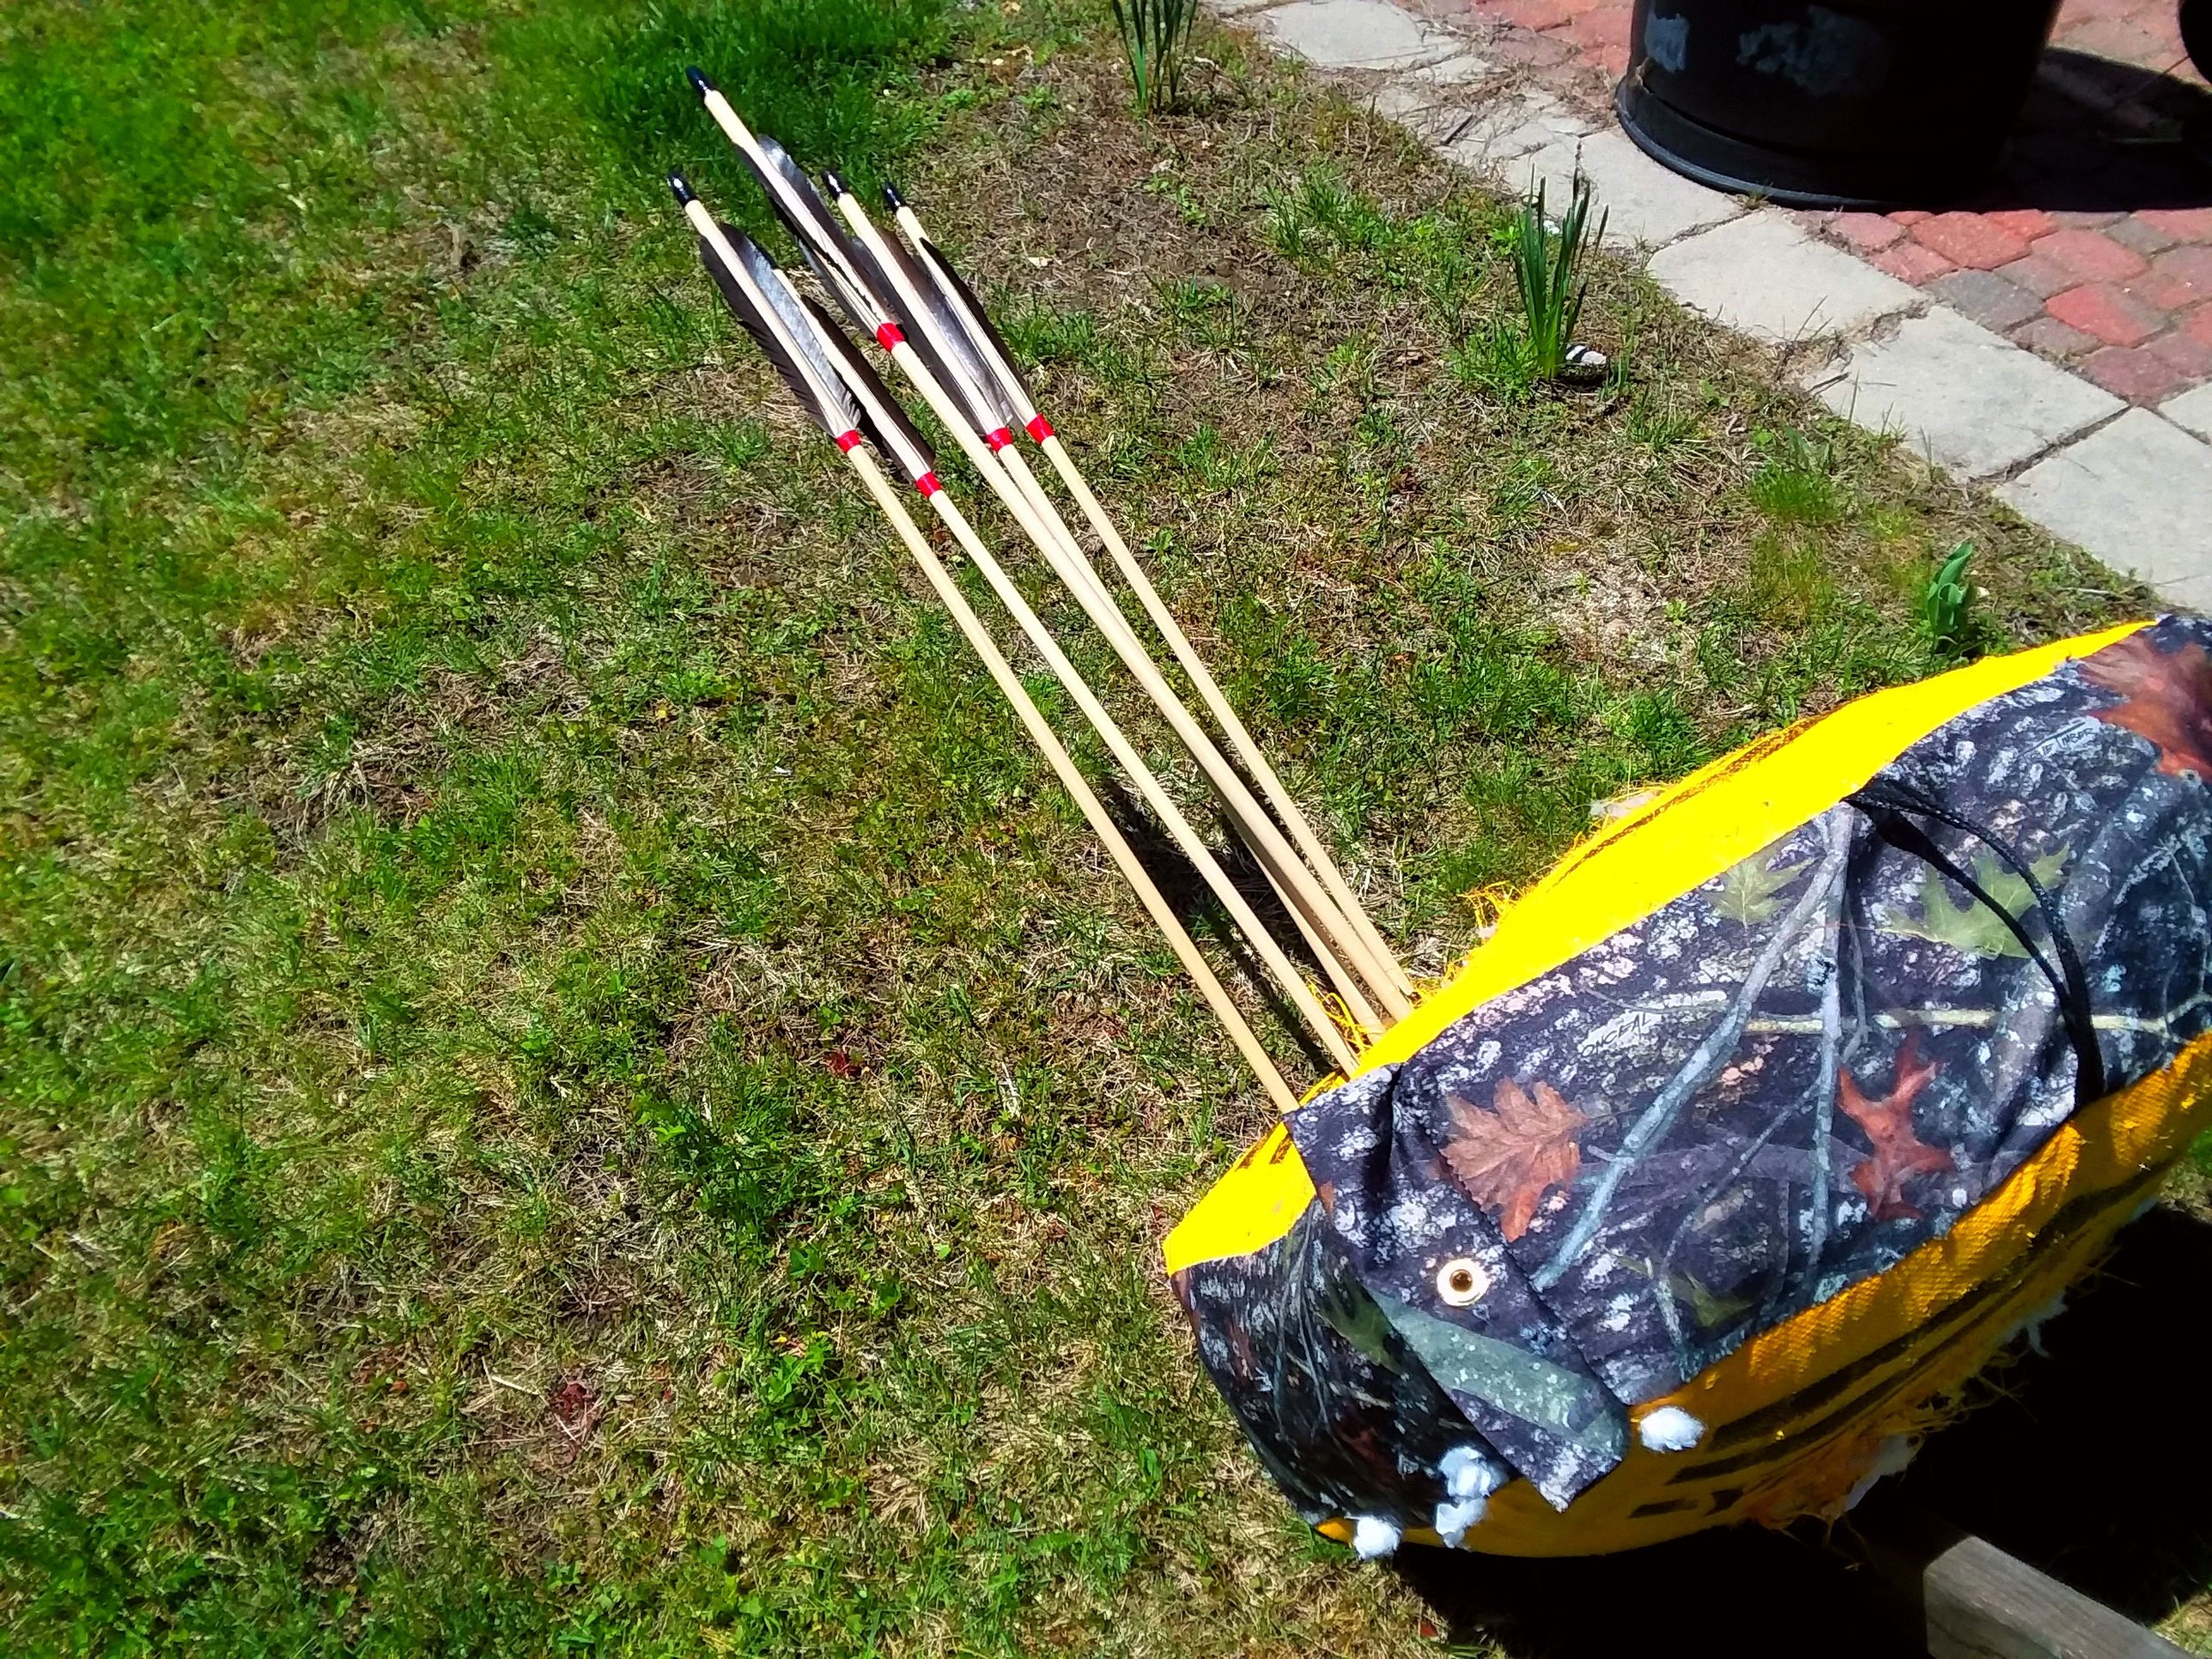
Again, trimming the fletching presented a problem. Normal hot-wire-cutters aren't long enough. We could build one, but again that may be beyond what most people would want to do or be capable of. There is always the blow-torch and bent coat hanger solution, however we ultimately just went with the easiest: scissors. The results were very reasonable, but somewhat short of excellent. And, as you can see from the above image, they are a success. 

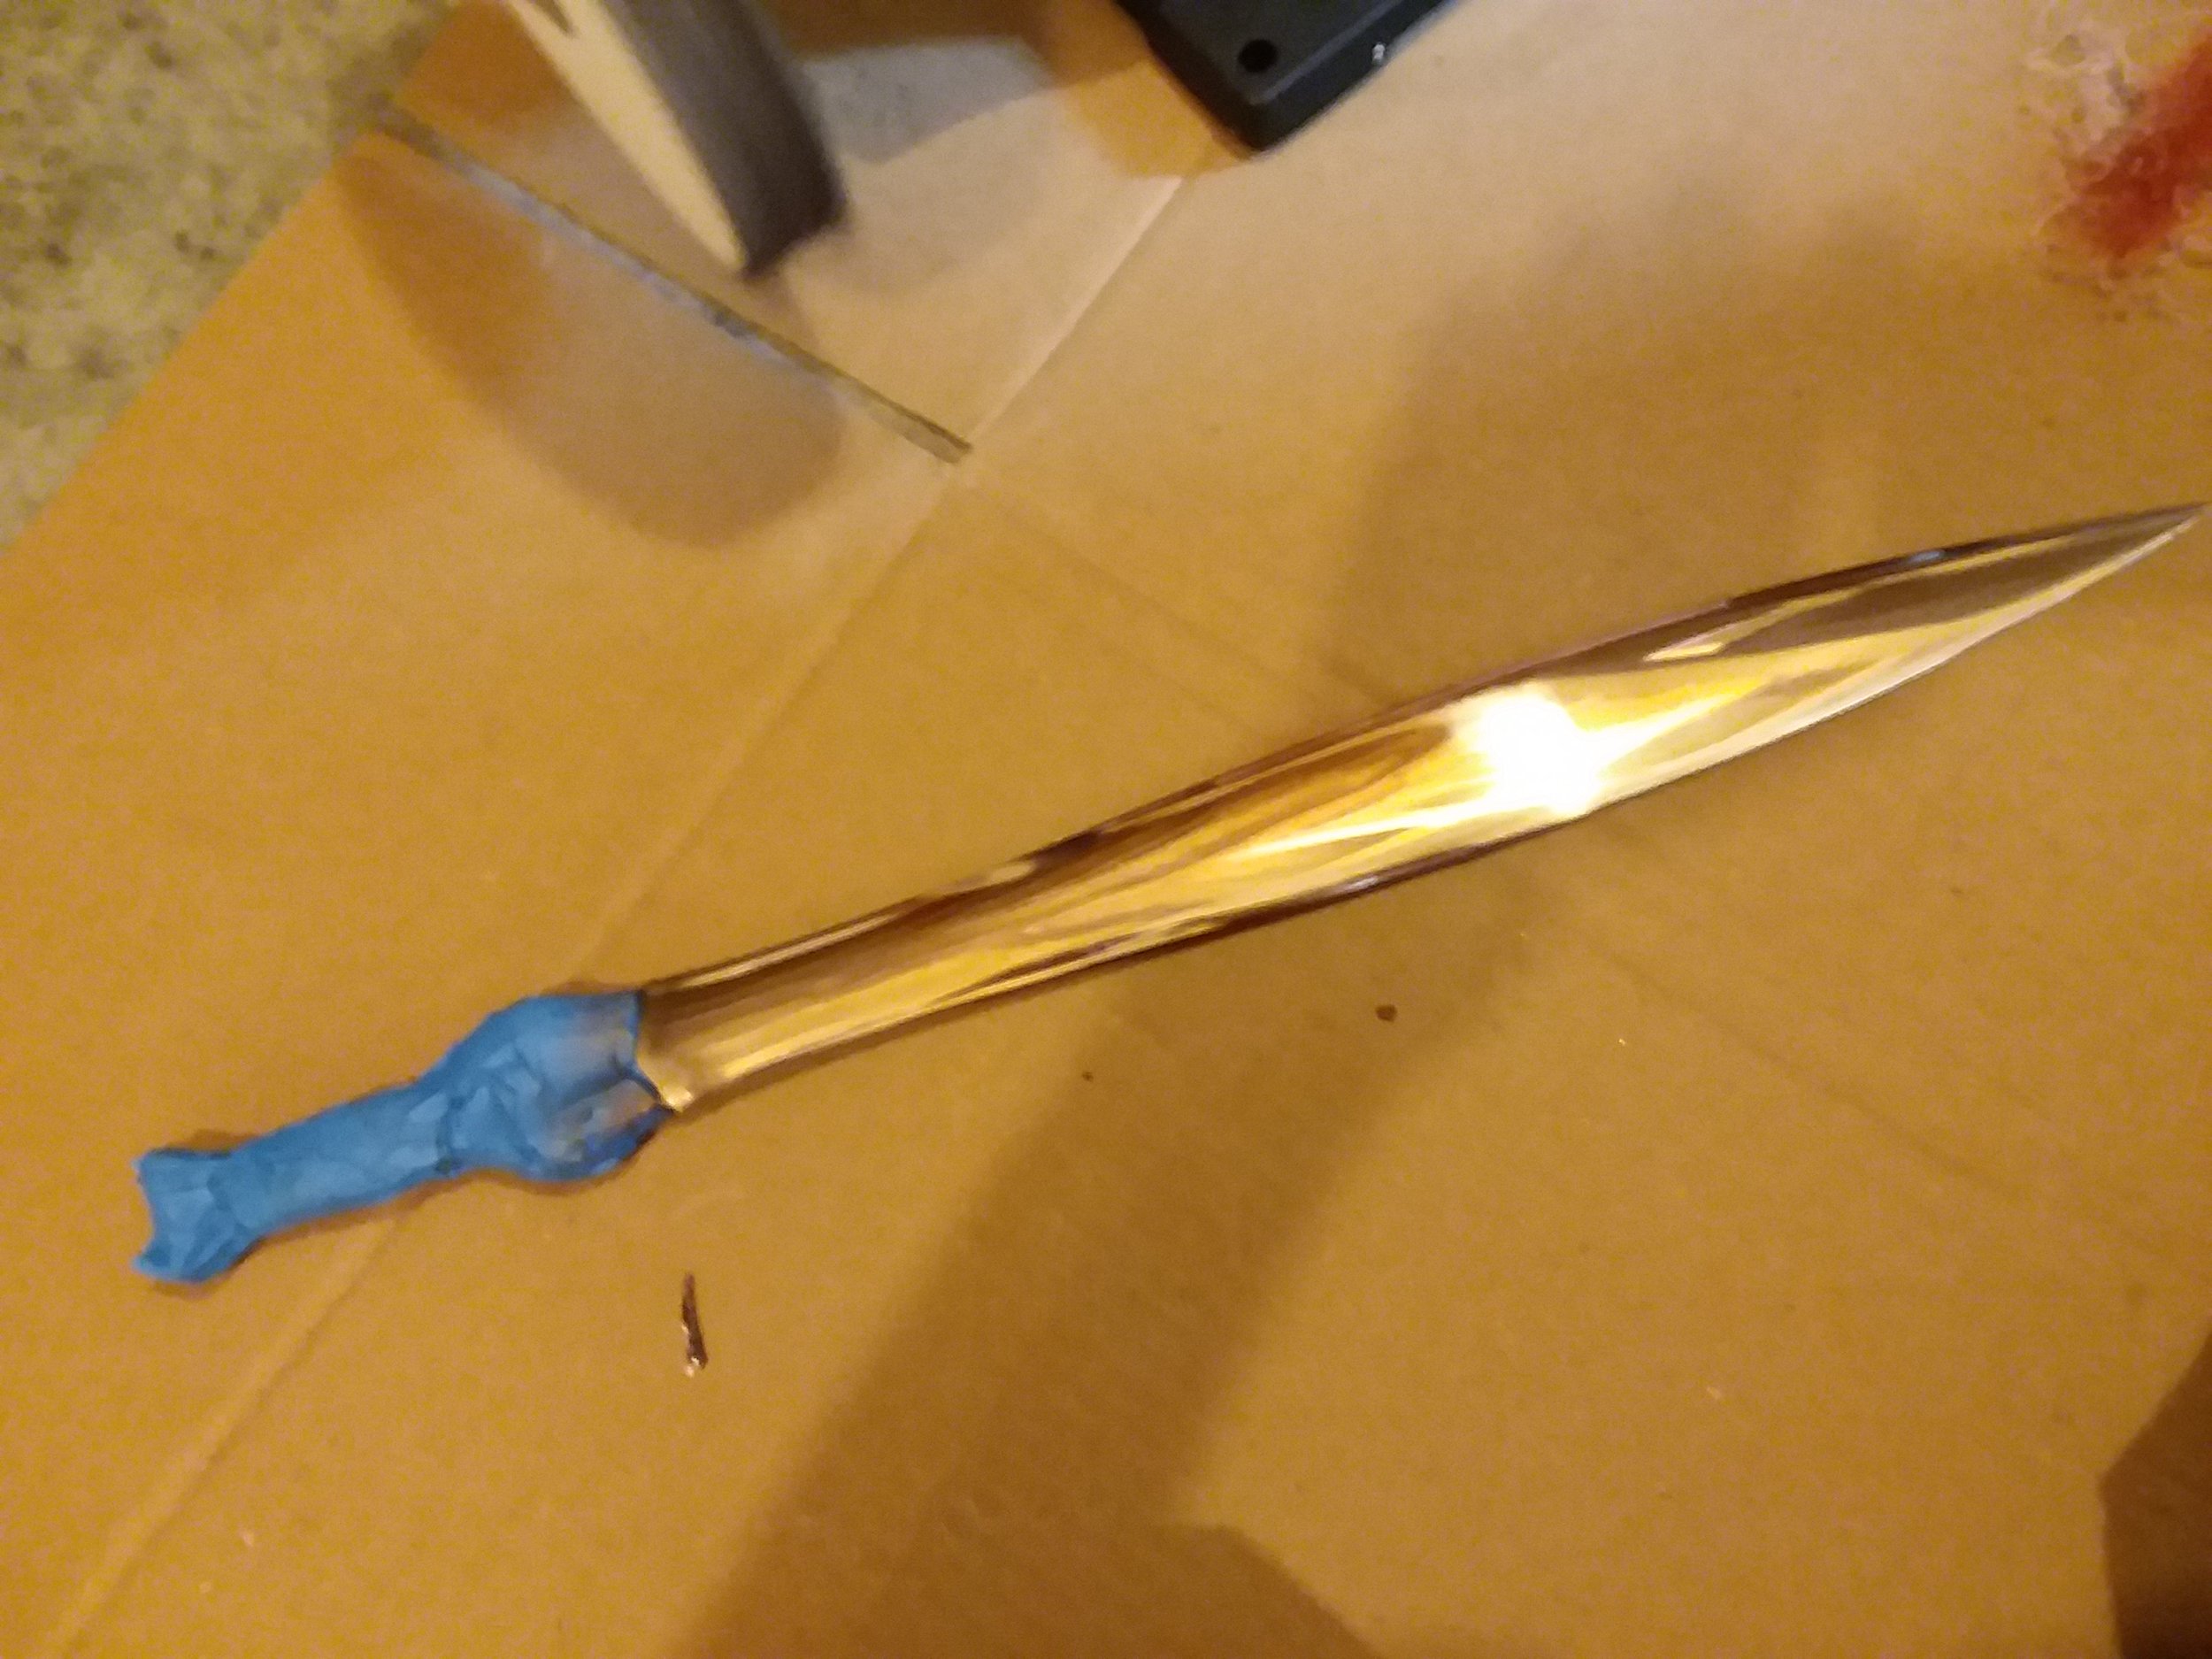
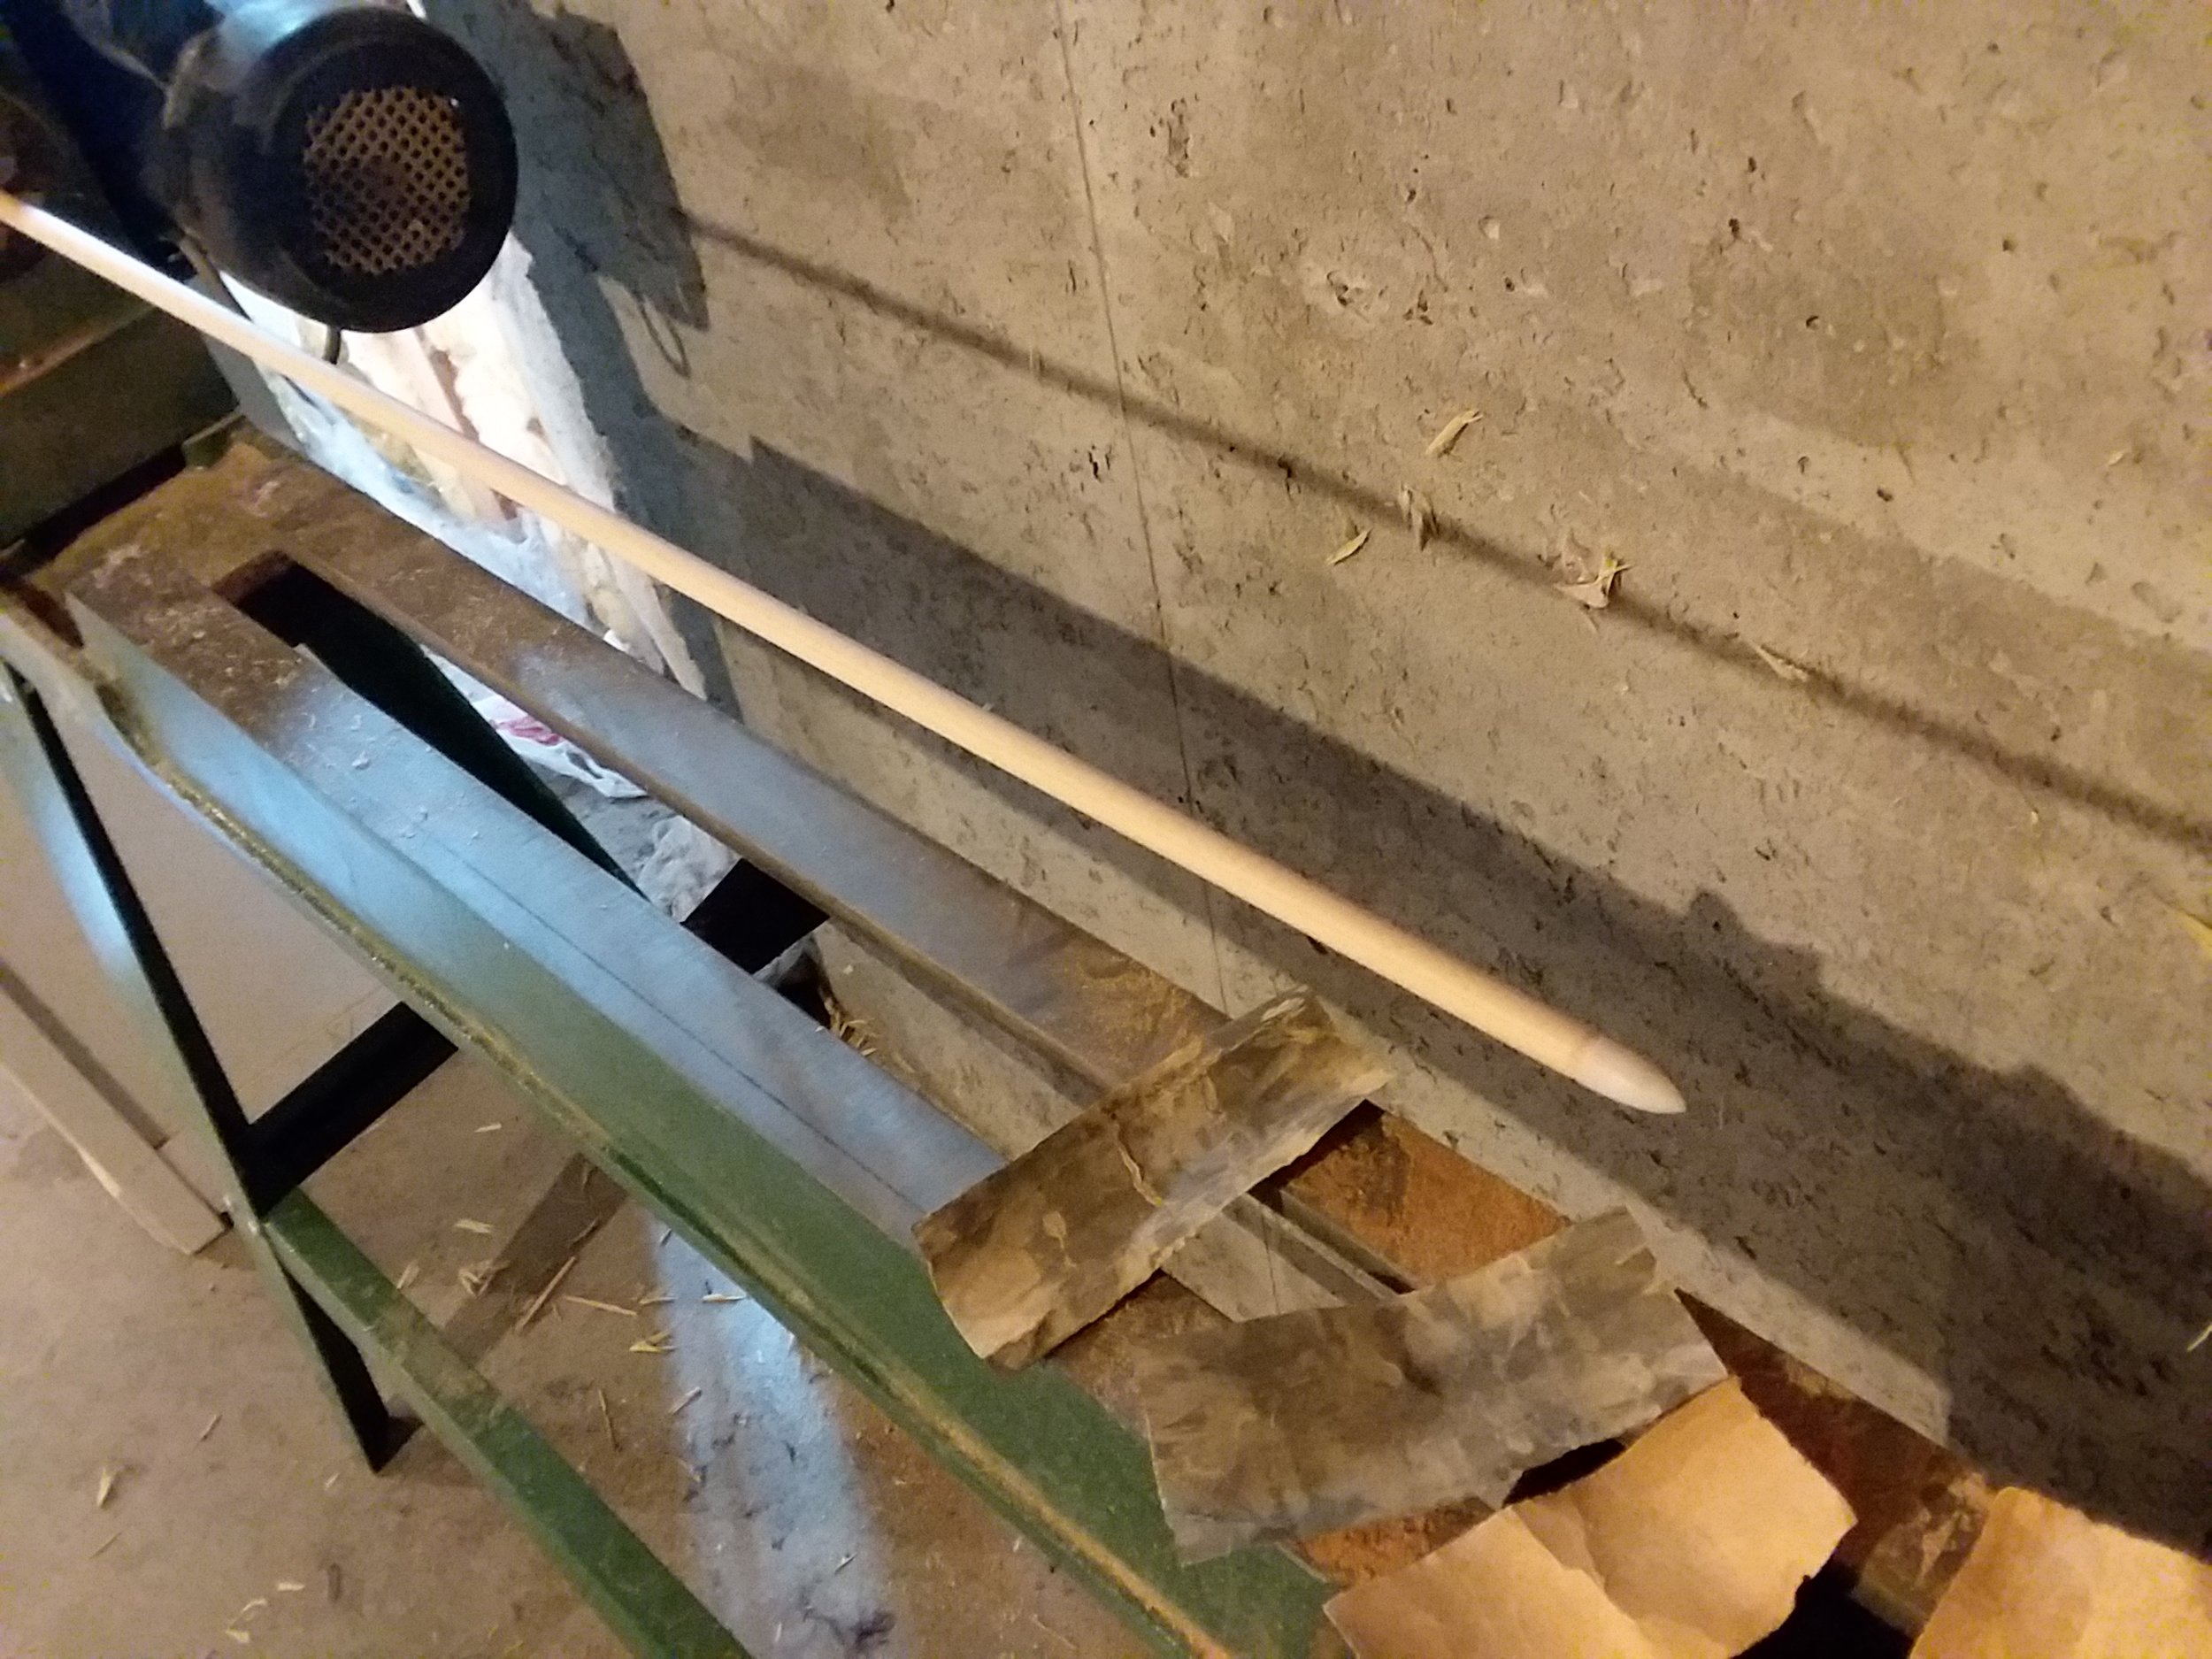
So, project completed, what did we get right and what did we get wrong or would we do differently? Real Manchu arrows have complex taper, shallow bulbous nocks for HUGE strings, different points, and are (allegedly) fletched with eagle feathers. For a set of display arrows, adding tapers would be very reasonable. In this case though, we're questing for extreme mass on arrows that'll actually see not-insignificant use. Tapers then would be both time consuming and counterproductive. Manchu bows are significantly taller than the majority of bows I own and shoot. Shallower nocks would be incompatible with such string angles. So, once again, I thing a practical adaptation was made here although another nock variant would be perfectly possible. 

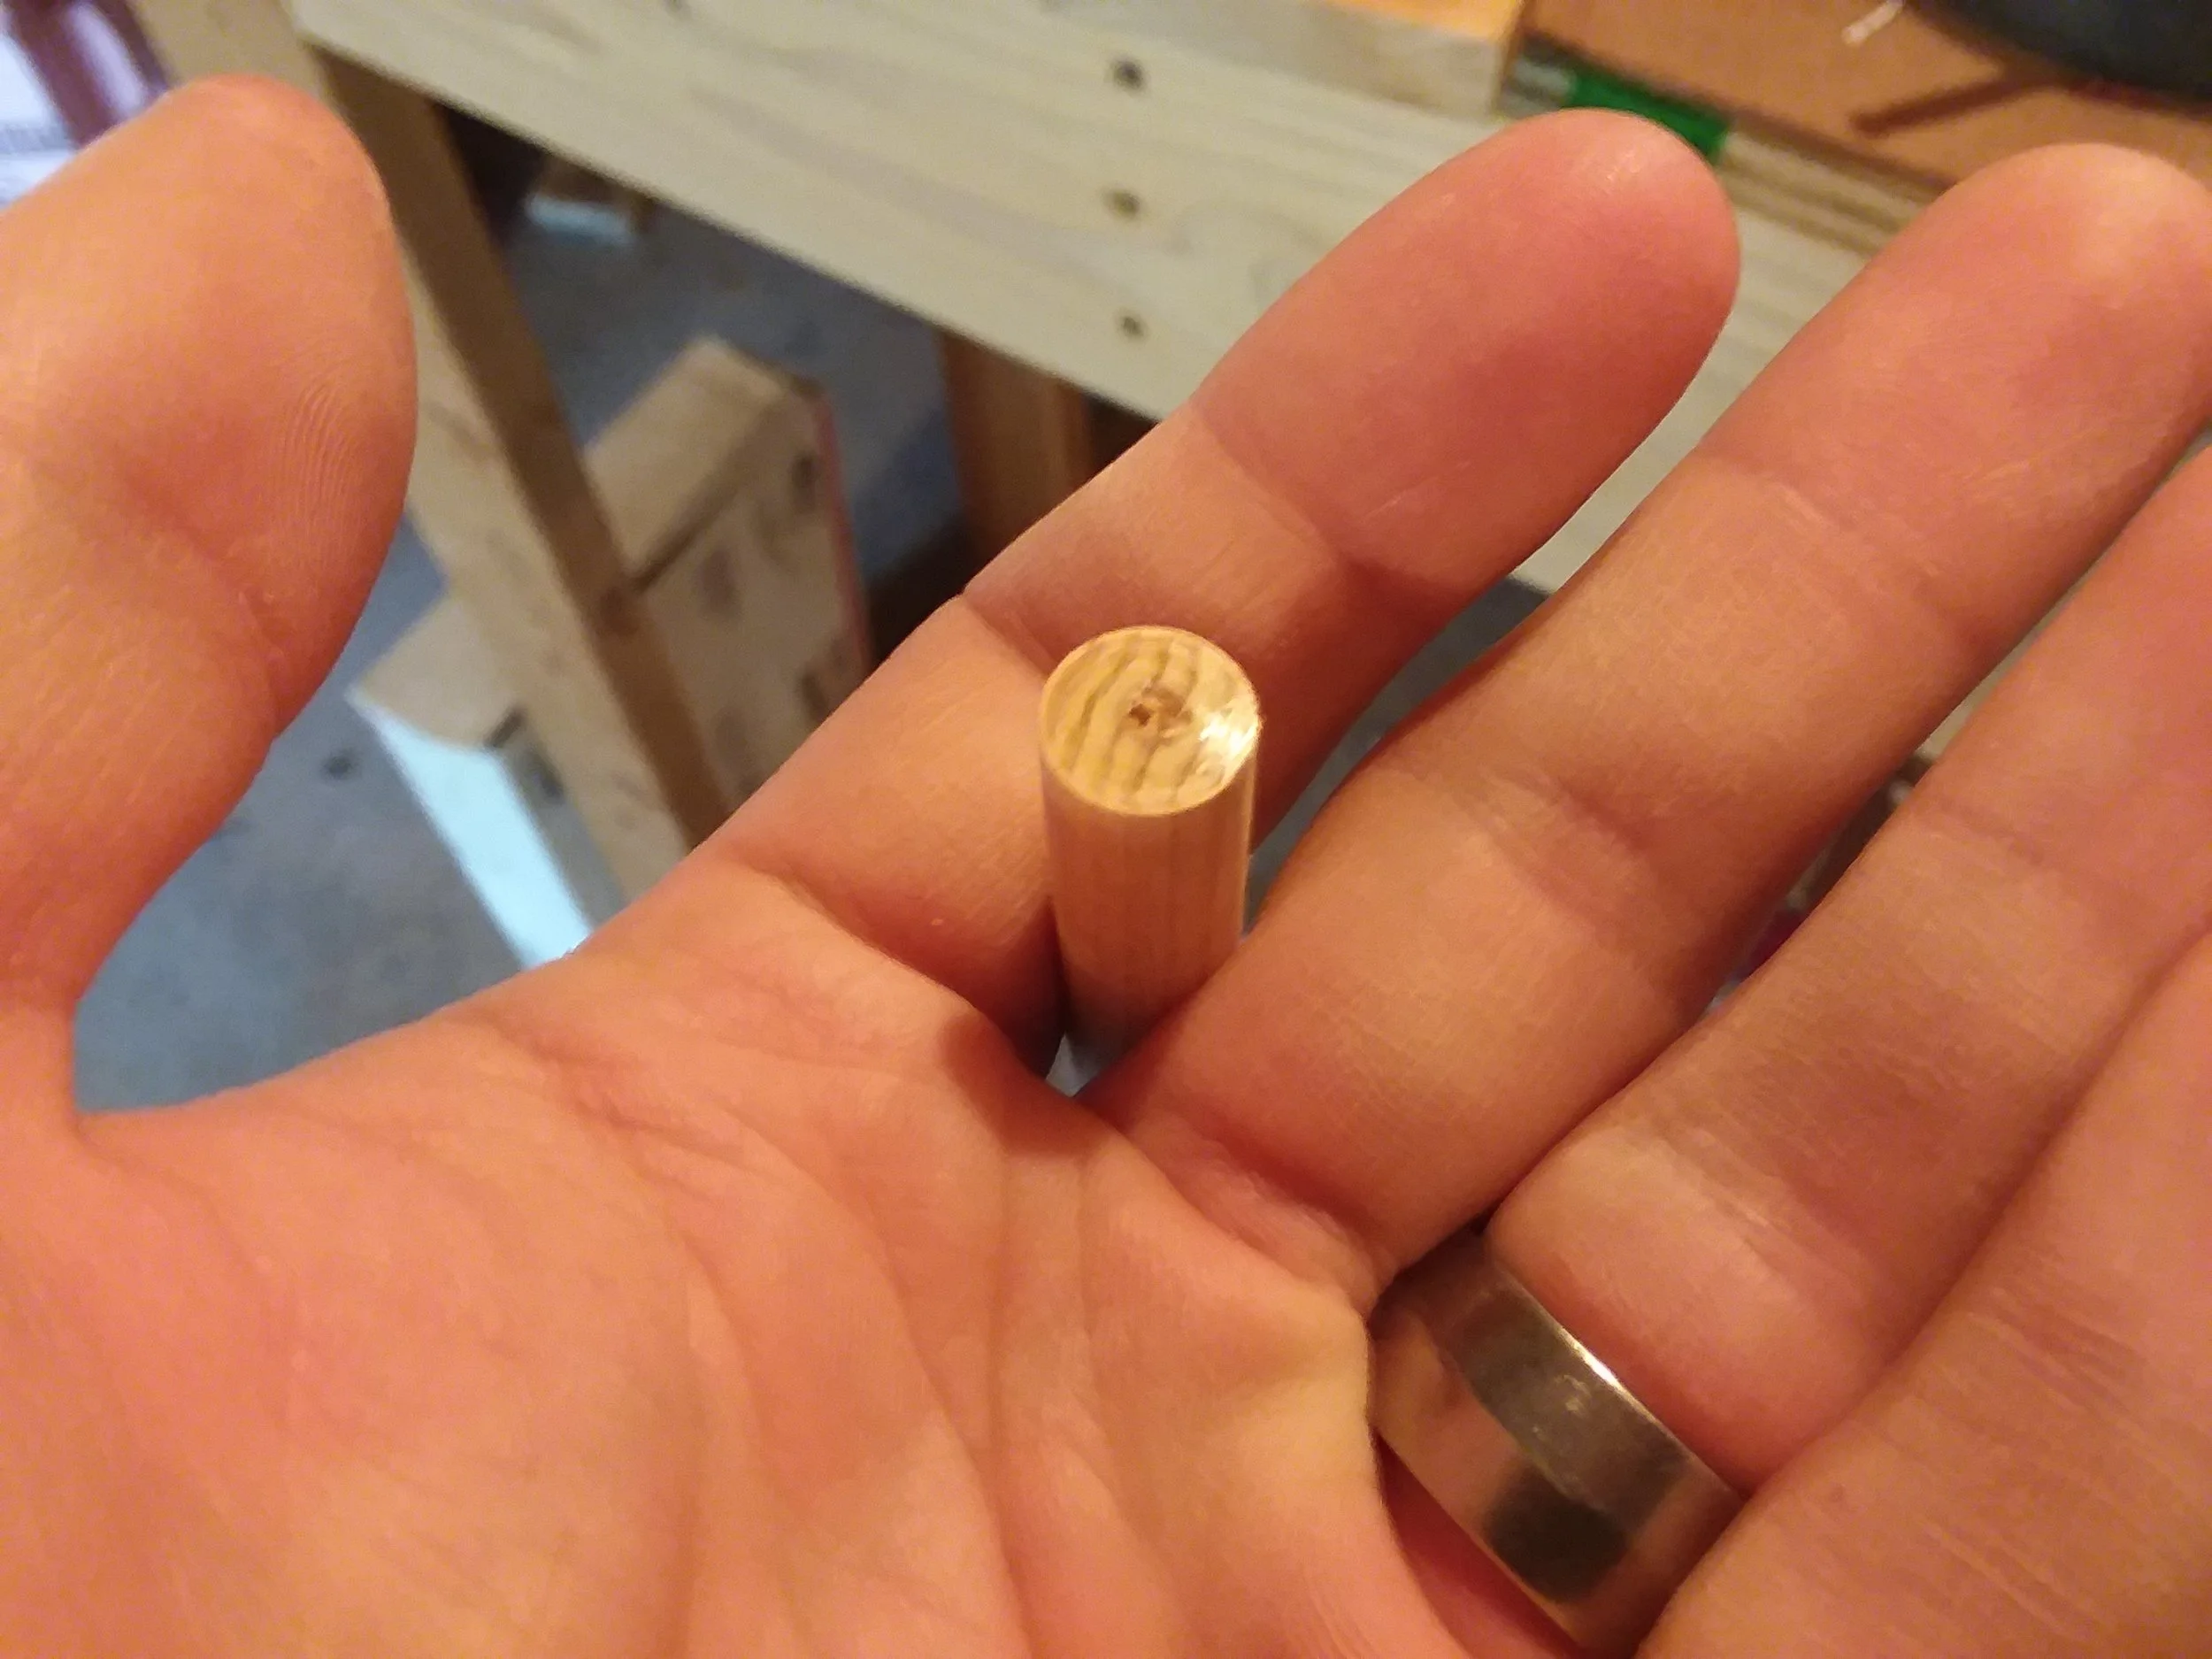
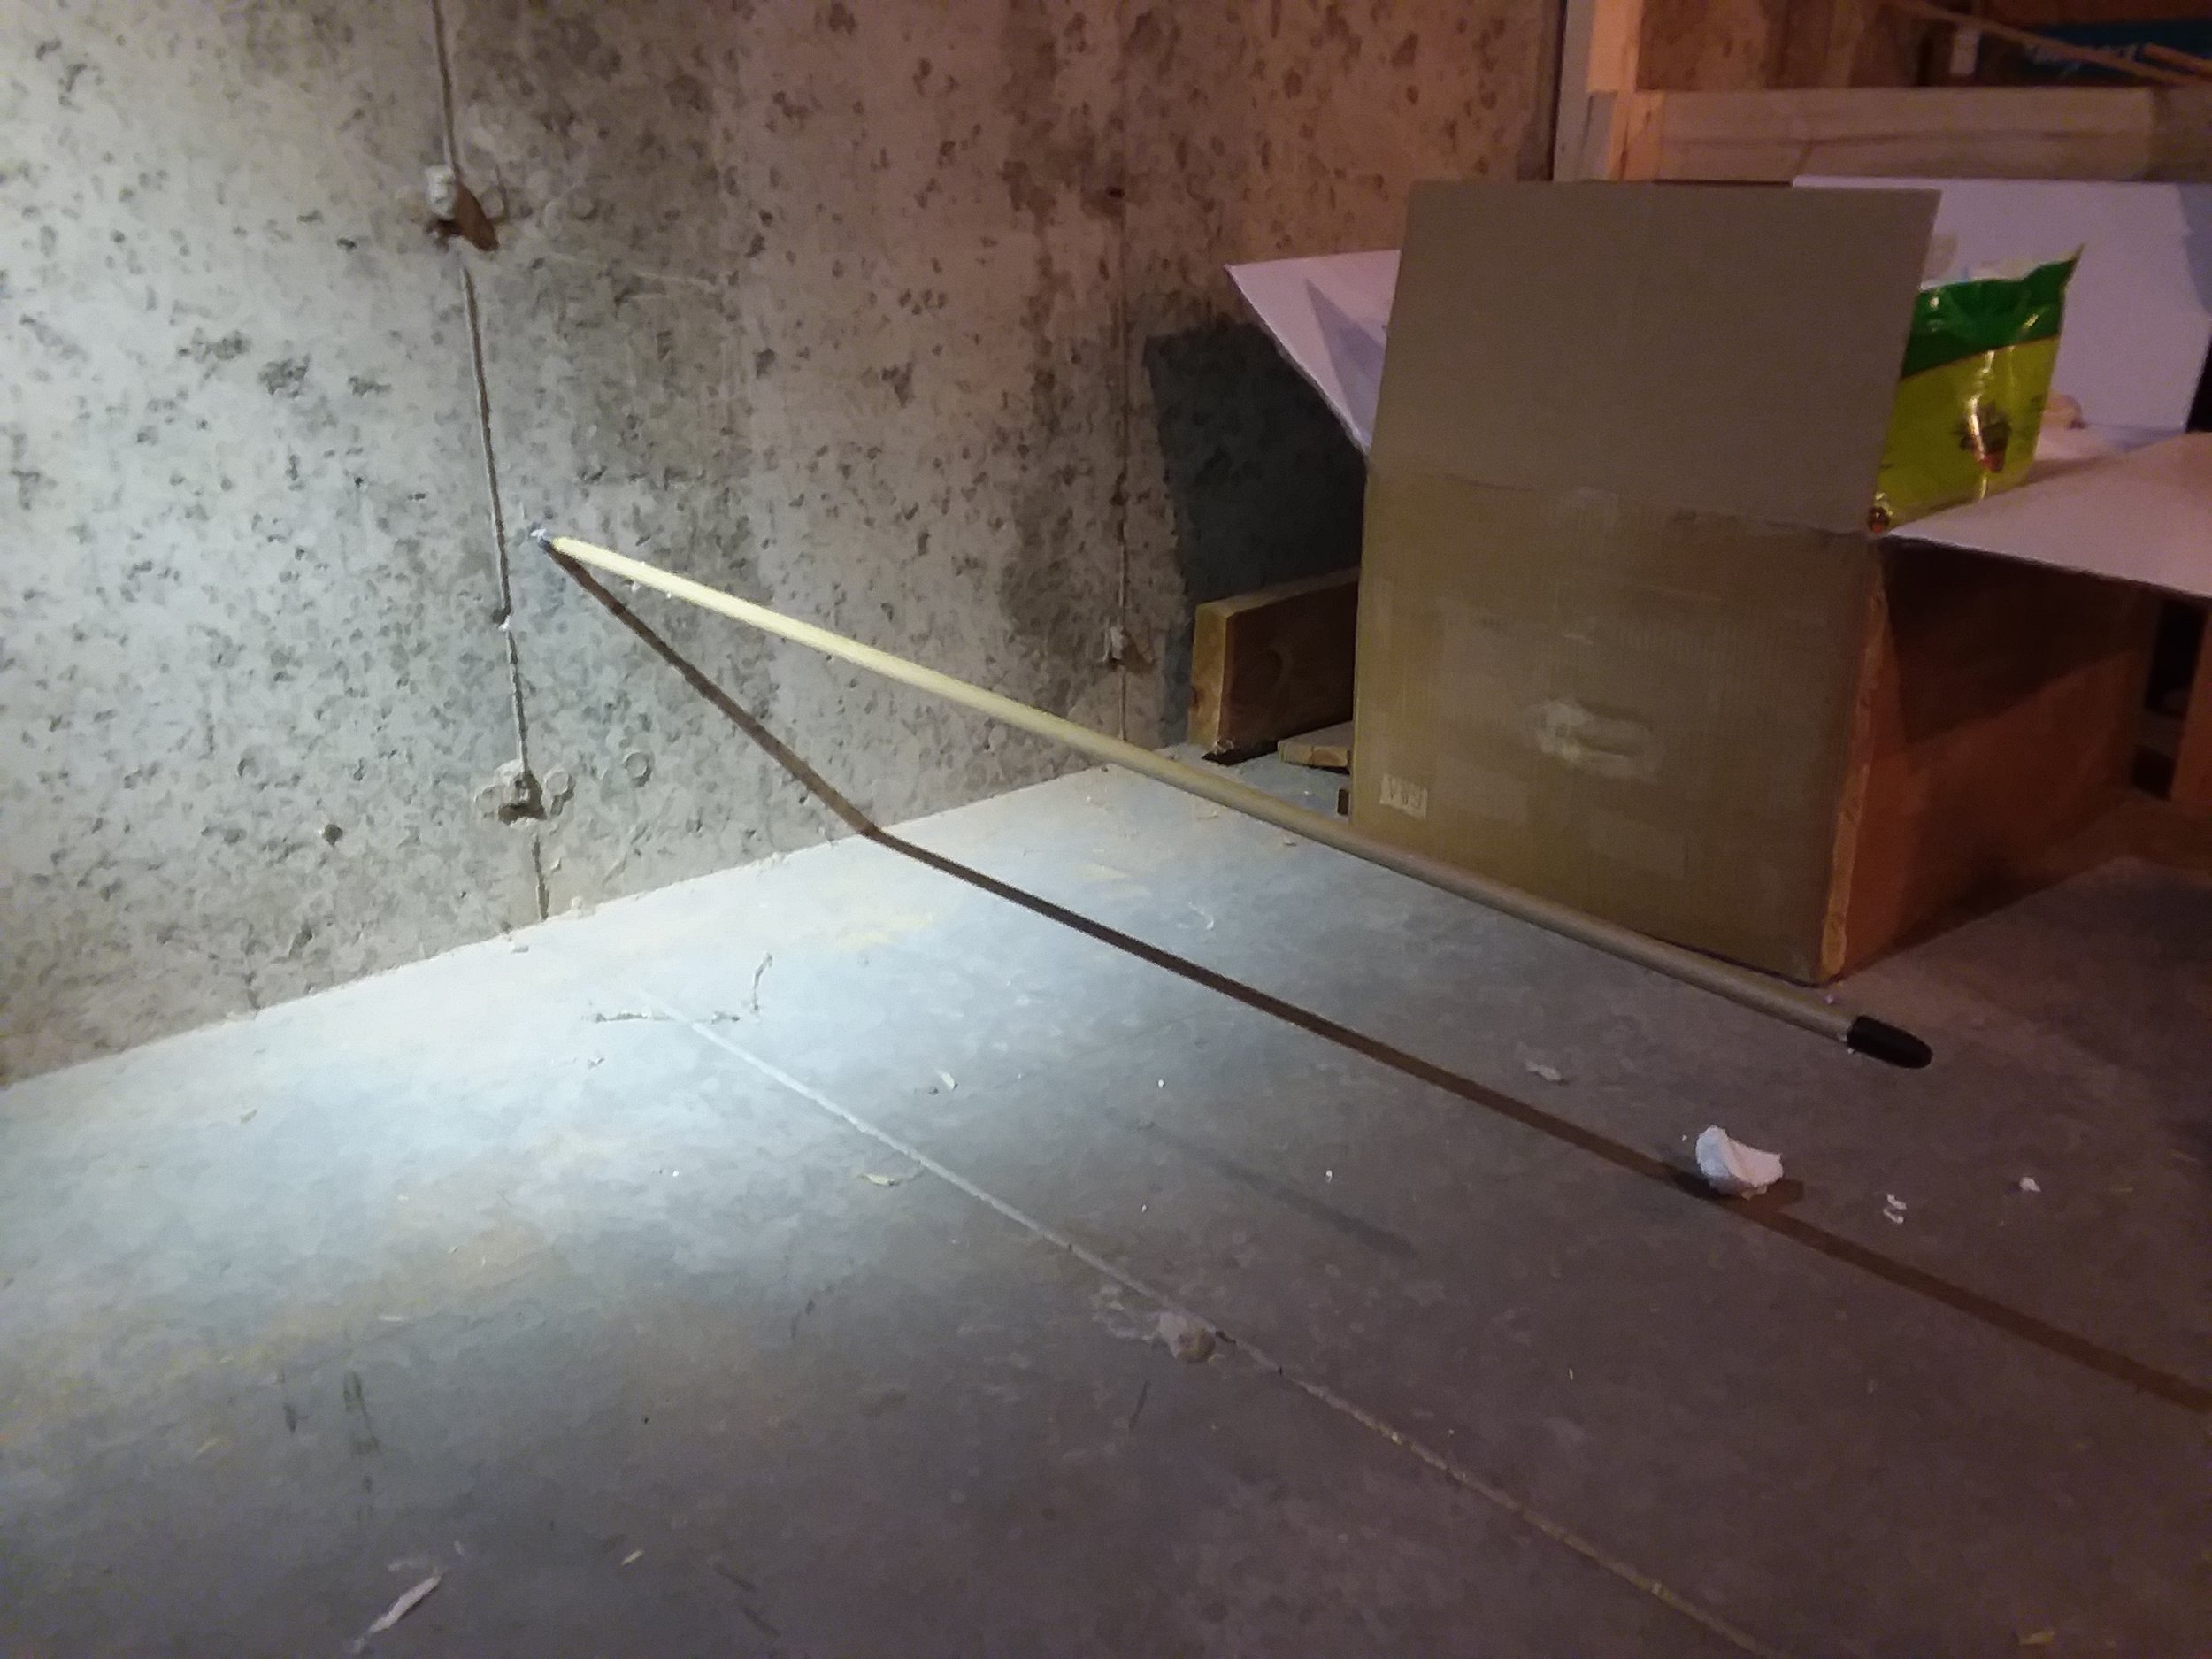
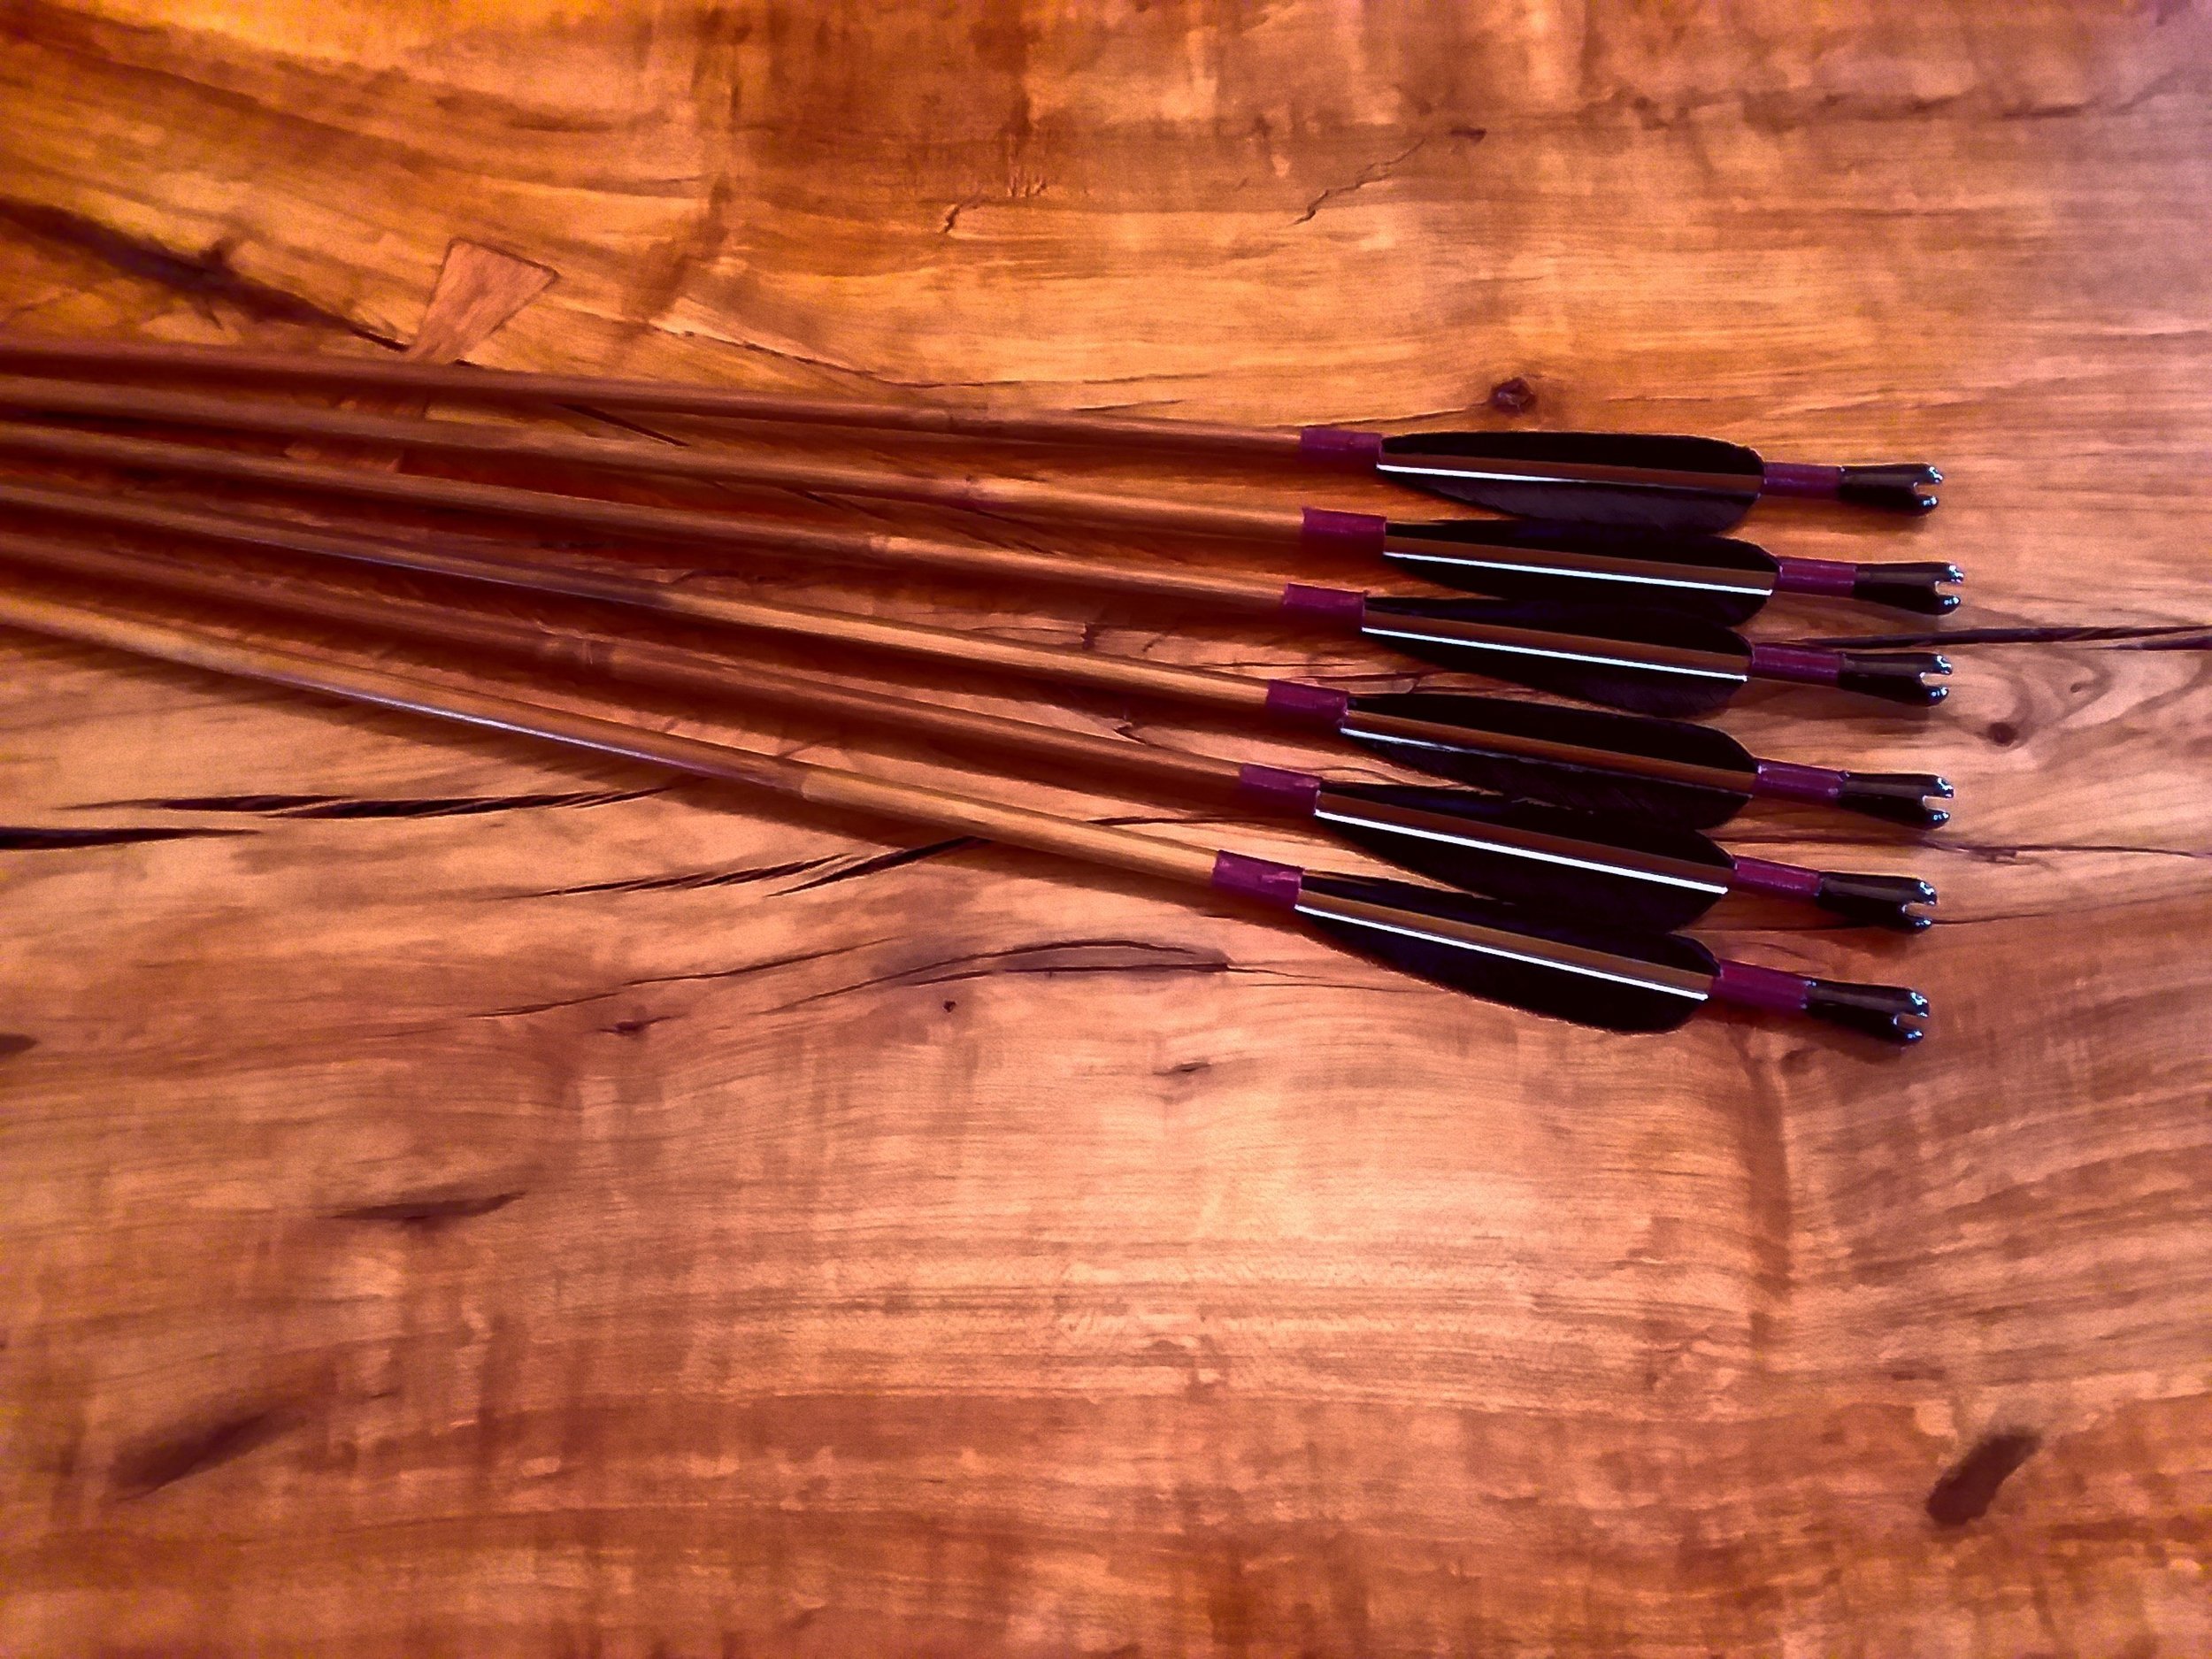
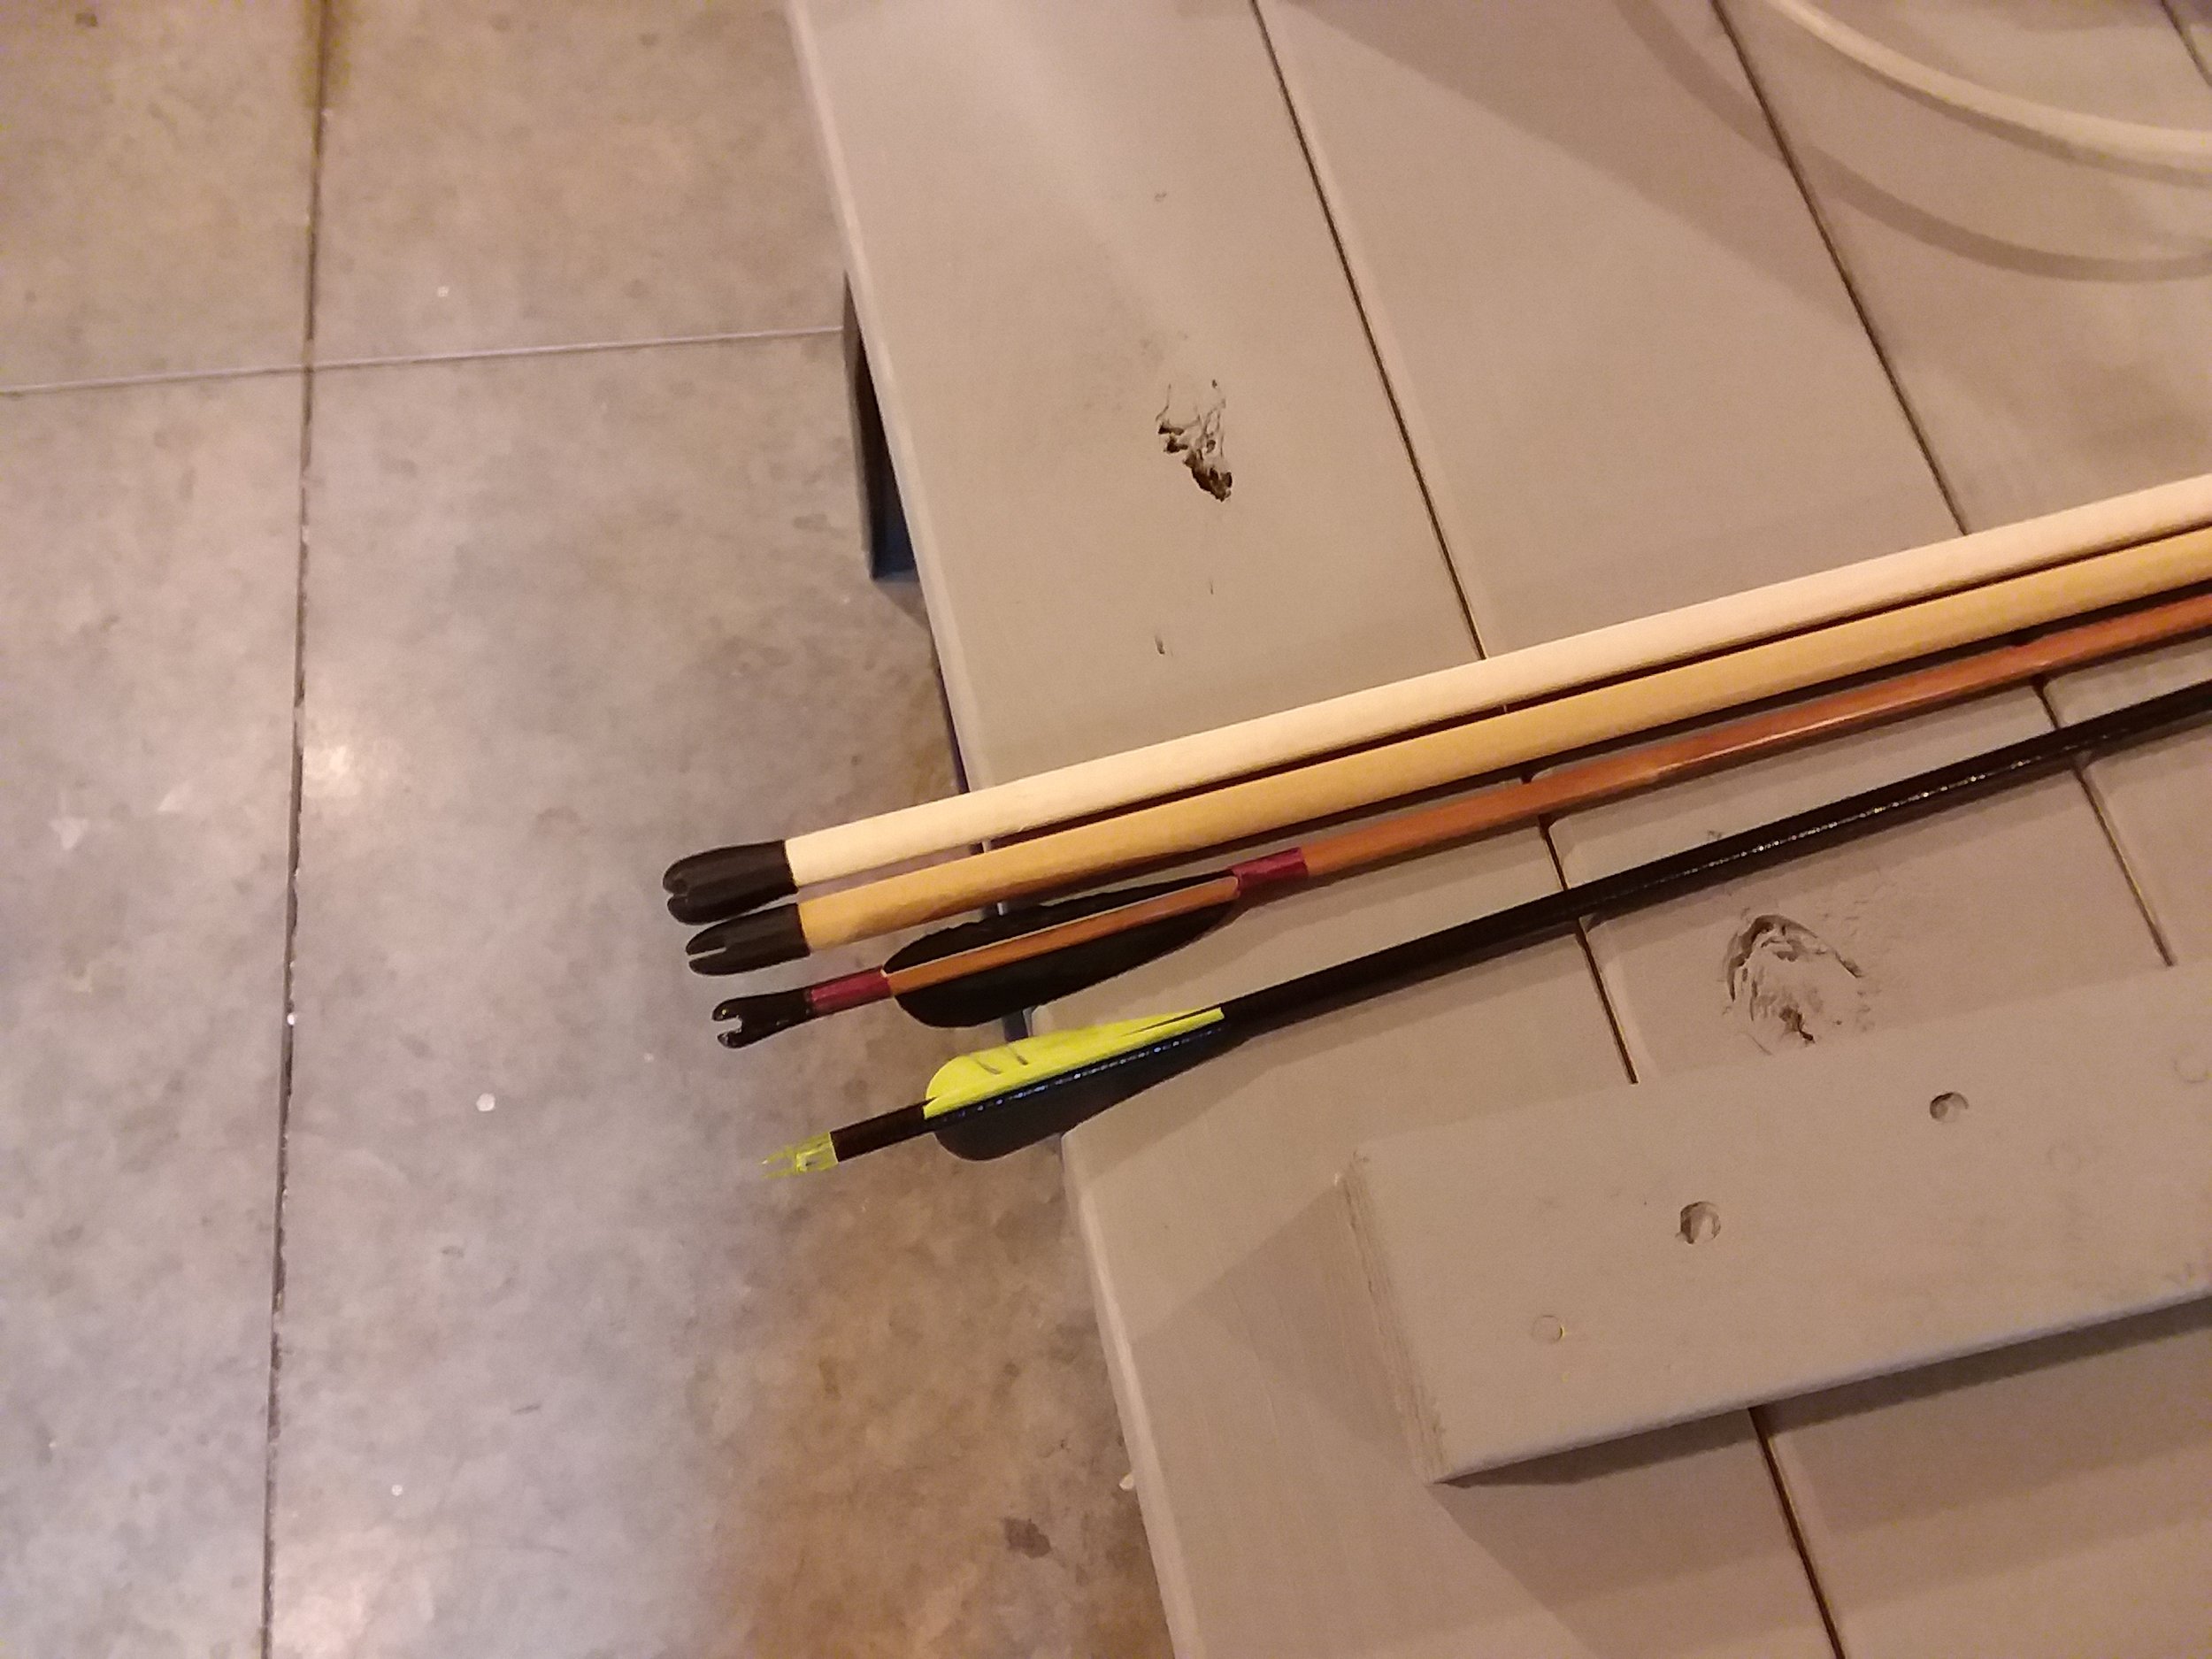
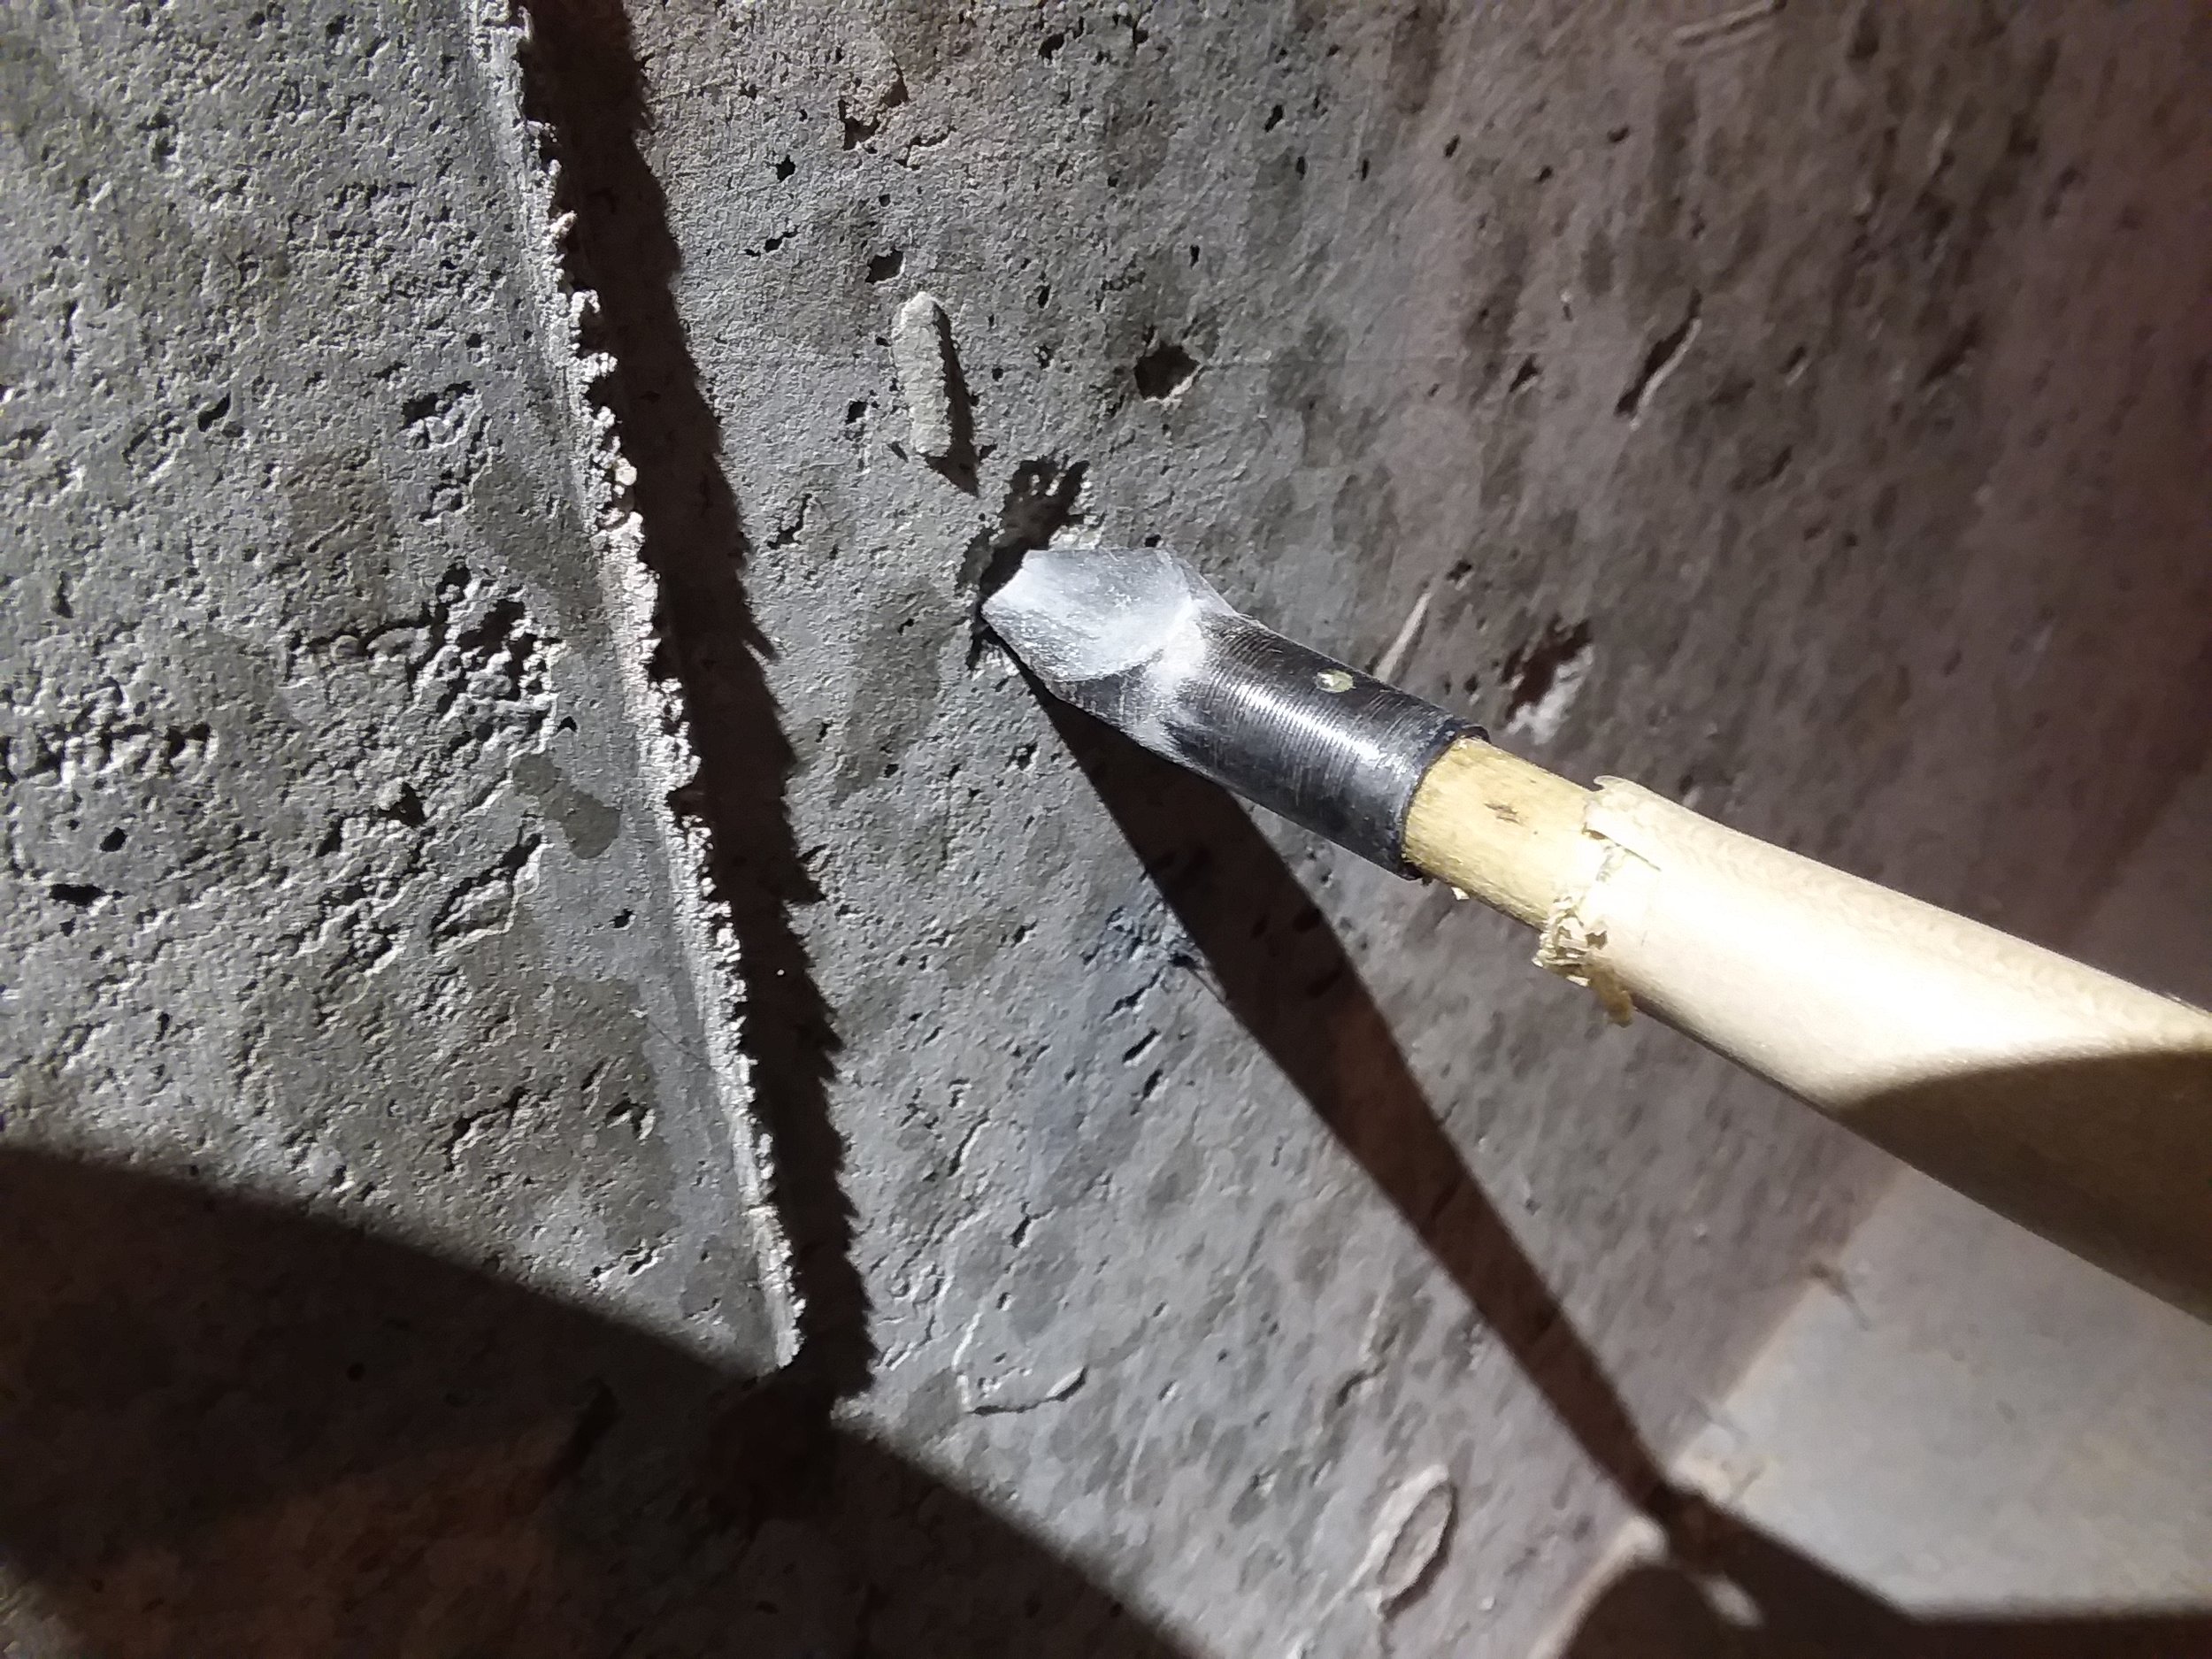
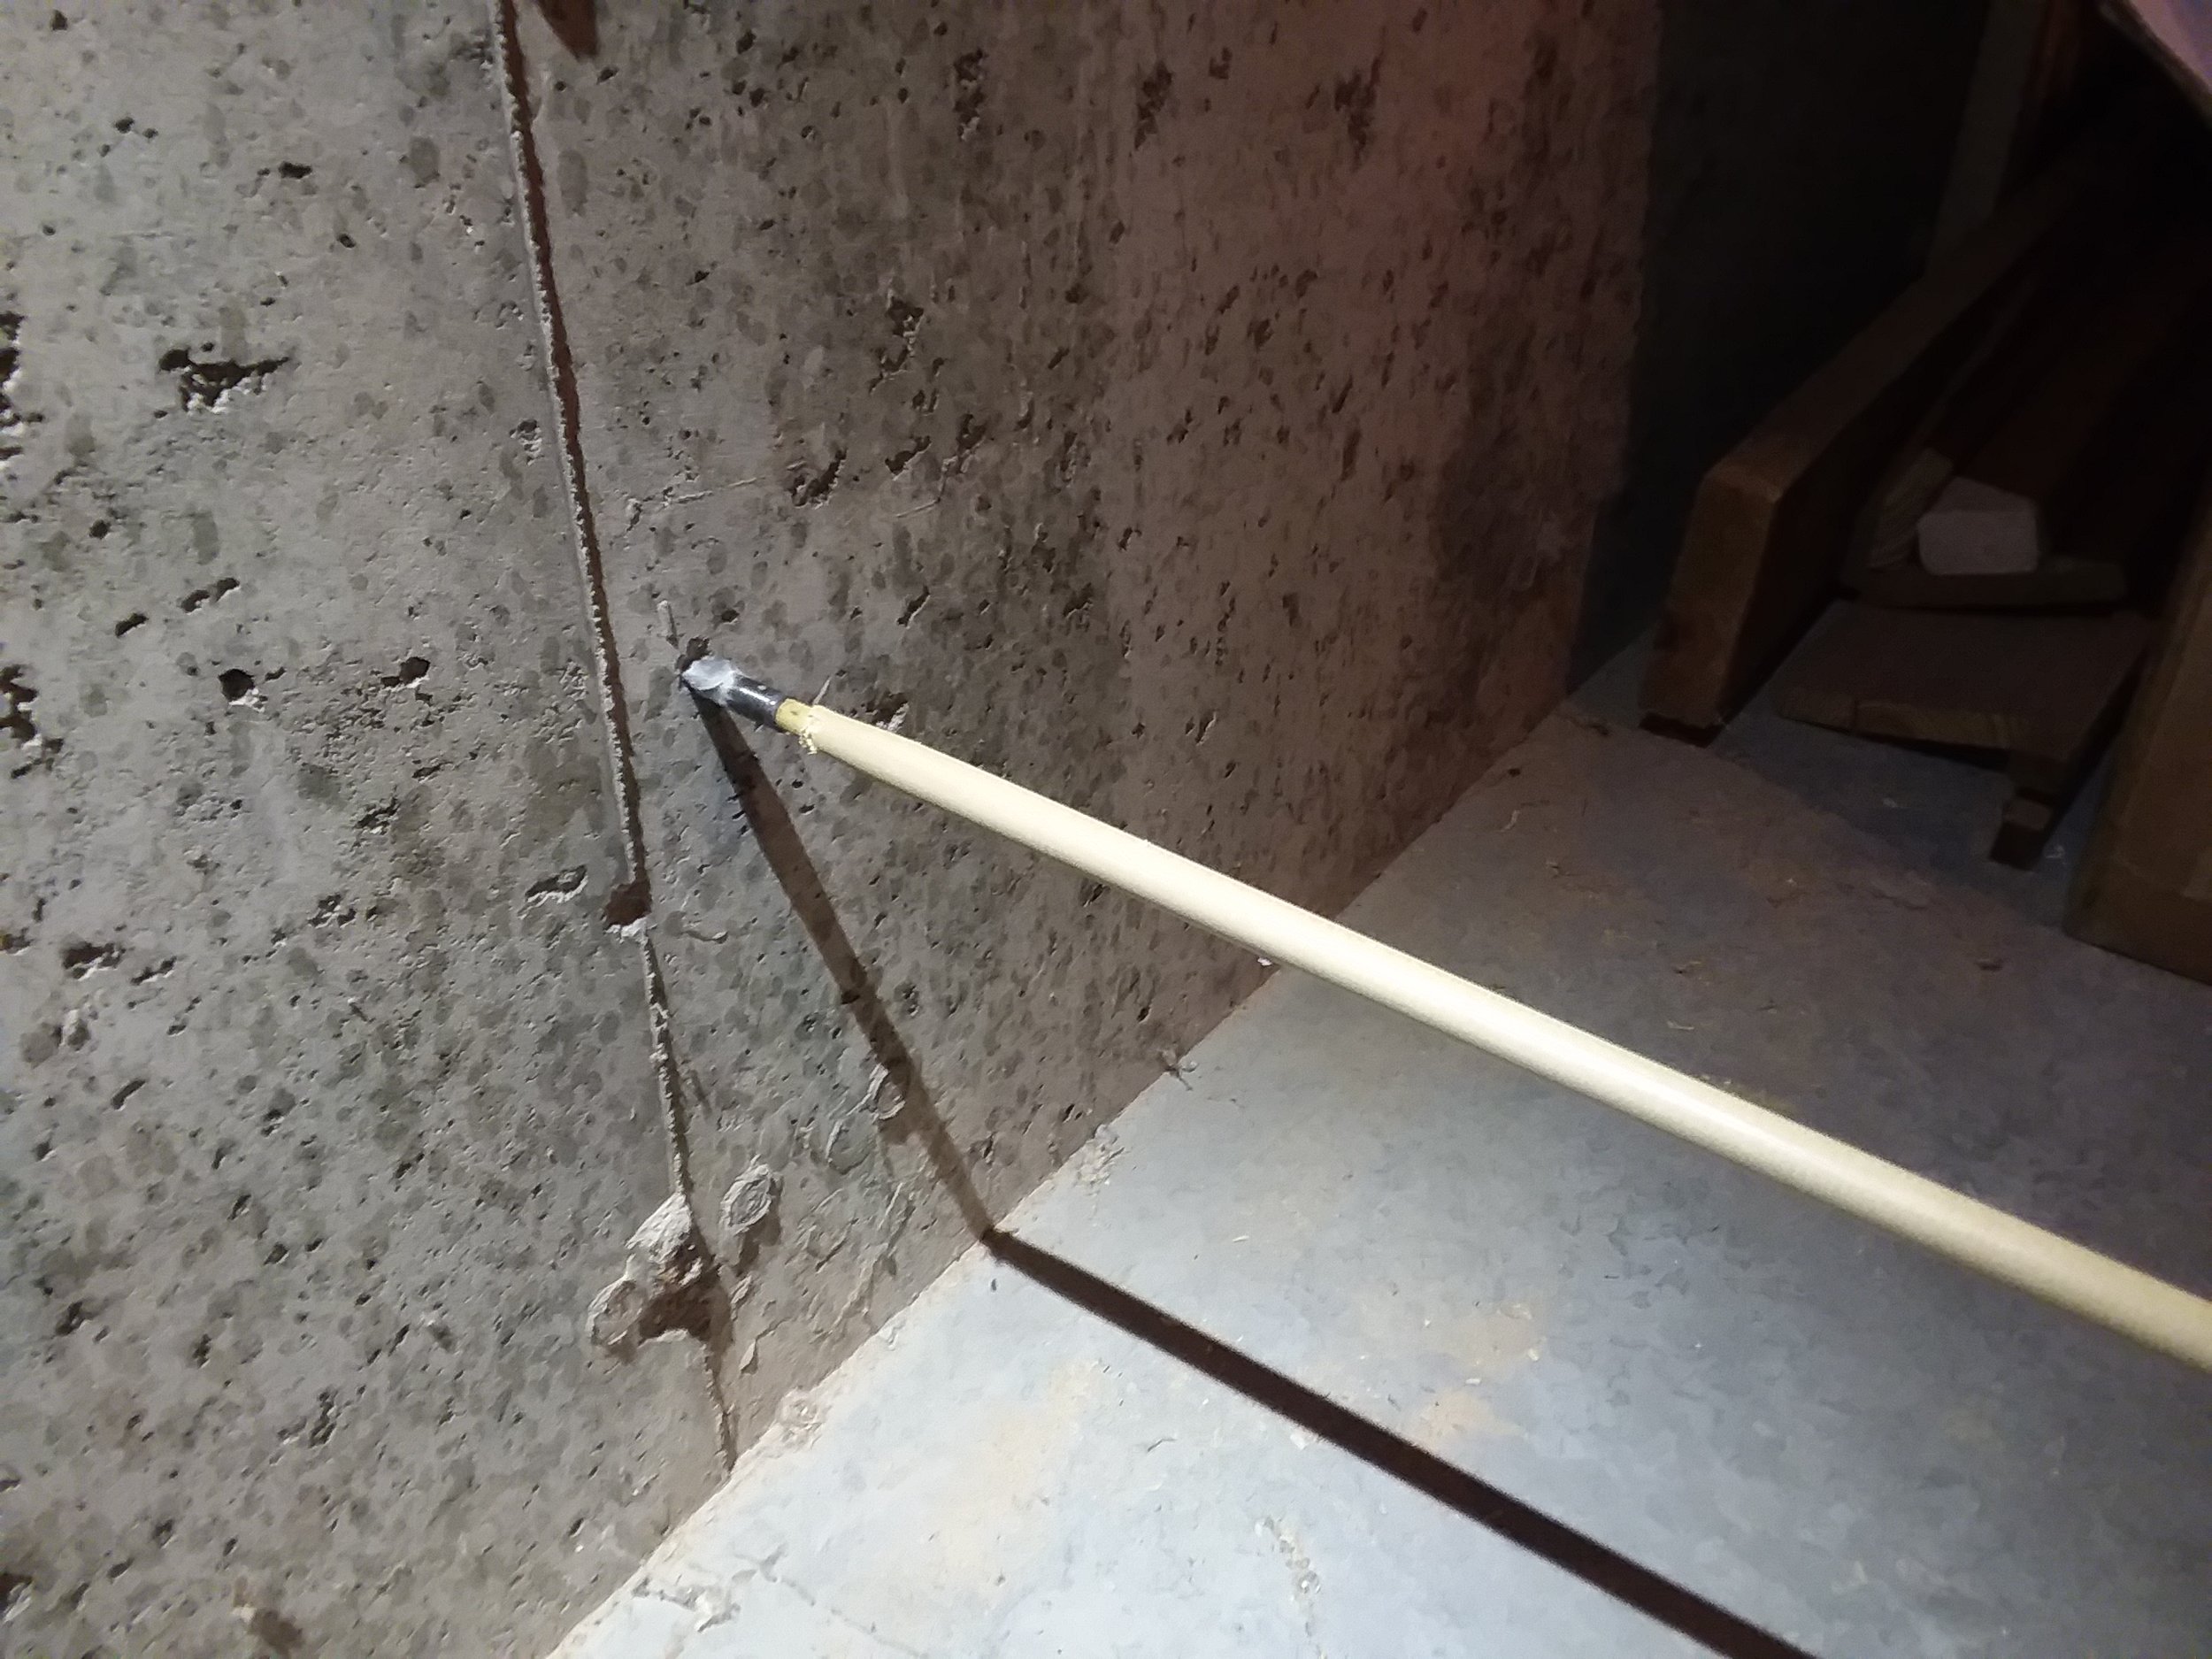
What did we get right? Well going off the fantastic article by Peter Dekker, poplar was a correct wood choice, minimal finish on the surface is authentic, correct fletching orientation, and most importantly correct weight. The fletching is an odd tossup of sorts. These examples are on the fringe short end of the spectrum for Manchu. In this case though, these arrows already have more fletching than I need. Nobody is penetrating armor anymore, and the larger mass combined with lower velocities are very forgiving when it comes to form and flight. I can shoot these off a fickle Korean bow bare at 16 yards without fletching. Furthermore, I can do this well enough to penetrate the backer and then concrete as you saw above! If I were to do this again, I'd use normal 5.5" fletching that didn't interfere with the early stages of draw, or potentially the vertical second and third feather orientations.

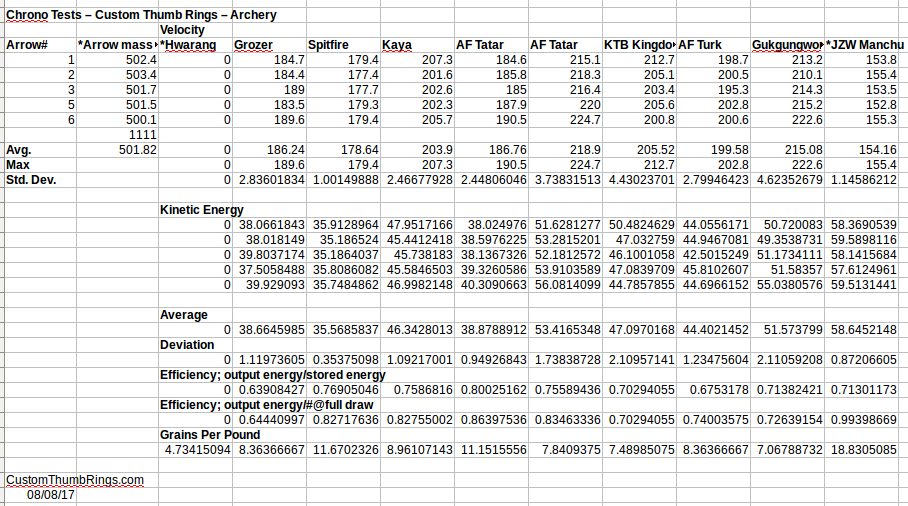
And, finally, the correct weight was what we were going for here, so we can safely shoot very heavy bows to produce ferocious power. In this respect, we were unequivocally successful. While chrono data will have to wait for another day, preliminary numbers suggest the powerful AF Tatar is over 150fps, while the Hwarang is about 190fps. 

Bulbous Nocks - a Mike Loades project

Silent Thunder Ordnance

Our final iteration of the Mughal style nock or, as Mike calls them: "the MikeL-Nock

Our final iteration of the Mughal style nock or, as Mike calls them: "the MikeL-Nock

So lets start this off with a big thank you to Mike Loades for supplying images, dimensions, arrows, and ultimately the impetus for this entire project. To that end, we've been working on Mughal style bulbous nocks, but made for modern arrows and strings. Mike's stated goals for this project were to create a modern interpretation of a Mughal bulbous nock to aid in mounted archery speed shooting. 

To be clear, before someone nitpicks historical inaccuracies of this project, no these nocks are not nor were meant to be perfect replicas. Furthermore, we've been modifying dimensions and tuning the design for Mike Loades' specific application, rather than aiming at the general public. As the project evolved, to achieve functionality and its ultimate ends, we've drifted further and further from the design's historical roots. 

Our first, and failed, attempt at a bulbous Mughal style nock

Our first, and failed, attempt at a bulbous Mughal style nock

Initially the host arrow was Gold Tip Traditional 500 arrows. Our first gen, seen above, was a failure, but not for the reasons you might expect. Given a string diameter supplied by Mike, we matched the depth as a ratio to width of multiple historical examples, which I should add were surprisingly consistent. The result, equally surprisingly, was that the string angle on short bows was too extreme for the nock. Unless one were to draw the bow using the nock itself, or some sort of device to balance the string above and below, I simply can't imagine a way this type of nock could function. And this seems like it would be the case irrespective of string diameter, sure a larger diameter string would necessitate a deeper nock, but the ratios and string angle would remain the same. Perhaps the diameter of the bulb remaining constant would be sufficient? A puzzle, certainly. 

Progress! An arrow propelled into the target by a 60 pound bow. 

Progress! An arrow propelled into the target by a 60 pound bow. 

The next gen offered a MUCH deeper string groove, and initial shooting tests were successful. With a thumb draw, you can really feel your index finger drawing the bulb backward onto the string. Unfortunately, upon further evaluation, we discovered these nocks too were unsuccessful. This time though, the gremlin was more insidious: nock mass. Upon impact, arrows endure a great deal of flex, whip, and off axis forces. Most nocks are thin, hollow,  light, and only as long as they need to be. This improves their durability as that neck in the arrow, which is a fixed maximum diameter, has less external mass to whip around. We're now doing the opposite, building a taper and large bulb on the end. The, now-obvious-with-hindsight result? Nocks failed at the neck where they insert into the arrow with sufficient shot count. 

Our final iteration of the Mughal style nock or, as Mike calls them: "the MikeL-Nock"

Our final iteration of the Mughal style nock or, as Mike calls them: "the MikeL-Nock"

Clearly then, on carbon arrows this wasn't going to work. But what about a more reinforced design? How about nocks for the more typical 11 degree taper found on most wood and some bamboo shafts? This appears to have solved our durability problem, reduces the mass of the nock itself, and the results performed as desired. Mike was extremely pleased with the results as well, so much so he named them "the MikeL-Nock."

We were so pleased with the results on these arrows that, in a sister project, we adapted the design to fit our 1/2" in diameter Manchu arrows. As can be seen above, one of these was given quite a test when the arrow was slammed through the backstop lodging itself into the concrete wall with enough force to stick..... and be difficult to remove. Quite a testament to it's durability, granted at absolutely comical proportions. 

This may not be the last we see of these either. Other nock designs for other style arrows may be in the works. ;) 

Bow Performance Project - Gukgungwon Chrono Data

Silent Thunder Ordnance

Gukgungwon bow shown here with our Hybrid ring in sterling silver

Gukgungwon bow shown here with our Hybrid ring in sterling silver

For the sake of having everything in one place, as this post completes the analysis of all our bows on hand, the force draw et al. charts are attached at the bottom, even though this post only updates chrono data. This is where the rubber meets the road: how effectively can these bows convert that stored energy into kinetic energy? 

Full disclosure, I love this bow. On the day we tested it though, I had basically spent the earlier part of the afternoon shooting it until my shoulder told me to stop. So when someone popped their head in and said "time to chrono" that evening, I groaned a little bit. Shooting through a chrono, if you've never done it before, is hard. Particularly it is hard with a Korean bow. You're down on the ground, shooting at a weird angle to try and get the arrow through  the sweet spots on both sensors. And you've got to get that flight darn near perfect, lest you smash an arrow into one of the diffuser supports or simply miss one of the sensors. I don't mean to lead in with excuses, but lets just say this was not my finest hour. 

The results though were quite good. Despite my shoulder, and what I suspect was me under-drawing, we're within a deviation of being the fastest bow we've ever tested. We're also cleanly over 70% efficient. And then there is the twist, if we go with the highest KE produced, rather than the average, it is not 71% efficient, it is 76.2% efficient beating the heavy AF Tatar's 75.6%. Of course, applying the same standard to the AF Tatar, it'd be 79.3% efficient. The point? In terms of stored energy and velocity, I am betting I could take both these bows out again and see the roles reversed. They are within margin of error of each other. Cool huh?

And that concludes our additions to bow performance data for now. Own a bow and want it tested? Manufacture bows and want some unbiased independent testing to show off? Send us a message. There are a thousands of beautiful bows out there, and we'd love to add yours to the list. 

Chrono data

Product Announcement - Manchu Rings

Silent Thunder Ordnance

Our two Manchu ring variants, thick on the left and slim on the right. 

Our two Manchu ring variants, thick on the left and slim on the right. 

Our original Manchu ring was a huge success. Slim, sleek, it was the perfect pairing with modern bowstrings. Nevertheless, we've gotten feedback that some users would like a thicker option, which we're now proud to introduce. We now call our original version "Slim" and the new version "Thick." Sizing remains unchanged, being identical between the two, so if we know your size in one we can easily fit you for the other. These variants are also available in our Exotic materials, carbon fiber and glow.