Bronze Sword Project (part 2)
Silent Thunder Ordnance
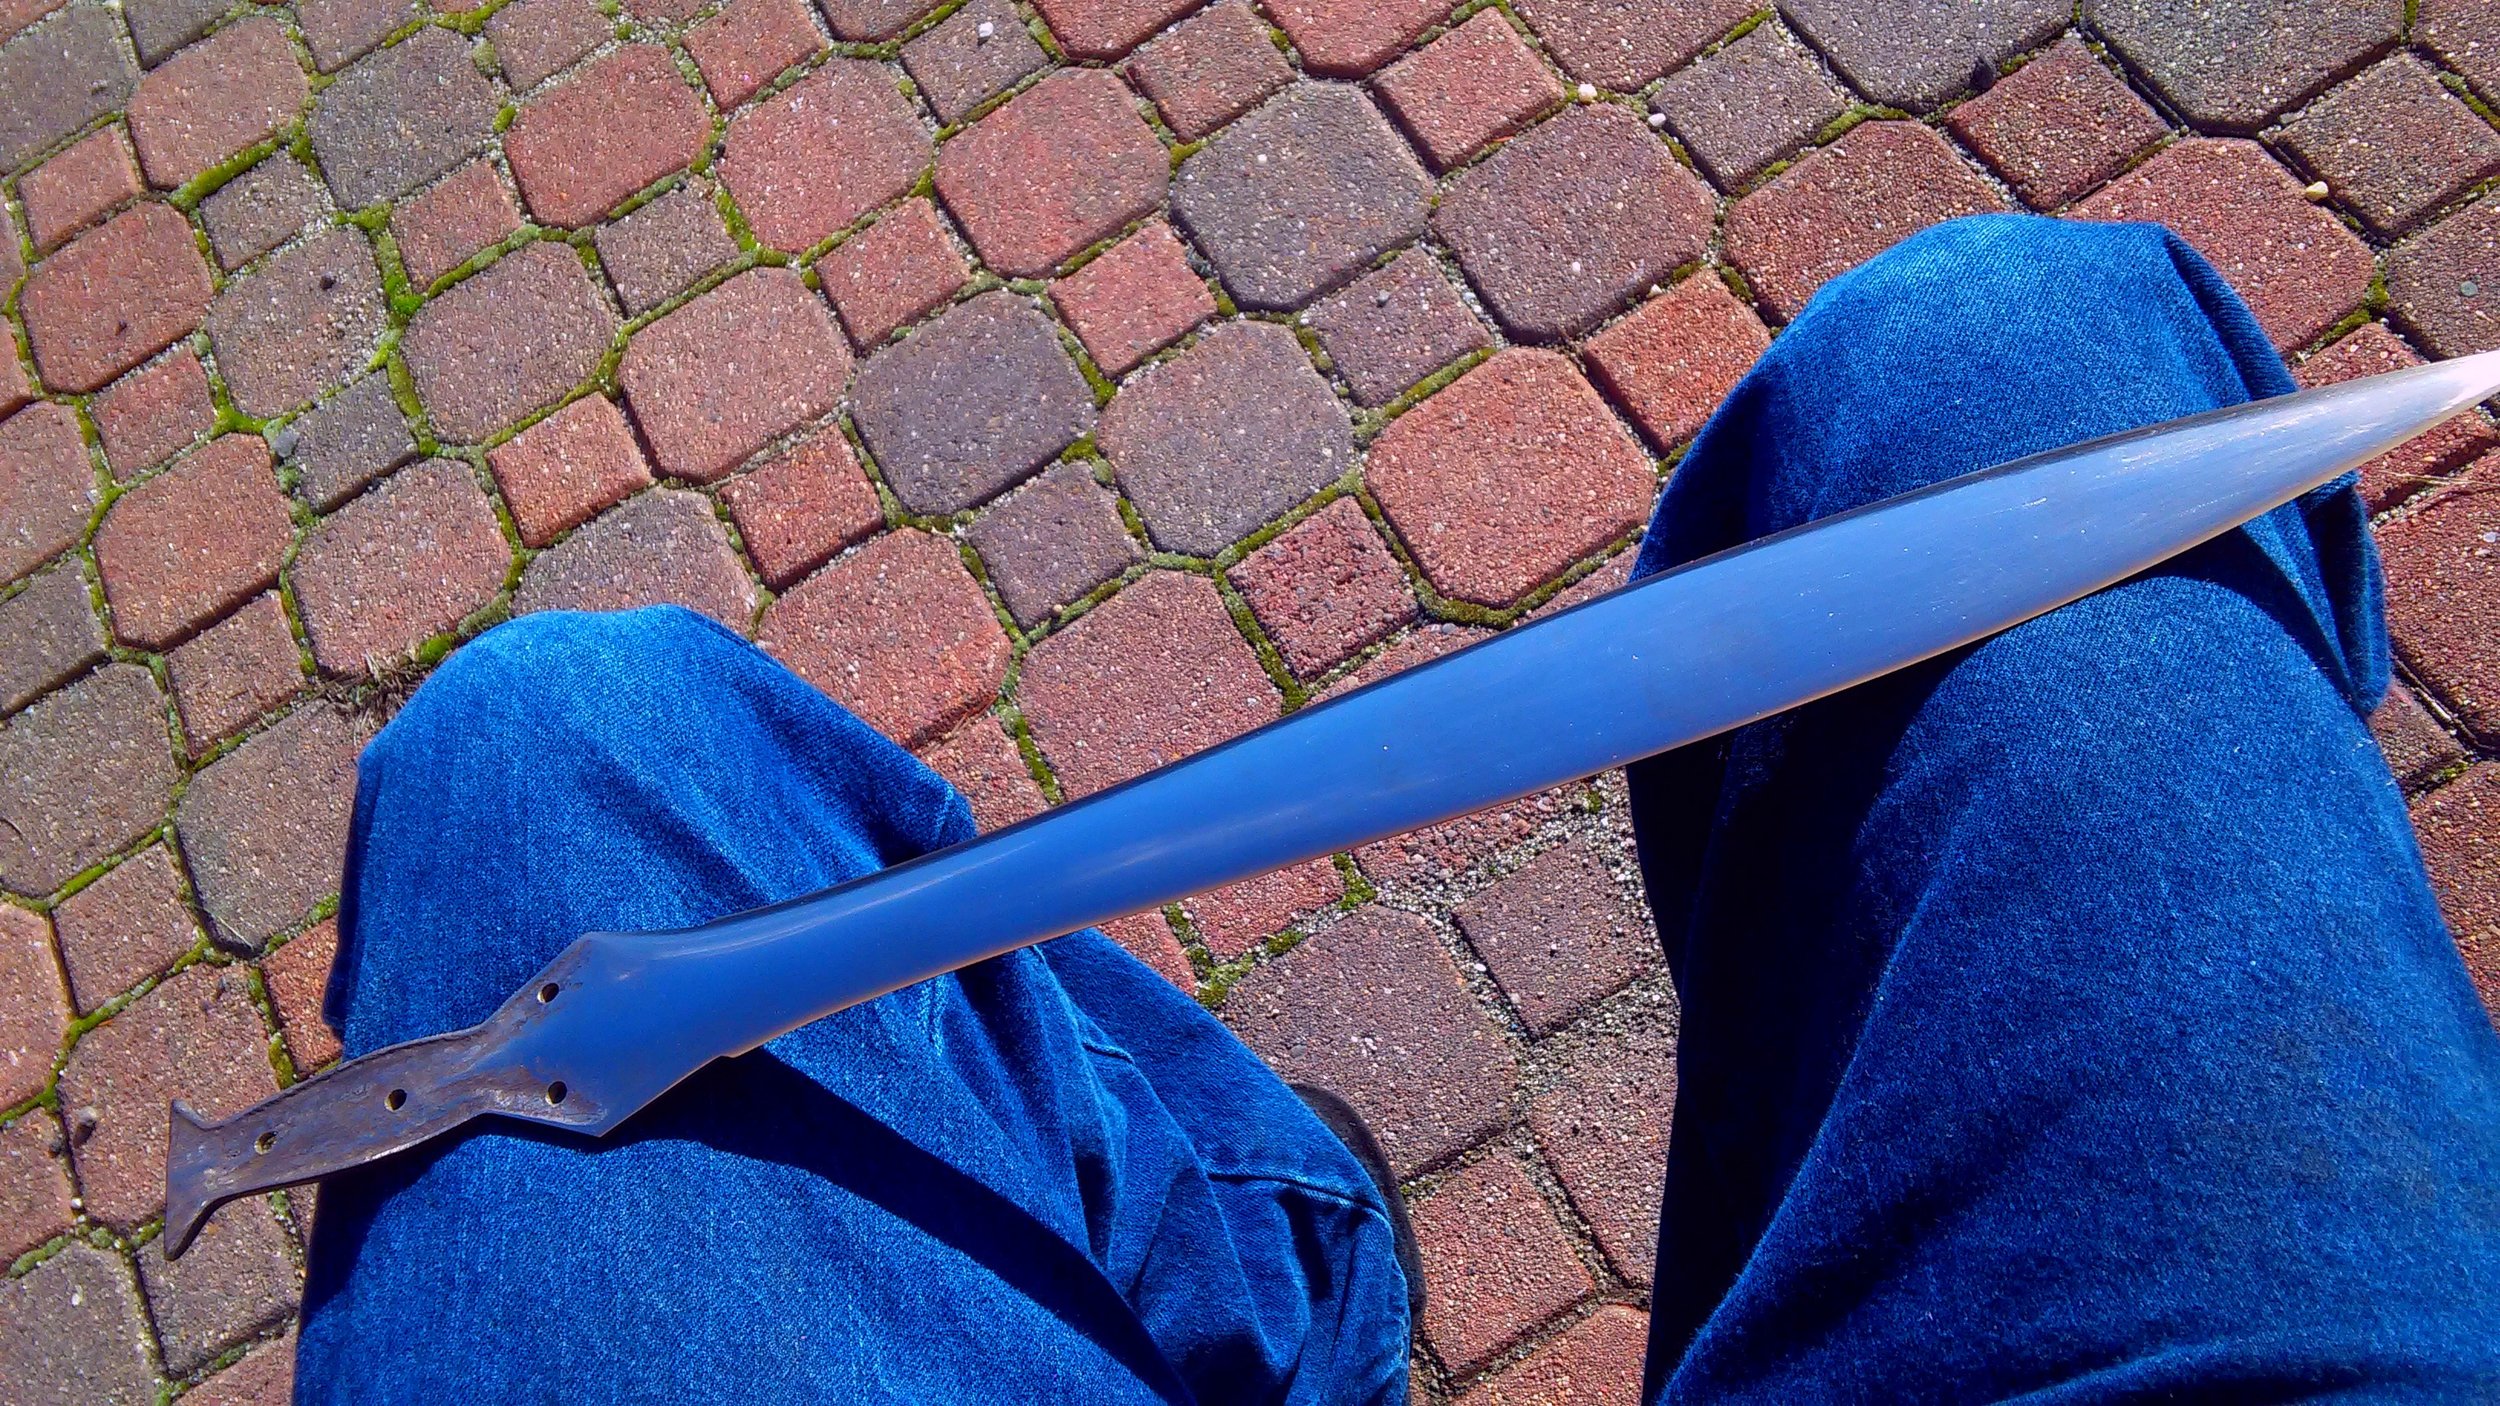
Showing off the bronze blade's polish
PART 2: THE HANDLE
Shown above is the blade with what I hope will be the final polish. Why we didn't get here in the previous episode will become obvious shortly.
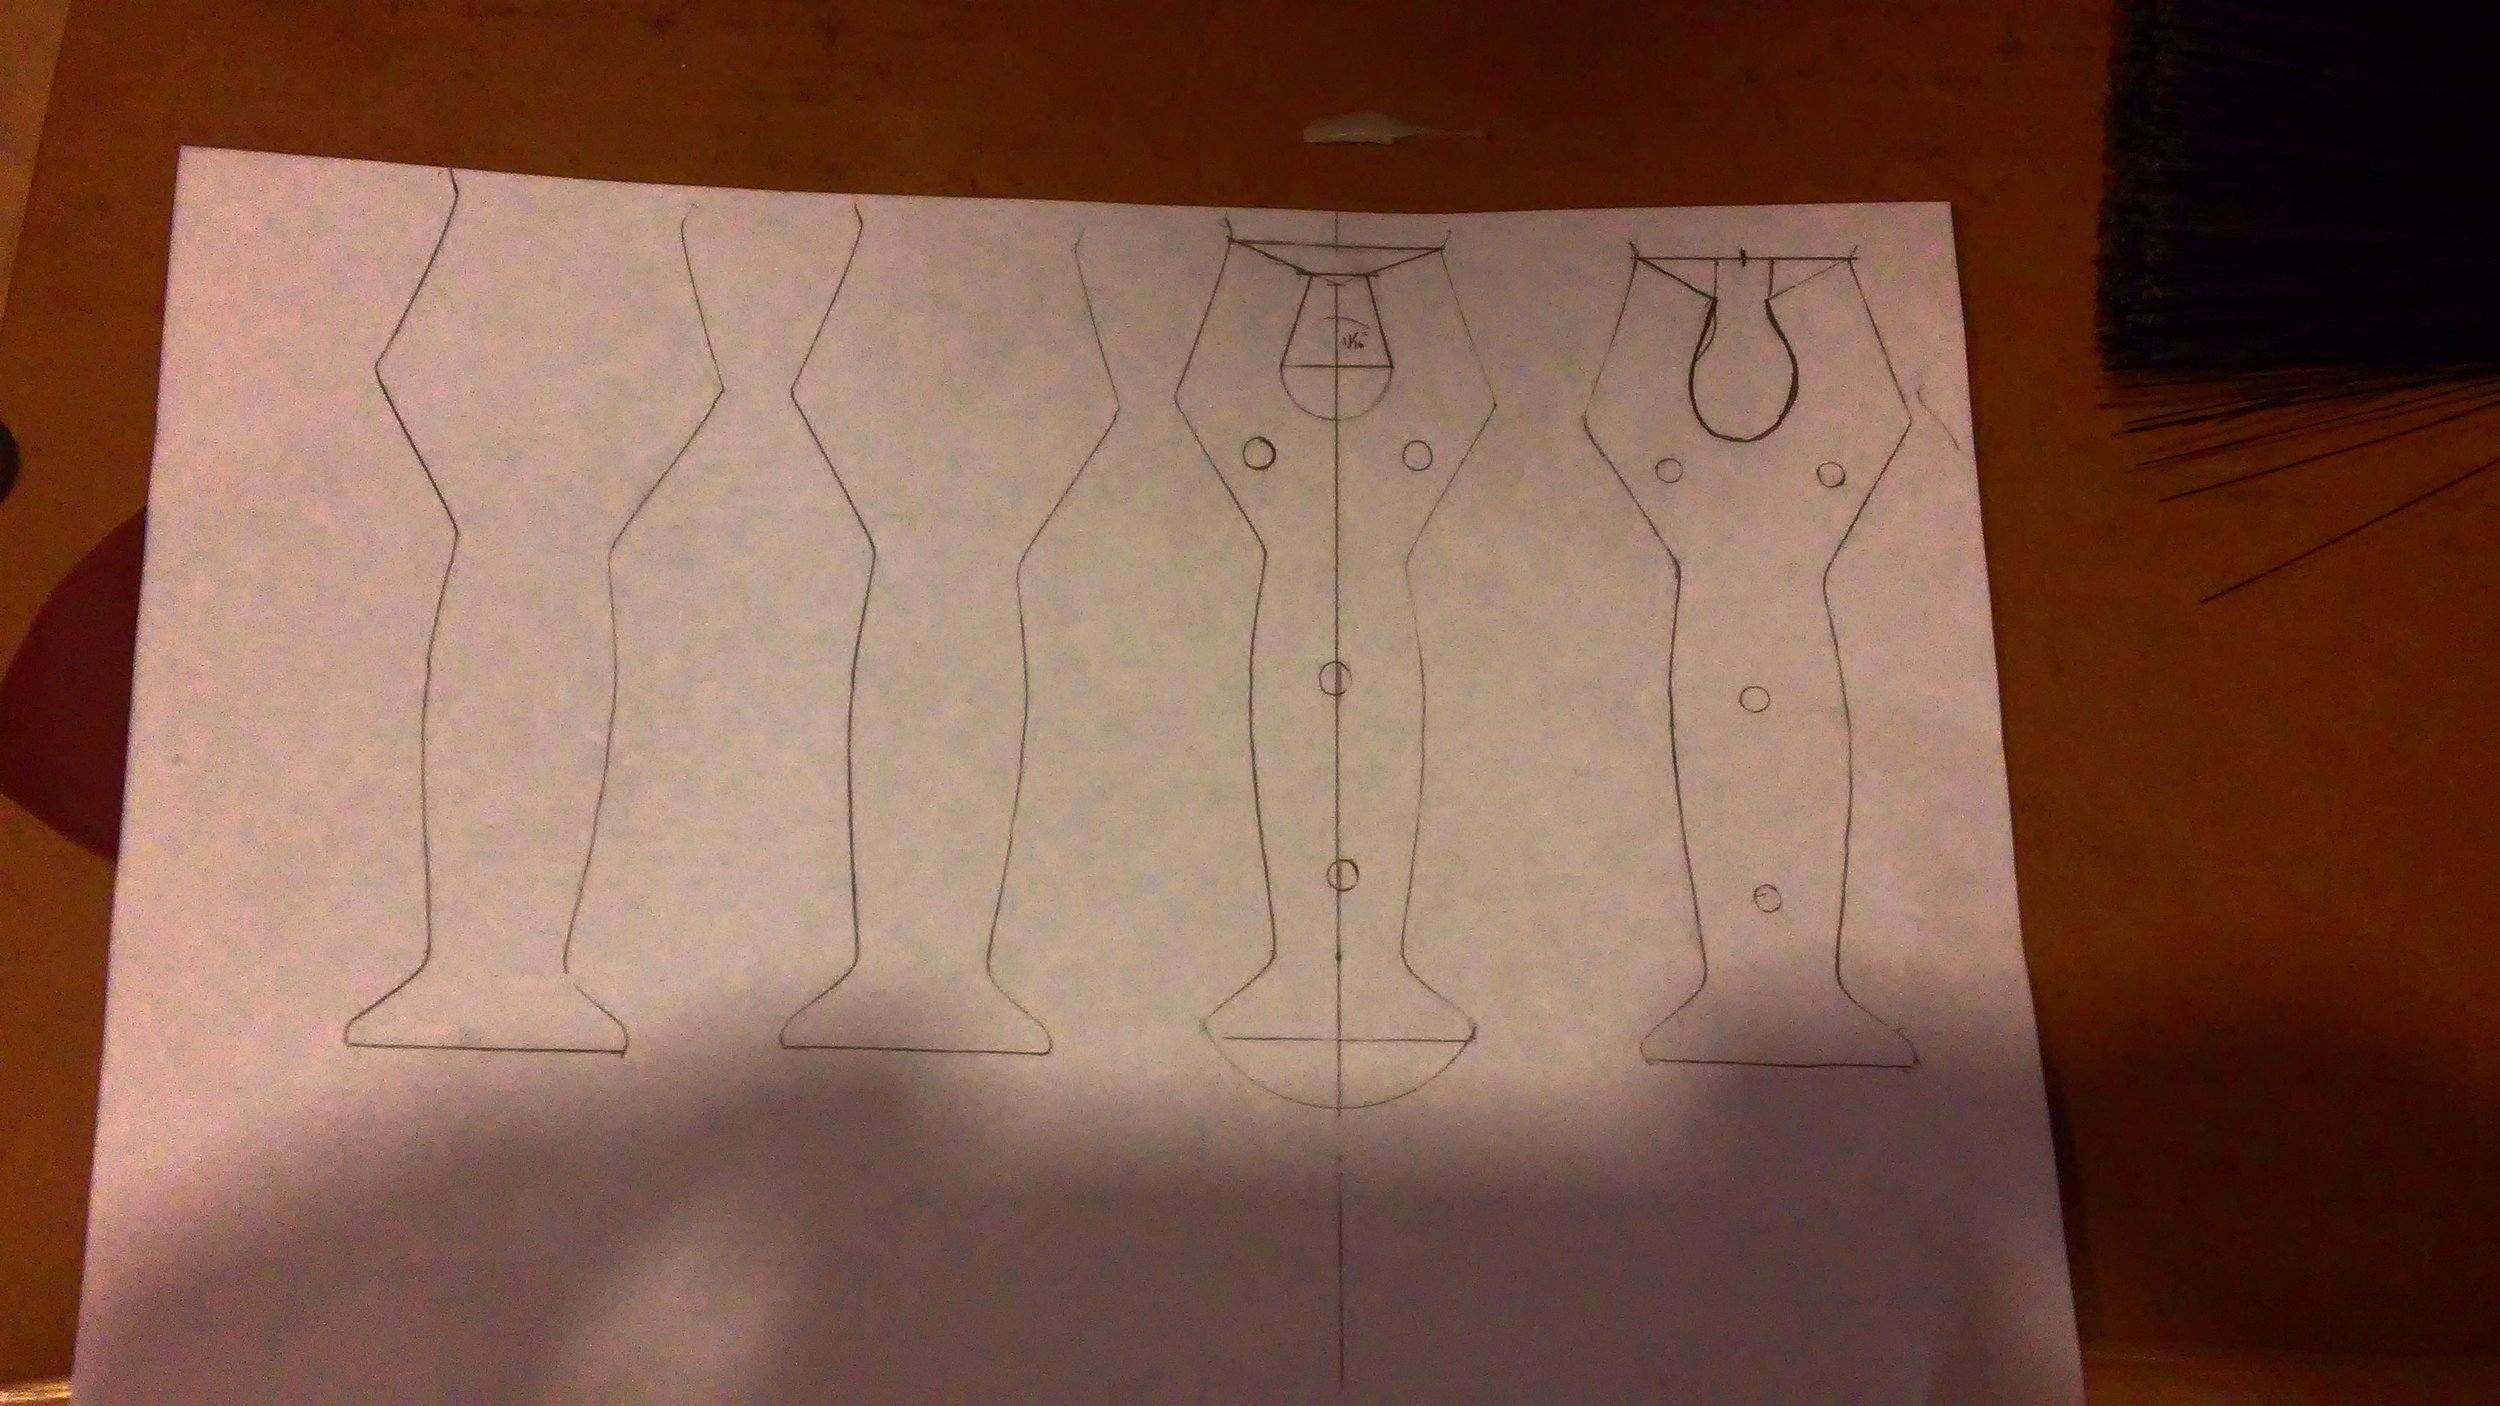
Laying out the sword tang and desired handle shape
LAY OUT THE HANDLE
First step of pretty much anything worth doing is planning. You saw the above image in part 1. I started by tracing the blade onto a sheet of paper. Because I screw things up, I traced it four times with the expectation it'd take me a couple tries to get it right. The first was just a freehand sketch, how do I want it to look. Next up I grabbed a few light drafting tools and laid everything out with precision. Turns out I didn't need the extra two tracings. Oh well. For the handle I decided to go with my favorite exotic: cocobolo. If you've never worked with cocobolo before, you've been missing out. The wood is beautiful, resin rich, and always a surprise once you start to work it. The colors just pop so beautifully, and you never know what you'll get. To this date the most beautiful piece of wood I've ever seen or worked was cocobolo, all purples, reds, and stirred honey gold. I have never found another piece of similar quality since, despite being on the hunt for the last two decades. But I digress. Copper pins to secure the handle in 3/16".

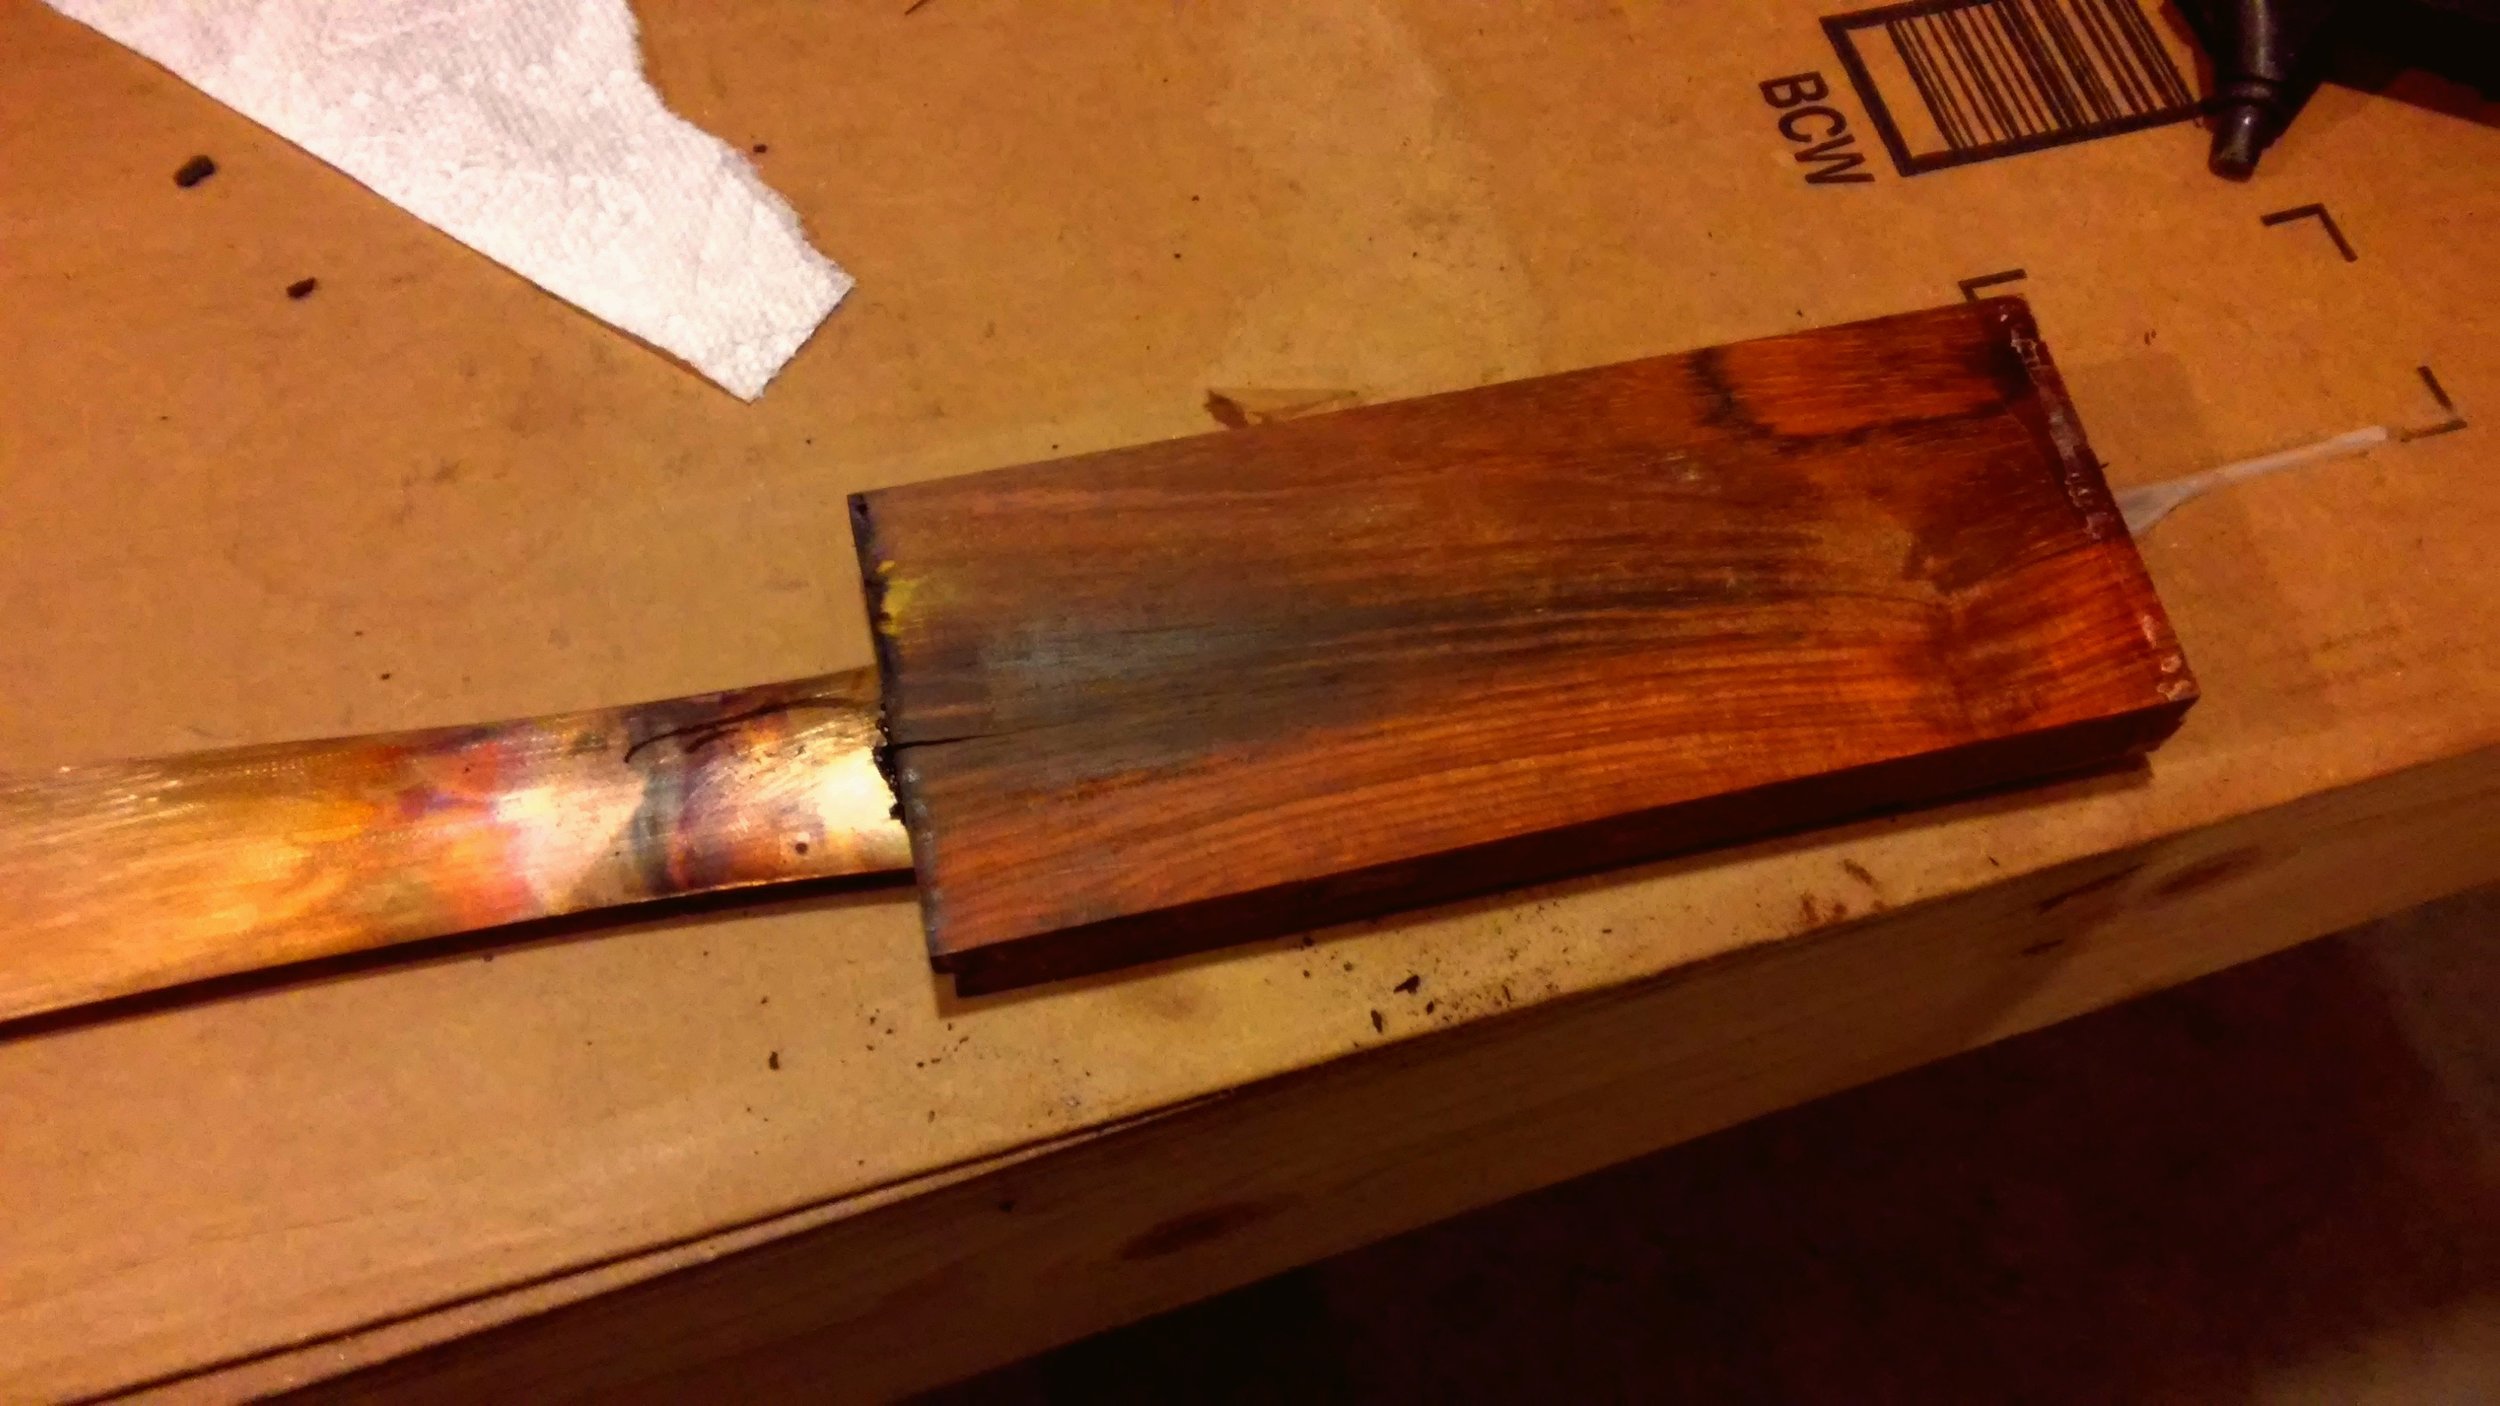
Heat forming (burning) the blade tang into the handle scales
HEAT FORM THE HANDLE
Get that handle SCREAMING hot with a blowtorch and then clamp it between your two bookmatched handle scales. Something to be wary of: maybe it is the resin, more likely it is the wood gasification creating a lubricious boundary layer. Either way, just be aware that curved surface is going to make that glowing hot sword try to squirt out from between the handle scales and come at you. Don't let it. Also cut your scales large. This may take one or two tries and a friend to help is very useful. The point, in case it wasn't obvious, is to burn the sword into the scales so you get a perfect fit.
Formed scales straight out of the vice

Formed scales, fresh pulled off the tang
DRILL FOR PINS
So you now have a perfect form of your sword in wood. I used some squeeze clamps to hold one scale on the tang and drilled from the sword side. Now comes a key point, clamp BOTH scales on, and drill through the existing holes in the far scale to the other side. Why? Because unless everything is perfectly flat and square, which it never is, your pin holes will only line up correctly if through-drilled in one perfect shot.
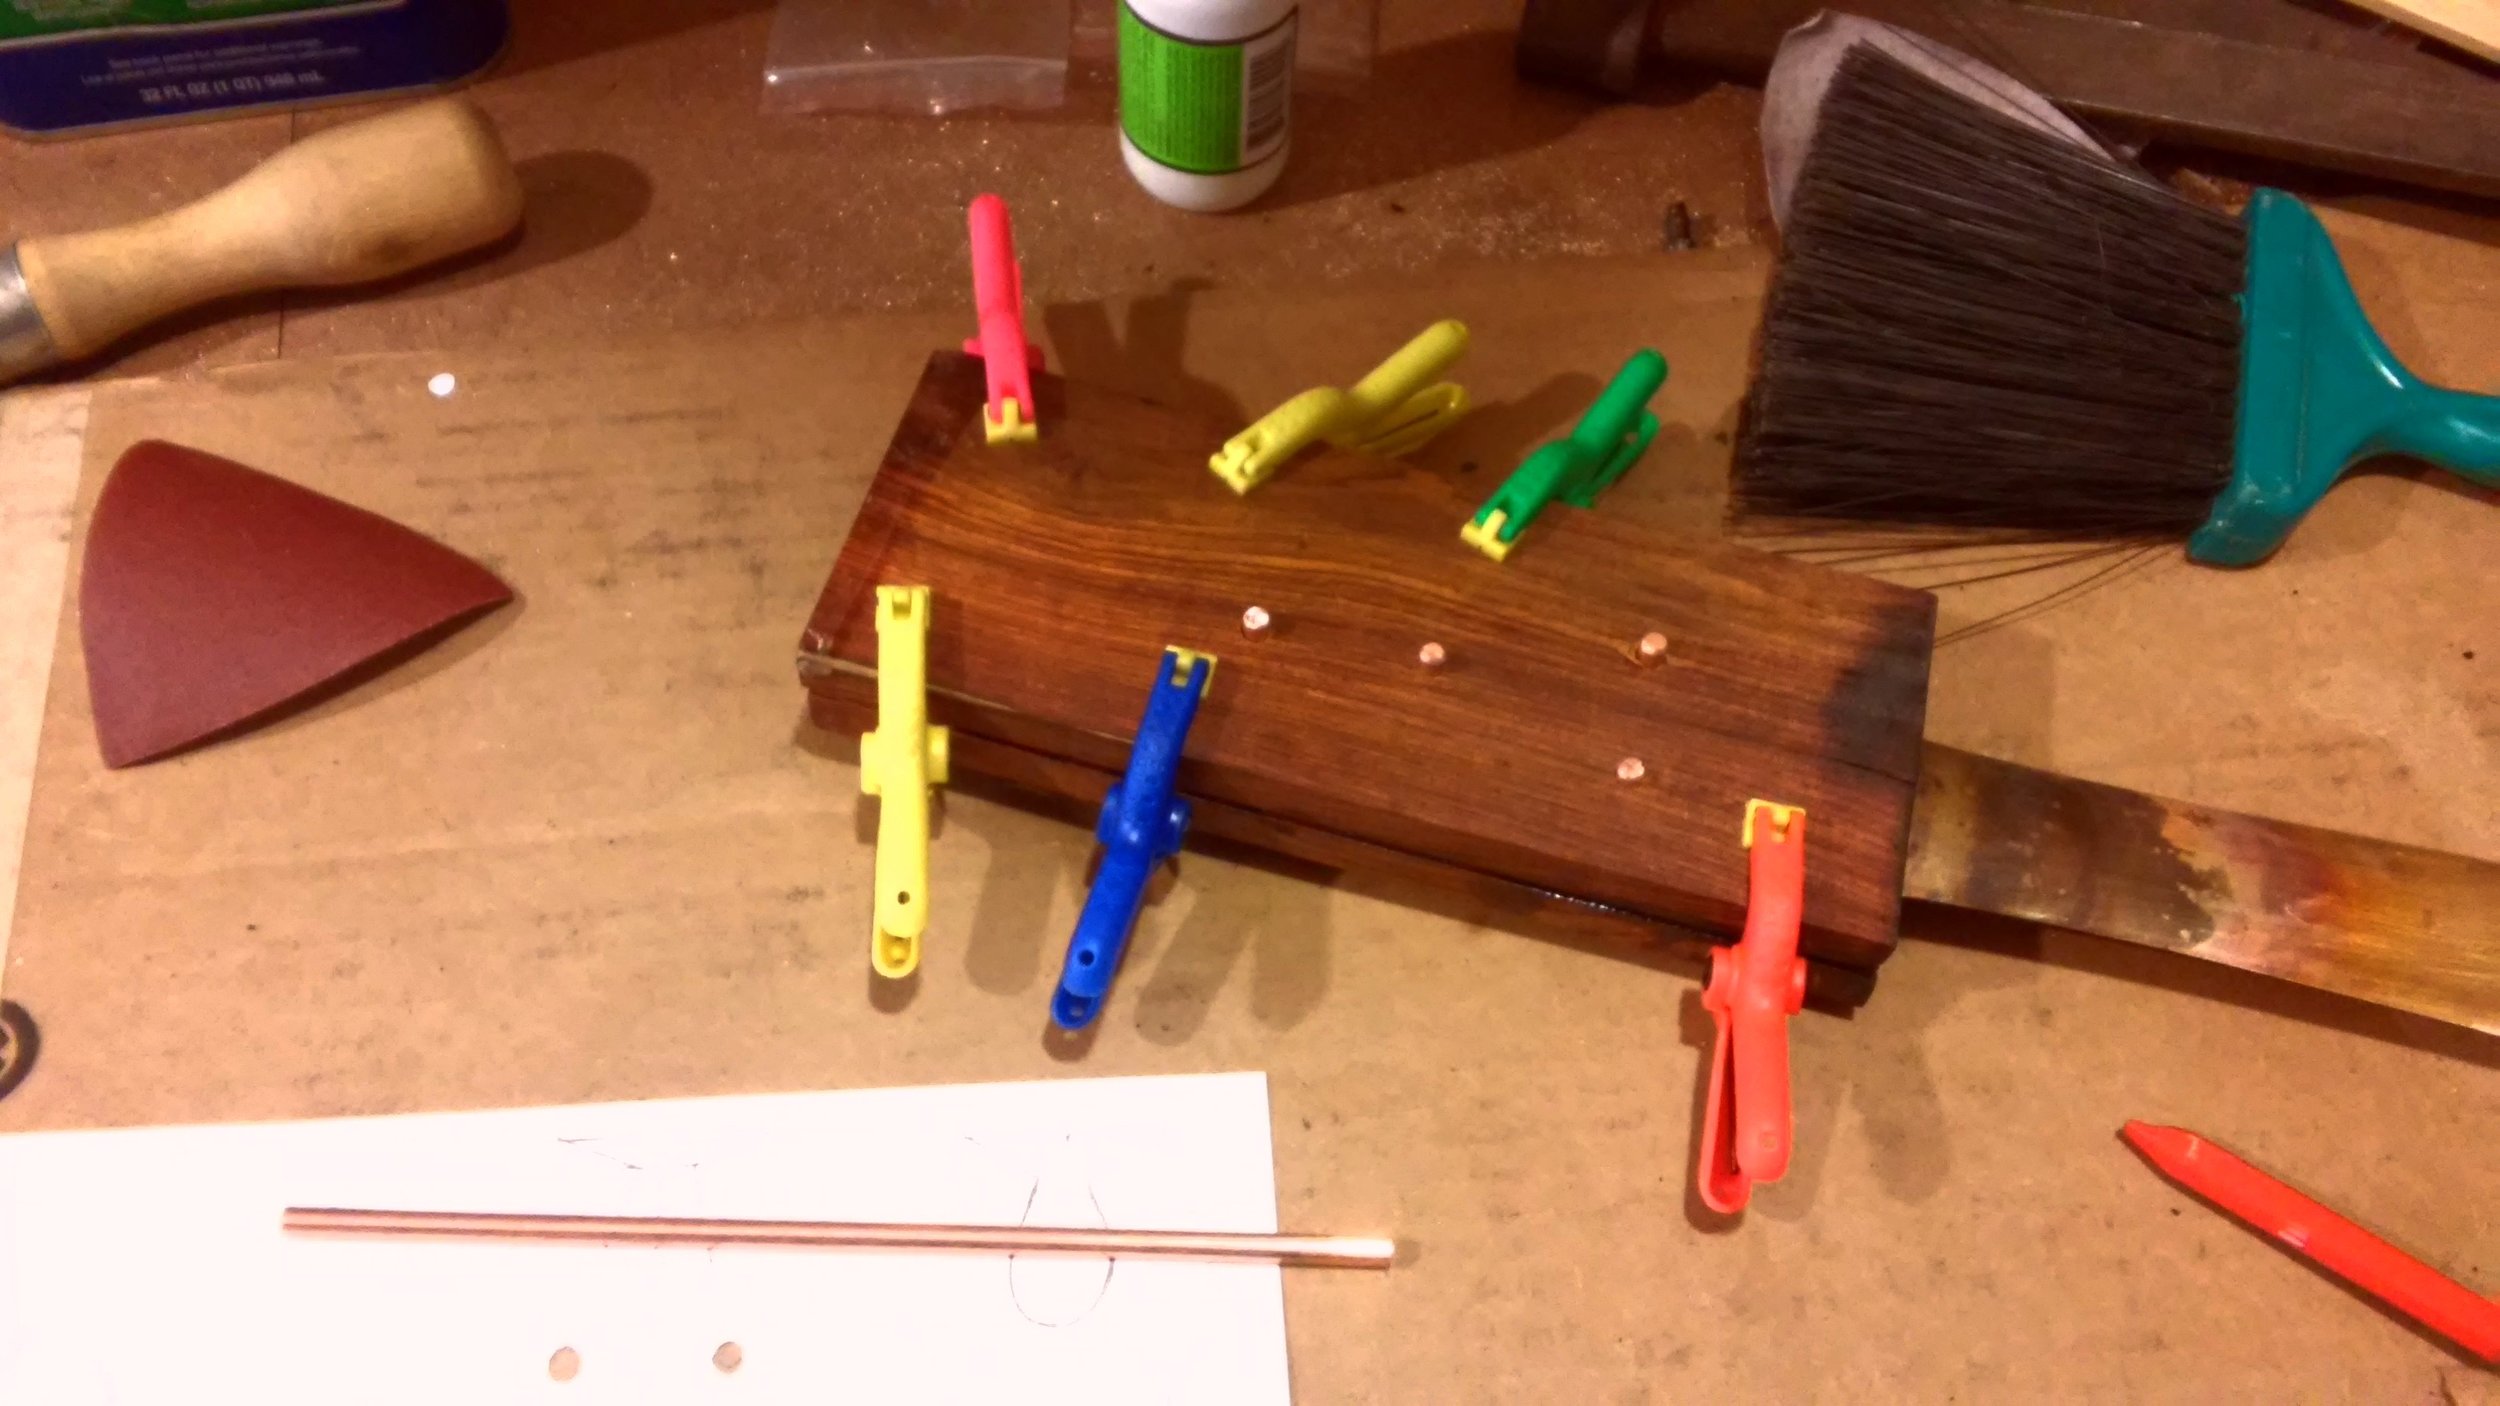
Drilled with pins installed

Attaching the form
ATTACH LAID OUT DESIGN
Some people use a transfer process to scribe their form onto the dominant scale. I'm lazy, so I just attach it. I misplaced my contact cement but, figuring I'd finish the handle in tung oil anyway, used a little tung oil to hold it on.

Roughing out the handle scales on the jigsaw
ROUGH OUT DESIGN
Tight corners in here means a bandsaw is no es bueno, so scroll saw it is. Lacking that, a coping saw would work just dandy. In case it wasn't obvious, this is why your pin holes not being ovaled out and lining up properly is so critical. You can't cut internal flourishes or do a lot of the sanding with the sword in the middle, so everything needs to fit tight on just the pins with no blade. Be sure to leave plenty of margin in the areas where you're going to want to be flush with the blade. Why? Because, again, nothing is perfect, perfectly square, flat, accidents happen, etc. We'll fit the perimeter perfectly later, we're just removing bulk material. That naughty sensual little teardrop in the middle though, because it will be filled with sword, needs to be finished now as part of the ricasso.

Prettying up the ricasso area

Working on the teardrop and ricasso area on the belt grinder
FINISH THE RICASSO
Went in here with the belt grinder to pretty some of it up. Again, if you didn't have the two scales pinned together, you wouldn't be able to get these blind parts symmetrical. Not shown, I also wrapped some sandpaper on a broken arrow shaft, chucked it in the lathe, and used that to round out and smooth the teardrop.

Handles ready to attach, sword blade.... not so much
FINISH THE BLADE
The discoloration and residue from the handle attachment process should have made it pretty obvious why I didn't go above 320 grit finishing the blade before. Now though the blade must be finished before the handle goes on, otherwise there will be no way to get into that naughty naughty teardrop and polish things up. Here we can see the scales, ready to attach, and the blade at 320 grit. I went up to 1200 grit and then 00 and 0000 steel wool to achieve the final finish.

Final finish on the blade. 1K grit plus 0000 steel wool

You simply can never have enough clamps. Also tape up your blade, unless you like scratches, scrapes, and dings
ATTACH THE HANDLE SCALES
There are a couple things going on here. Surface prep, as always, is critical. A quick finish sand to the blade tang and a wipe down of all applicable surfaces with denatured alcohol is critical. You want to remove any oils, dirt, debris, or oxide layers prior to attempting a bond. Second, now that I've beautifully polished the blade, I put it in blue painters tape jail to keep it pretty while I work on the handle and scabbard. As far as actually bonding the scales on, start with your pins in place. Because I like to live on the edge, I used a high viscosity construction grade cyanoacrylate adhesive, as I wanted both chemical and mechanical bonding. A more typical epoxy would have been less risky and stressful while probably providing adequate results as well. Clamp everything thoroughly, and wait twice as long as the manufacturer recommends for full joint strength. With this adhesive I'd discovered a bond can be formed instantly, but the bond continues building in strength for at least a week. Given that atmospheric H20 is the catalyst, and this is a fairly large surface area, I expect this will take quite some time to achieve truly peak strength. Thankfully, 24 hours should be adequate although I expect I won't get back to it for longer than that.
And that is it for now. Next time we'll be shaping and finishing the handles, and thus the sword. A sheath/scabbard will be on the menu as well.