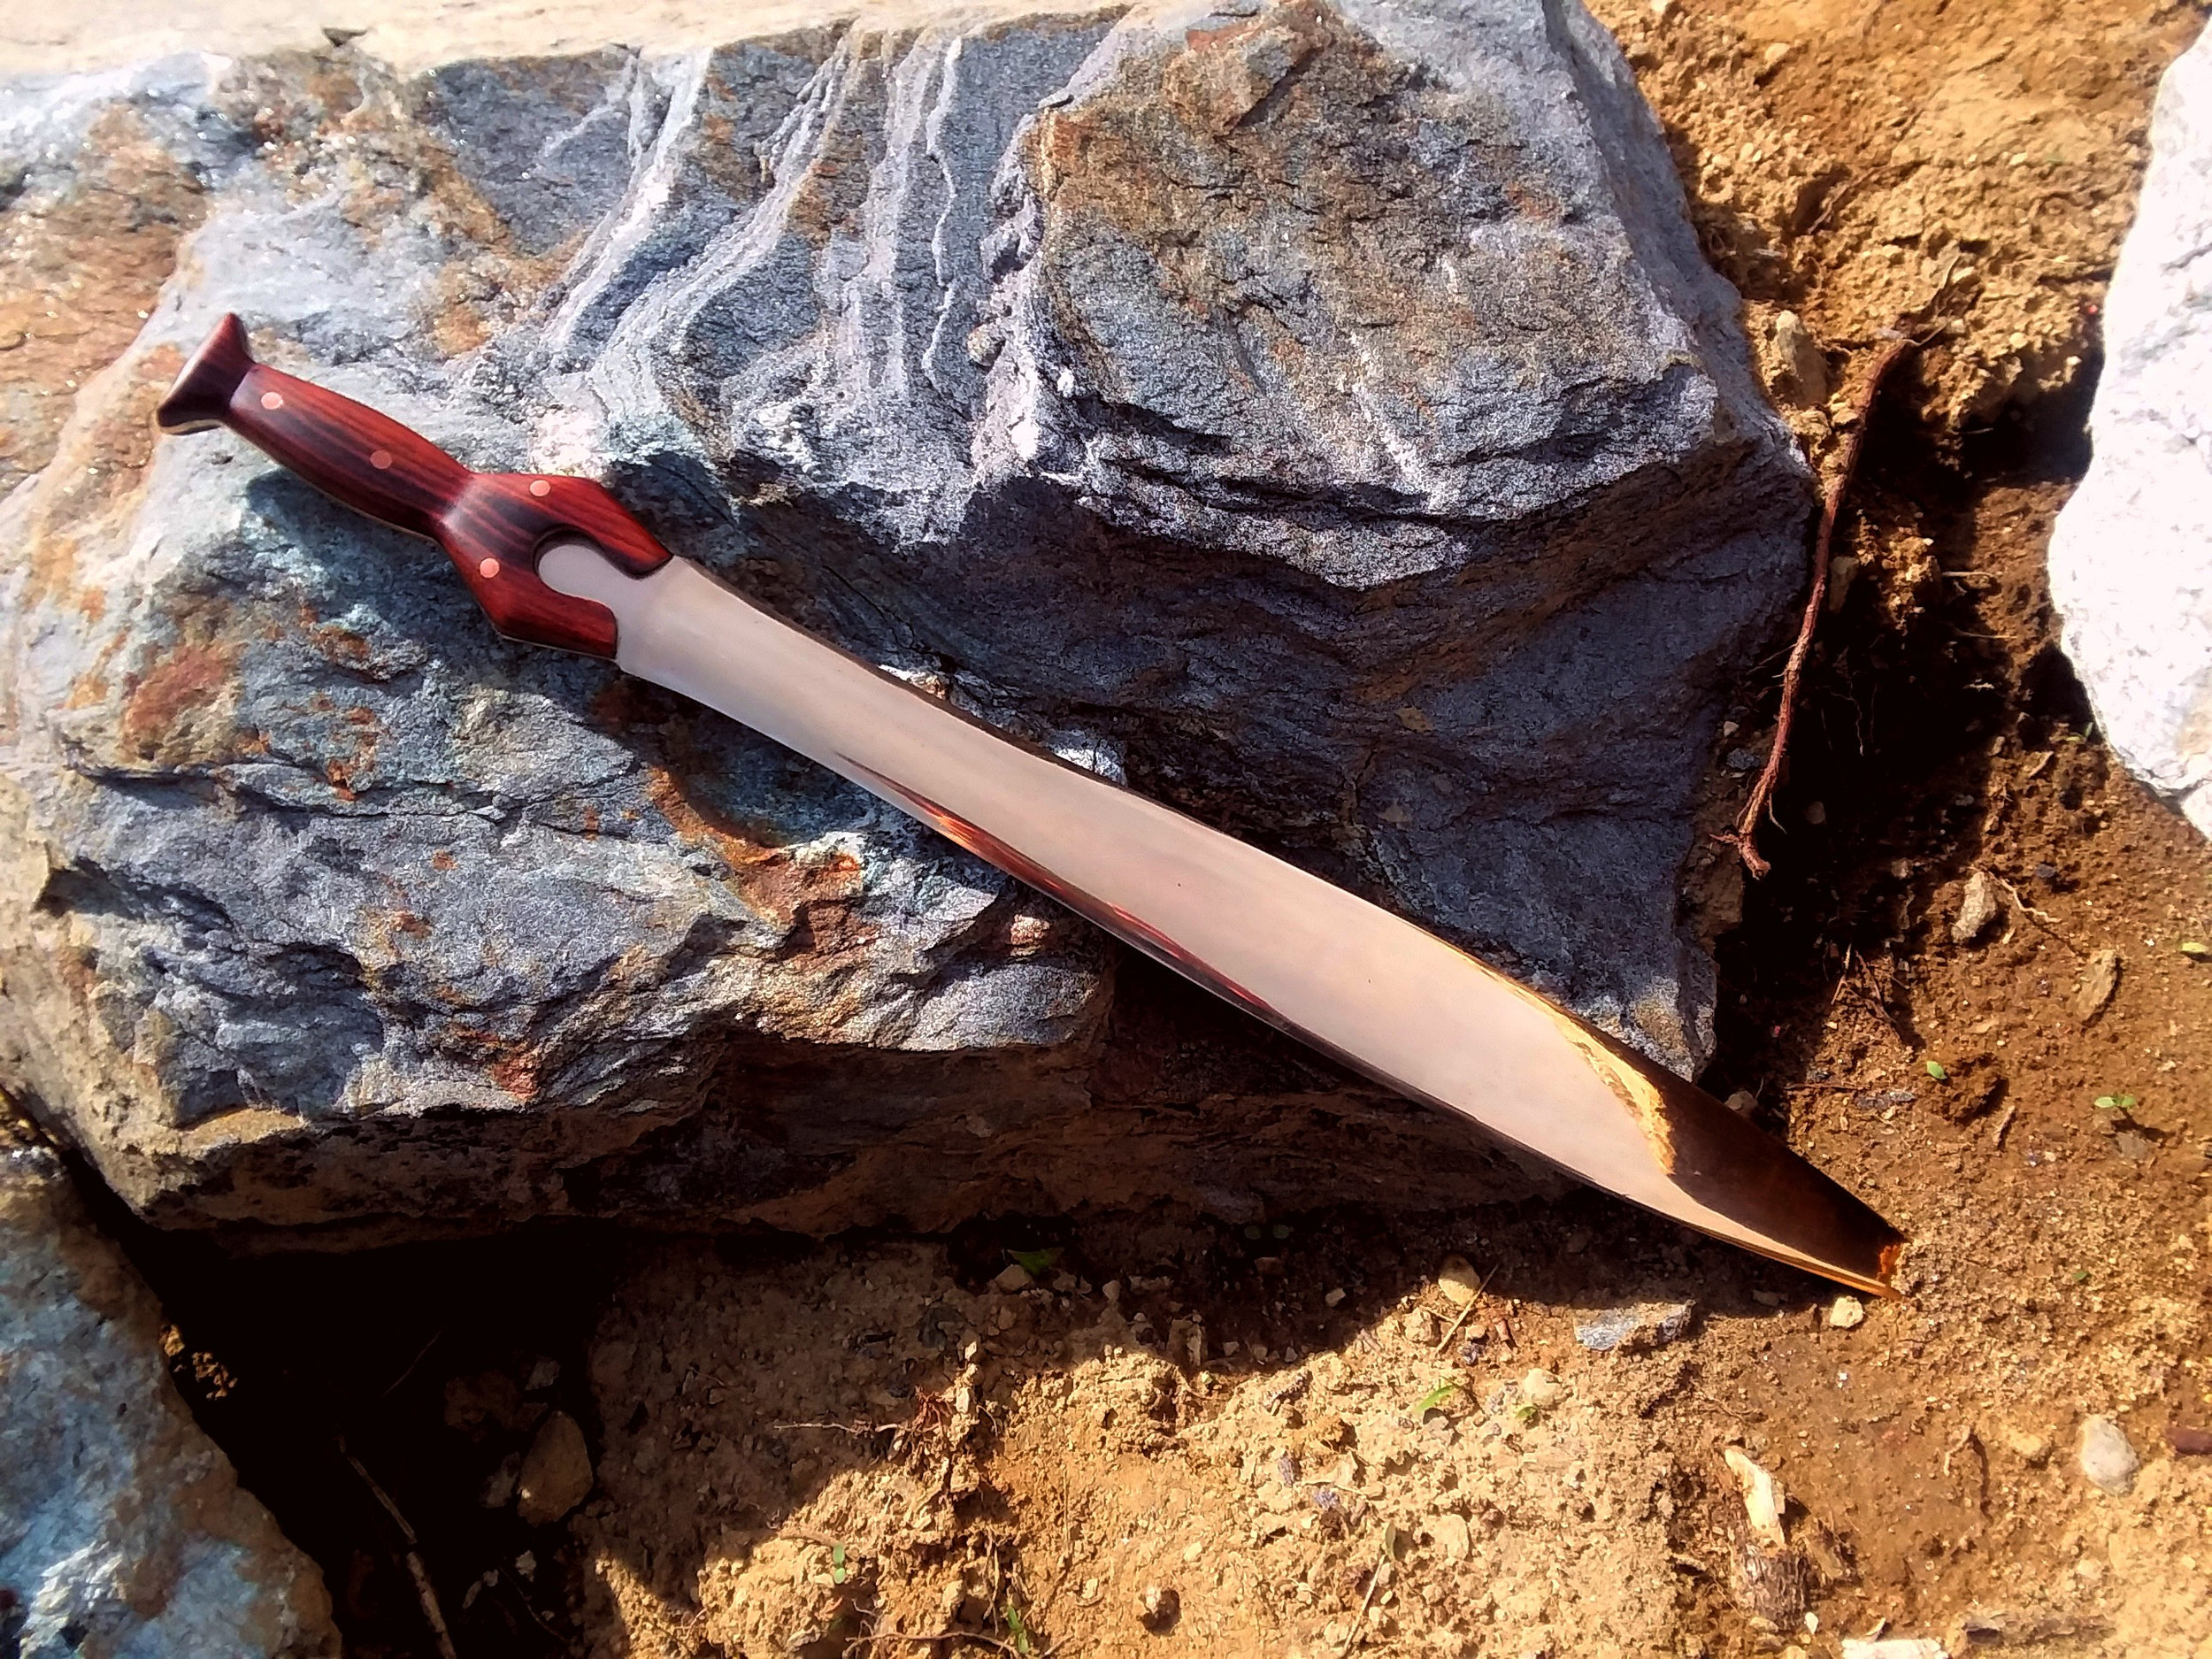
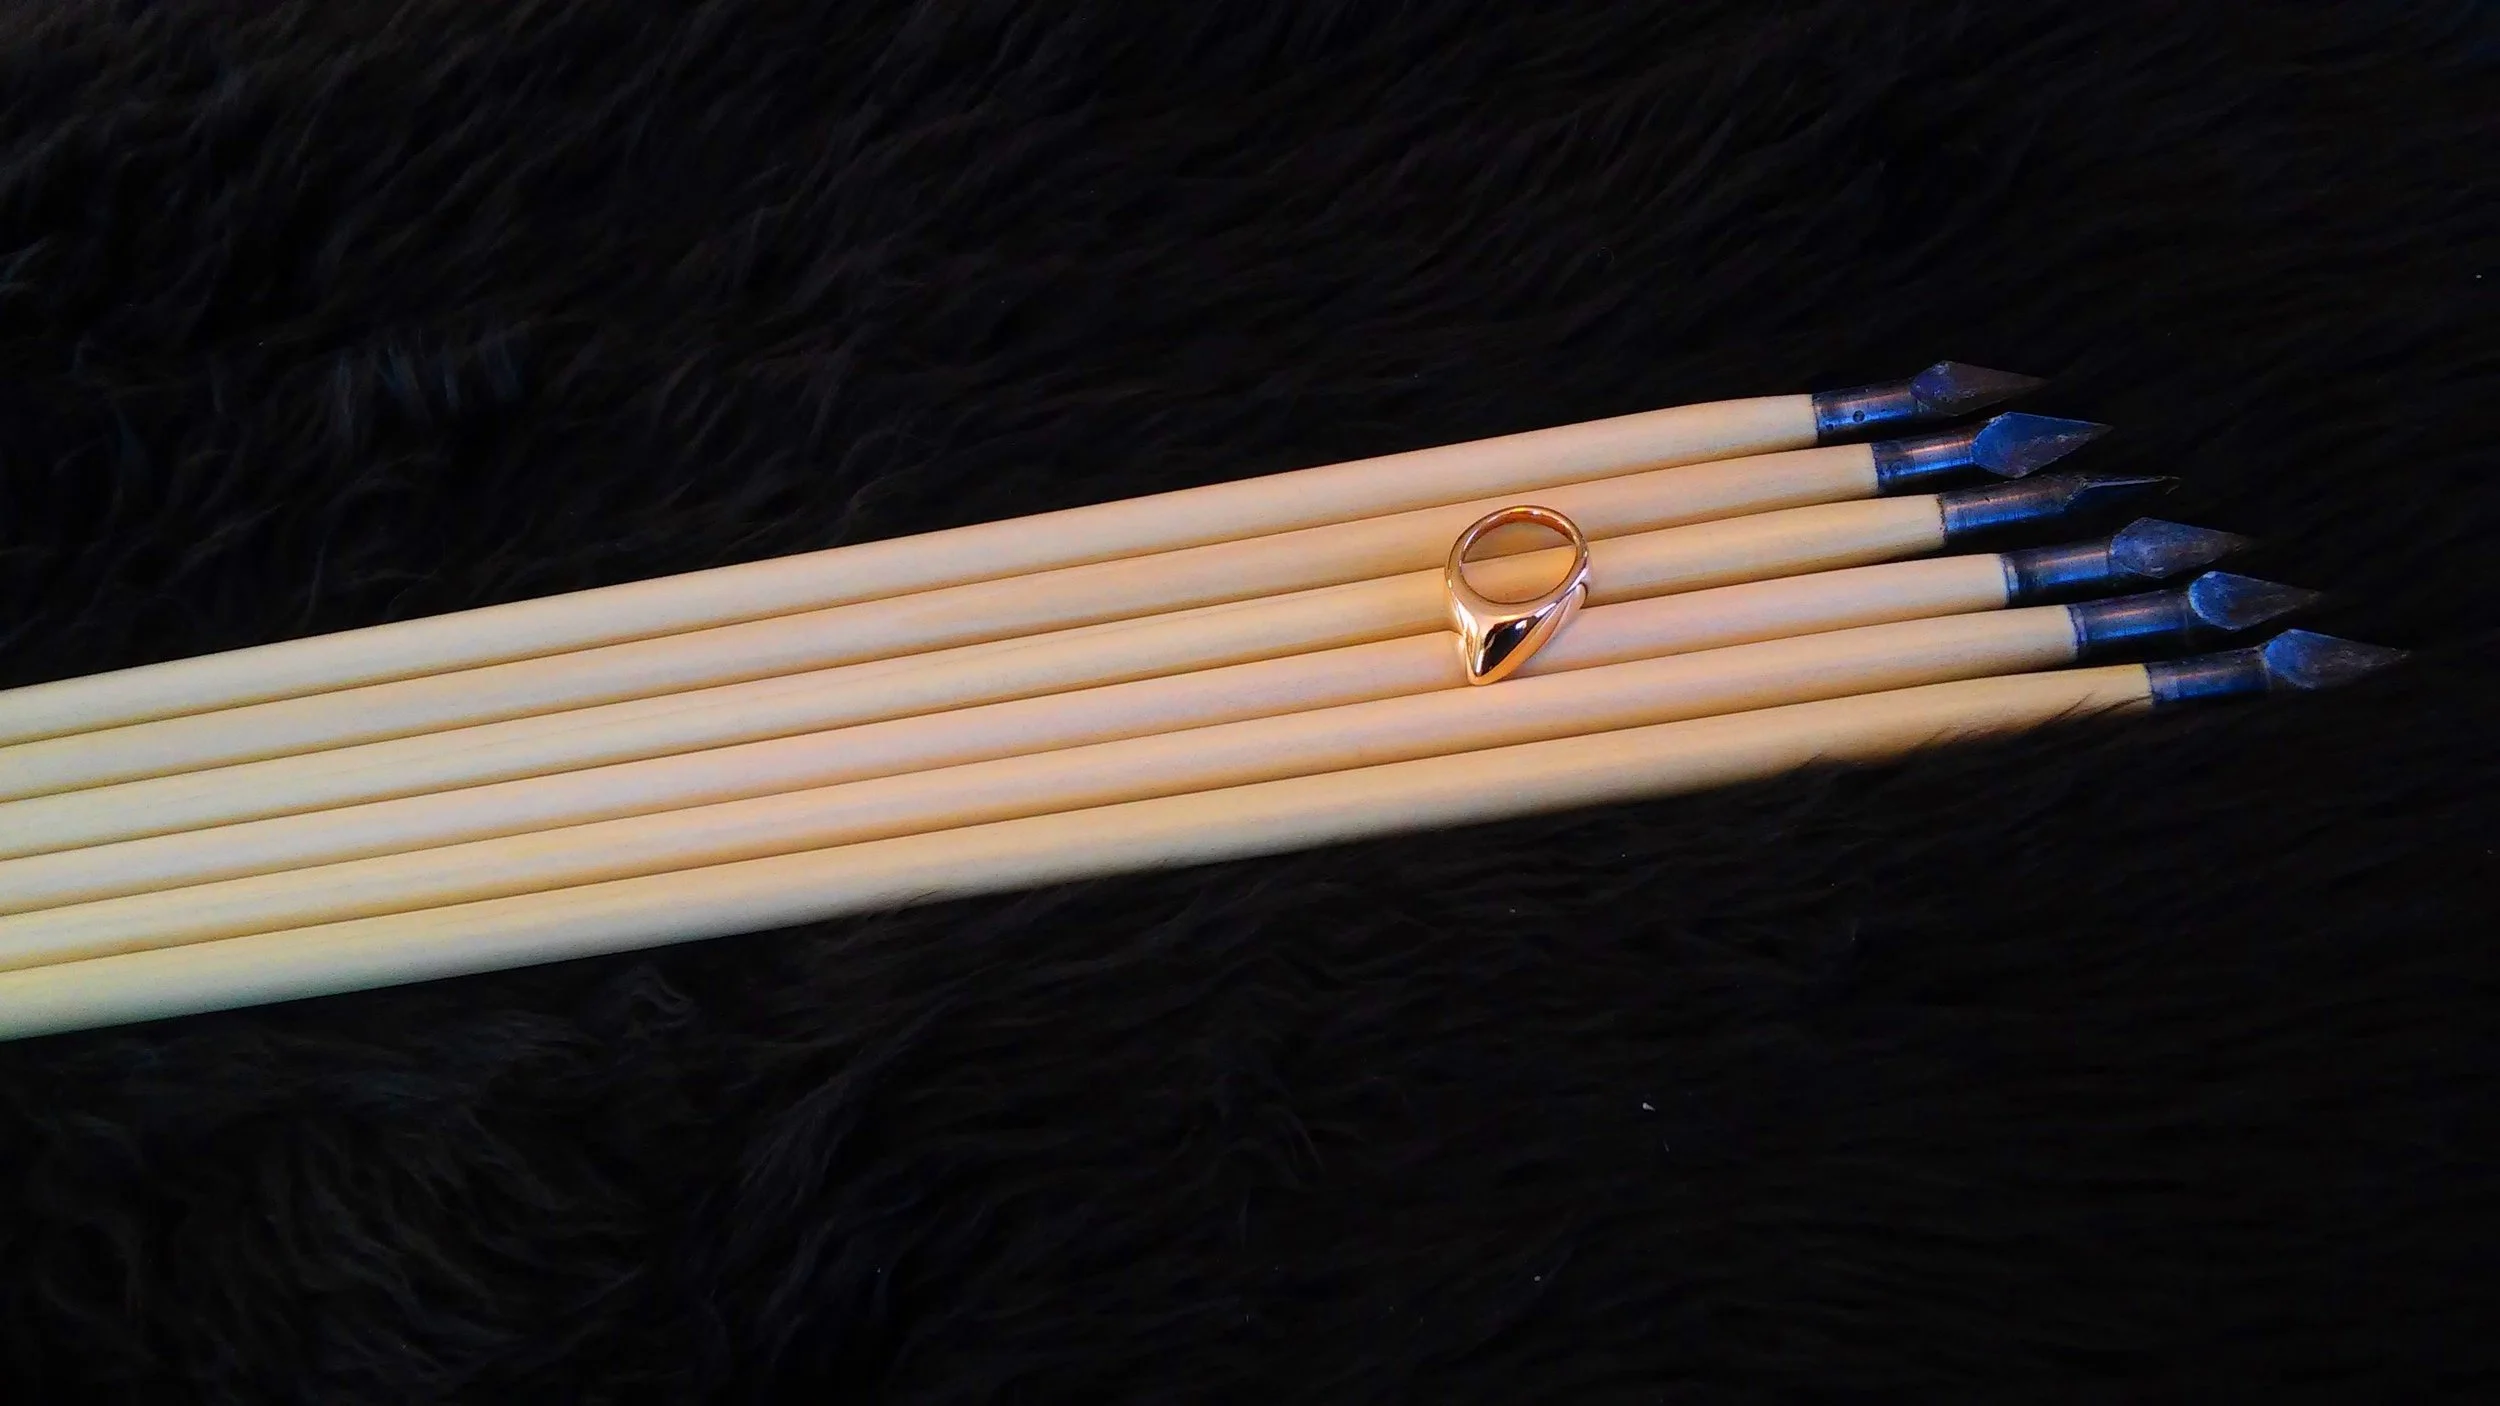
Contact Us


We offer historical Asiatic archery products, including fitted thumb rings customized to the individual archer. We also offer a variety of accessories, tools, and exotic replicas. 

10 - rX5mR4JEDITED.jpg

Blog

Stay abreast of the latest sales, discounts, news, product releases, projects, and guides here on our blog. 

Bow Performance Project - AF Turkish Chrono Data

Silent Thunder Ordnance

AF Archery Turkish bow shown with our Hybrid ring in sterling silver

AF Archery Turkish bow shown with our Hybrid ring in sterling silver

The last complete project analysis prior to this post, force-draw curves et al., can be found HERE. It contains the complete breakdown of bow poundage, how much energy is being stored, and how efficiently the bows store energy. This though, this is where the rubber meets the road: how effectively can these bows convert that stored energy into kinetic energy? 

AF Archery has been landing a lot of winners in terms of physical beauty, efficiency, and smoothness of draw. The Saluki style isn't without its drawbacks, namely being somewhat less durable, but my god are they seductive.... particularly this example hand-painted, bamboo laminations under clear glass, ivory colored discs inlaid at the arrow pass, and a silky smooth draw. (remember, in terms of percentage of total poundage gained in the last two inches of draw, this bow is the lowest we have tested at just 10%). I was typing "it is easier for lower poundage bows to pull off this trick, and this bow is comparatively low poundage being a mere....." before noticing it is 60#s at 31". I guess it isn't actually low poundage, it is just smooth enough to feel like it. Whoops. Anyway, enough salivating, how did it do? Remember, this bow has the second highest energy storage per pound of any we've yet tested. Sadly, not a knockout, only managing 67.5% efficiency, with fairly low deviation. If I were to guess why, I'd point to the fact that the siyahs are both thicker and deeper than the Tatar's, while being about the same

length. The laminated on tip protectors are larger too. To that point, the bow itself is shorter than the Tatar, while having the same mass. This doesn't make the bow awful, far from it, even knowing all this I'd buy it again without a second's hesitation and 200fps is far from slow, but it does sadly mean not all AF bows are absolute monsters. I guess things had to come back to earth eventually? It is also possible, being the newest of my AF bows, that they had been experiencing failures from running too close to the edge and this bow was beefed up to address that. 

Stay tuned, next week we have the Gukgungwon up on the chrono. This, tied with my Hwarang, is my favorite bow. Qualitatively, it is a real screamer. It may well be the fastest bow we've ever tested. 

Chrono data

New Ring Color - Ivory

Silent Thunder Ordnance

Our Ottoman ring in Ivory

Our Ottoman ring in Ivory

We're pleased to add another color to the lineup: ivory. Obviously no, not real elephant ivory. We  struggled with what to call this material. Perhaps it could best be described as an odd love child taking an ethereal almost pearlessence of silk, hints of jade's translucency, and the beautiful creamy-white hues of young ivory. We did up samples and showed them to people, asking them what they'd call it. The unanimous response was ivory, and we agree. These make for truly striking and exotic rings, in a way that almost defies description. 

Our Chinese Spur ring modeling all four standard polymer colors, from left to right: Black, Silver Gray, Nocturnal Blue, Ivory

Our Chinese Spur ring modeling all four standard polymer colors, from left to right: Black, Silver Gray, Nocturnal Blue, Ivory

Bow Performance Project - KTB Kingdom Chrono data

Silent Thunder Ordnance

KTB Kingdom shown here with our Byzantine ring in bronze 

KTB Kingdom shown here with our Byzantine ring in bronze 

The last complete project analysis prior to this post, force-draw curves et al., can be found HERE. It contains the complete breakdown of bow poundage, how much energy is being stored, and how efficiently the bows store energy. This though, this is where the rubber meets the road: how effectively can these bows convert that stored energy into kinetic energy? 

We've already given the KTB Kingdom a brief overview/review highlighting it's strong points (short length, modest price, durability), and weak points (severe stacking, too small a grip). How does it perform though? Well, about average. This is, by .35 grains per pound, the lowest GPP bow we've collected data on so far. And it managed a reasonable 70% efficiency. The Kaya, with a 1.5gpp advantage, squeezed out an extra almost 6% efficiency. Look at what that translates to in terms of velocity though, the Kaya is 11 pounds lighter draw and is, on average, 1.6fps slower. Look at the deviation though on the KTB Kingdom. Shooting through a chrono with a fickle Korean bow on a small grip is hard, don't let anyone tell you otherwise. I think the quality of shooting suffered with this bow, because of that difficulty, suffered. The result is a larger deviation and what may be an under-representation of performance. And, remember, that poundage really starts to spike up around full draw so plus or minus half an inch will make a big difference. My takeaway? This data shows this bow under-performing slightly, especially watching the two send arrows down range side by side, however I don't feel it is particularly unfair. I would strongly encourage the manufacturer of these bows to use thinner covers over the arrow-pass, and a beefy robust grip more typical of the Korean style.

Up next week, the absolutely stunning AF Turkish is up on the chrono. Will it live up to it's looks and the brand's reputation thus far for fearsome speed and efficiency? 

Chrono data 

Bow Performance Project 5.8.17

Silent Thunder Ordnance

The latest bow, sold under the brand Gukgungwon, seen at back. A similar Hwarang seen at front. And below them two of our rings in stainless steel, the left in a grey finish the right in a bronze finish. 

Another update in our ongoing series to quantify the performance of bows, and maybe offering a little commentary. While the series initially started on our Facebook Page, the first installment on our blog which covers the introduction and a couple bows can be found HERE. We also added one additional metric this round: bow mass, measured in Kilograms because it is the appropriate unit. Why bow draw forces are typically measured in lb-f rather than Kg-f I don't know, but the convention will be observed. What is the point of this? Well, generally speaking, reducing the moving mass (limb mass) of a bow while maintaining draw force will increase performance. So, while this necessarily also does include the entire bow mass including string, hopefully it'll provide some insight into why certain bows may perform well while others are more marginal for no externally visible reason. 

Our latest stablemate is an absolutely beautiful Korean bow sold under the brand "Gukgungwon." The bow comes with multiple strings, including a knotted and un-served "traditional" style string. The grip is very aggressively textured, bordering on too much, but not quite. It provides excellent traction in controlling what are very demanding bows. This stands in contrast to the Nomad, which has a grip too smooth and too thin, making grip-slip a major problem in controlling the bow. The finish appears very similar to the Hwarang and is stunningly beautiful with real birch bark, thick looking limbs with a curved belly looking very much like horn. What is more notable might be the differences. Wrapping on the Hwarang is brown, and borders the grip and siyahs. On the Gukgungwon, the wrapping is red and only at the tips, while the leather, rather than being a pad, wraps all the way around above and below the grip. Stickers also are just below the tips, not present on the Hwarang. In physical profile, the bows are very similar, more similar than any two other of the Korean bows reviewed here, however they aren't identical. Poundage is written on a small heart shaped sticker below the grip, and is a simple "65." This, and my Hwarang, are easily my favorite two bows. Don't ask me to pick one though. ;) 

In drawing the bow is very smooth, far smoother draw than the data would suggest. The Nomad, when it starts stacking, feels like you've hit a wall and is a distinct struggle to pull to the full 31" as a result. This though, while poundage reads higher, feels significantly lighter. I was shocked when it topped out over 70 pounds, it easily feels like a lot less. Not as smooth as the AF Tatar, but feels just as fast and is a LOT quieter. Again, maybe it is that new bow smell, but when I go to shoot I seem to always be reaching for this. It is worth noting that, for practical shooting purposes, this bow seems to be as fast as the AF Tatar, only slower than Hwarang. Only time will tell if it holds up, although it has gotten a fair bit of shooting in a short period of time, unsurprisingly. 

Chrono data is forthcoming, stay tuned to the blog. Getting good clean chrono numbers is surprisingly difficult, as anyone who has tried it should know well, but we're working on it. 

Kukal - Product Introduction

Silent Thunder Ordnance

Our Ottoman ring with a Kulak

Our Ottoman ring with a Kulak

Kulak is a Turkish word for the small leather tab often inserted between the pad of the thumb, ring aperture, and bow string. It can be used to adjust fit, and increases comfort. Our Kulak is laser cut for precise consistent sizes on it's complex shape. While it obviously pairs well with our Ottoman ring, it can also be a great addition to any of our other rings, the Manchu excluded. We offer them in three sizes: small, medium, and large. Which size you want depends in part on how large your thumb is, but also how loose your ring is as larger ones take up more space making for a snugger fit. 

Our three sizes of Kulak. (.45ACP for scale) 

Our three sizes of Kulak. (.45ACP for scale) 

Installation is as simple as aligning the pad inside the ring, gluing it in place, and trimming any excess with a sharp knife. We recommend a quality cyanoacrylate adhesive. The taper around the waist of our Kulak design allows for minor adjustment of fit to be achieved, having more or less leather incorporated into the ring's aperture. They are made from a soft leather approximately 1.5 millimeters thick. 

Bronze Sword Project (part 3)

Silent Thunder Ordnance

Bronze sword complete, seen here with one of our Hybrid rings in sterling silver balanced on top. 

Bronze sword complete, seen here with one of our Hybrid rings in sterling silver balanced on top. 

It has been quite a process, but we're finally here at a finished sword. Shiny eh? Still needs a scabbard, but that'll be a project unto itself.  As you may recall, we left the action with the handle scales being bonded in place. We pick up with our intrepid heroes >24 hours later, now that the glue has dried. 

Handle scales immediately after gluing

Handle scales immediately after gluing

CHECK SCALE AND PIN ADHESION
Before proceeding, if something didn't hold, you want to find out now. So give everything a good double check. Once you have profiled everything, if you lose a scale, it is too late and you'll have to either start over or remove a surprising amount of material from the tang to get them to align again. 

Profiled handle, straight off the belt grinder

Profiled handle, straight off the belt grinder

PROFILE THE HANDLE
First step of forming any three dimensional shape by hand via a subtractive technology is sizing things up in two dimensions. So we head to the belt grinder to profile things. This is one of those titanic moments when the handle really starts to take shape, and you also get to see how close the handle fitting came out. 

Rounding out the edges with rasp and file 

Rounding out the edges with rasp and file 

ROUGH OUT THE SHAPE
From here, with rasp and files, rough out the shape. Power tools generally do this too quickly, and coarse sandpaper or similar tends to remove wood faster than metal leaving the pins and tang proud. The result? This must be done with something rigid like a file to the final shape and fairly high finish. 

Filling a few little gaps between the scales with glue

Filling a few little gaps between the scales with glue

FIX ANY GAPS
Technically I could/should have done this as part of the profiling process. No big deal doing it now though. A little dab of glue here and there to firm up the softer charred wood at the edges and to fill some small gaps where the burning-in didn't go perfectly. 

Cleaned up the glue seepage

Cleaned up the glue seepage

CLEAN UP EXCESS GLUE
Before we get to finish sanding, cleaning up any glue seepage, particularly around the ricasso, is important. I did it with some acetone, q-tips, scrap wood carved into toothpicks, and some 0000 steel wool. 

Interminable sanding

Interminable sanding

INTERMINABLE SANDING
Sanding is both the most annoying and rewarding part of any project. It takes ages and is incredibly fickle, however it is also the rewarding moment where, if you're skilled and a little lucky, beauty gets to spring free from your work. 

Sanding complete at a 1000 grit. Ready to wipe on some finish. 

Sanding complete at a 1000 grit. Ready to wipe on some finish. 

CLEAN AND PREP
I finished sanding at 1000 grit. I tried some 0000 steel wool, however the sandpaper must have been wearing/loading as it produced a higher finish than the steel wool so I just left it. A good wipe down and blast with compressed air and we're ready for finish.

First coat of Formby's Tung Oil

First coat of Formby's Tung Oil

FINISHING, ONE COAT AT A TIME
This is immediately after the first coat of Formby's Tung Oil. (technically a tung oil varnish blend) Still works reasonably well at preserving and enhancing the natural beauty of the wood, rather than turning it to plastique. I will say, I am disappointed in how this handle came out. Cocobolo usually is richer and more beautiful than this. It also is typically quite a bit more red in color. What happened? Well the block from which I carved it still appears quite orange/red. Were I to finish that, I expect it would come out more like other cocobolo. My guess is the fire forming of the handle drove some of the beautiful resin and color out of it. Live and learn I suppose? It is still beautiful. shades of orange and purple which will only pop more with additional coats, however it isn't quite as stunning as I had hoped. 

04 - ysiiB7XEDITED.jpg

UNMASKING AND FINISHING TOUCHES
The final touches. I removed the masking from the blade, sharpened it, polished it, and with a grimace wiped a coating of wax on it to protect that lustre. It reduces that beautiful mirror shine somewhat, but in the long run it'll keep the blade looking prettier. Perhaps I'll hazard a buffing at some point, but don't want to buff through the protection. 

24 - Aj6hSuBEDITED.jpg

Bronze Sword Project (part 2)

Silent Thunder Ordnance

Showing off the bronze blade's polish

Showing off the bronze blade's polish

PART 2: THE HANDLE
Shown above is the blade with what I hope will be the final polish. Why we didn't get here in the previous episode will become obvious shortly. 

Laying out the sword tang and desired handle shape

Laying out the sword tang and desired handle shape

LAY OUT THE HANDLE
First step of pretty much anything worth doing is planning. You saw the above image in part 1. I started by tracing the blade onto a sheet of paper. Because I screw things up, I traced it four times with the expectation it'd take me a couple tries to get it right. The first was just a freehand sketch, how do I want it to look. Next up I grabbed a few light drafting tools and laid everything out with precision. Turns out I didn't need the extra two tracings. Oh well. For the handle I decided to go with my favorite exotic: cocobolo. If you've never worked with cocobolo before, you've been missing out. The wood is beautiful, resin rich, and always a surprise once you start to work it. The colors just pop so beautifully, and you never know what you'll get. To this date the most beautiful piece of wood I've ever seen or worked was cocobolo, all purples, reds, and stirred honey gold. I have never found another piece of similar quality since, despite being on the hunt for the last two decades. But I digress. Copper pins to secure the handle in 3/16". 

Heat forming (burning) the blade tang into the handle scales

Heat forming (burning) the blade tang into the handle scales

HEAT FORM THE HANDLE
Get that handle SCREAMING hot with a blowtorch and then clamp it between your two bookmatched handle scales. Something to be wary of: maybe it is the resin, more likely it is the wood gasification creating a lubricious boundary layer. Either way, just be aware that curved surface is going to make that glowing hot sword try to squirt out from between the handle scales and come at you. Don't let it. Also cut your scales large. This may take one or two tries and a friend to help is very useful. The point, in case it wasn't obvious, is to burn the sword into the scales so you get a perfect fit.

Formed scales straight out of the vice

Formed scales straight out of the vice

Formed scales, fresh pulled off the tang

Formed scales, fresh pulled off the tang

DRILL FOR PINS
So you now have a perfect form of your sword in wood. I used some squeeze clamps to hold one scale on the tang and drilled from the sword side. Now comes a key point, clamp BOTH scales on, and drill through the existing holes in the far scale to the other side. Why? Because unless everything is perfectly flat and square, which it never is, your pin holes will only line up correctly if through-drilled in one perfect shot. 

Drilled with pins installed

Drilled with pins installed

Attaching the form

Attaching the form

ATTACH LAID OUT DESIGN
Some people use a transfer process to scribe their form onto the dominant scale. I'm lazy, so I just attach it. I misplaced my contact cement but, figuring I'd finish the handle in tung oil anyway, used a little tung oil to hold it on. 

Roughing out the handle scales on the jigsaw 

Roughing out the handle scales on the jigsaw 

ROUGH OUT DESIGN
Tight corners in here means a bandsaw is no es bueno, so scroll saw it is. Lacking that, a coping saw would work just dandy. In case it wasn't obvious, this is why your pin holes not being ovaled out and lining up properly is so critical. You can't cut internal flourishes or do a lot of the sanding with the sword in the middle, so everything needs to fit tight on just the pins with no blade. Be sure to leave plenty of margin in the areas where you're going to want to be flush with the blade. Why? Because, again, nothing is perfect, perfectly square, flat, accidents happen, etc. We'll fit the perimeter perfectly later, we're just removing bulk material. That naughty sensual little teardrop in the middle though, because it will be filled with sword, needs to be finished now as part of the ricasso. 

Prettying up the ricasso area 

Prettying up the ricasso area 

Working on the teardrop and ricasso area on the belt grinder 

Working on the teardrop and ricasso area on the belt grinder 

FINISH THE RICASSO
Went in here with the belt grinder to pretty some of it up. Again, if you didn't have the two scales pinned together, you wouldn't be able to get these blind parts symmetrical. Not shown, I also wrapped some sandpaper on a broken arrow shaft, chucked it in the lathe, and used that to round out and smooth the teardrop. 

Handles ready to attach, sword blade.... not so much

Handles ready to attach, sword blade.... not so much

FINISH THE BLADE
The discoloration and residue from the handle attachment process should have made it pretty obvious why I didn't go above 320 grit finishing the blade before. Now though the blade must be finished before the handle goes on, otherwise there will be no way to get into that naughty naughty teardrop and polish things up. Here we can see the scales, ready to attach, and the blade at 320 grit. I went up to 1200 grit and then 00 and 0000 steel wool to achieve the final finish.

Final finish on the blade. 1K grit plus 0000 steel wool 

Final finish on the blade. 1K grit plus 0000 steel wool 

You simply can never have enough clamps. Also tape up your blade, unless you like scratches, scrapes, and dings

You simply can never have enough clamps. Also tape up your blade, unless you like scratches, scrapes, and dings

ATTACH THE HANDLE SCALES
There are a couple things going on here. Surface prep, as always, is critical. A quick finish sand to the blade tang and a wipe down of all applicable surfaces with denatured alcohol is critical. You want to remove any oils, dirt, debris, or oxide layers prior to attempting a bond. Second, now that I've beautifully polished the blade, I put it in blue painters tape jail to keep it pretty while I work on the handle and scabbard. As far as actually bonding the scales on, start with your pins in place. Because I like to live on the edge, I used a high viscosity construction grade cyanoacrylate adhesive, as I wanted both chemical and mechanical bonding. A more typical epoxy would have been less risky and stressful while probably providing adequate results as well. Clamp everything thoroughly, and wait twice as long as the manufacturer recommends for full joint strength. With this adhesive I'd discovered a bond can be formed instantly, but the bond continues building in strength for at least a week. Given that atmospheric H20 is the catalyst, and this is a fairly large surface area, I expect this will take quite some time to achieve truly peak strength. Thankfully, 24 hours should be adequate although I expect I won't get back to it for longer than that.

And that is it for now. Next time we'll be shaping and finishing the handles, and thus the sword. A sheath/scabbard will be on the menu as well. 

Chinese Spur Ring - Product Introduction

Silent Thunder Ordnance

Our take on the exotic Chinese Spur Ring

Our take on the exotic Chinese Spur Ring

Allow us to introduce our latest product: the Chinese Spur Ring. Huge thanks to Mike Loades for his collaboration on this project, which allowed us develop to these unique rings. 

What is it and how does it work? Simply put, the spur on the ring presses against the arrow while it holds the string. While this arrangement sounds awkward and fiddly, it is actually quite natural. Everything simply falls into place. 

The purpose and effects of this spur are debated. Some have suggested that it is to counterbalance the pressure of the index finger against the arrow. Others have suggested it is to grip the arrow more firmly. Our experiments suggest that, while these other mechanisms may be true, it acts indirectly as a string stop. The arrow holds the string, the spur holds the arrow, and the ring is justified relative to the spur. As a result, the string's rearward travel is limited thus protecting the soft of the thumb without any sort of lip or groove. The result is that clean and snappy release familiar to anyone who has shot an Ottoman style ring, but with protection for the thumb. 


Manchu Arrow Project (part 2)

Silent Thunder Ordnance

Shafting with points and a single coat of tung oil. Byzantine thumb ring, in bronze, to show the truly massive scale. 

Shafting with points and a single coat of tung oil. Byzantine thumb ring, in bronze, to show the truly massive scale. 

Picking up from PART ONE of the Manchu Arrow Project, I find myself on a quest for good arrow points, preferably at a modest price and available without a protracted wait. Searching online, there are a few options which stood out to me:

Nomadic Arts Archery offers some beautiful looking points, but the lead time of two months was too much for the first round of this project which I wanted to get a move on. We may revisit these at a later date if we decide to do some dressy shafts which would justify such beautiful points. 

Fairbow Shop NL also offers some attractive looking points, even having Manchu target points available in the correct diameter. We did reach out to them, but they declined the request for a sample for publication in this blog. We may yet acquire a few of them, because they look like the exact item we've been searching for, but with an unspecified long lead time (presumably hand-crafted to order), you won't find them in this post. 

While not necessarily optimal for this project, I did also stumble across a gentleman named Neil Burridge. Aside from some mouthwatering bronze swords and spears, he has another item I've quested after for quite a long time: bronze arrow heads. At five pounds a pop, and the pound not being what it used to be, that is a screaming good deal. I reached out to him requesting a socket diameter, trying to determine their suitability for this or any project. I did make contact, but unfortunately at the time of writing he has not provided the necessary dimension. I may well revisit this though. For the beauty, and at such a good price, I may well just take the gamble and build arrows special just for them. 

You may notice I'm waffling a bit here. Not finding exactly what I'm looking for, at least not at the price I want to pay and speed to satisfy my impatience, I decided the best gamble would be a cheap gamble. I grabbed half a dozen points of dubious asian origin off Amazon. 

Arrow in the lathe along with intended point

Arrow in the lathe along with intended point

Regret might be the best word to describe the purchase. They're showing rust spots, are crudely made, and are too small. They're 8.25mm ID, and 9.7mm OD. That is .382 inches, and I would like .500 inches in a perfect world. Of course this isn't a perfect world, historical Manchu arrows were tapered, etc. Oh speaking of tapers, these have a straight walled socket, they're not tapered....... but you've got to piss with the cock you've got, so to speak, so we'll do half a dozen shafts with them. 

The straight shank for the arrow heads cut on the lathe, over-length, ready to be cleaned up and individually fitted.

The straight shank for the arrow heads cut on the lathe, over-length, ready to be cleaned up and individually fitted.

First step is to chuck them in the lathe. The straight walled socket sounds like a good idea, but really is actually quite dim. It means, if you don't have a machine lathe or arrows with a perfect 8.25mm OD, free hand turning will be a slow and fraught process of guess and check. It also means the depth must be PERFECT. The point can only distribute the load effectively at the tip of the socket and at the rim. The straight walls will basically be along for the ride. Chuck it up on the lathe to start then, and guess-and-check your way to the correct depth on each one to fit. 

Fitted shafts ready for points to be bonded on. 

Fitted shafts ready for points to be bonded on. 

It was a little bit painstaking, but I used the belt grinder to fit the shanks to each point, clean everything up, and add a smidge of a chamfer to make my life easier. 

Points bonded on using bohning ferr-l-tite

Points bonded on using bohning ferr-l-tite

I bonded the points on with a Bohning product called Ferr-L-Tite. It'd always served me well in the past, so here I am hoping it'll fill any gaps and do me right with these ridiculous straight shank points. 

All finished! points cleaned up, and tapers put on to remove that ugly shoulder. 

All finished! points cleaned up, and tapers put on to remove that ugly shoulder. 

Back at the belt grinder I used a block to lift the shaft above the protruding corners of the points and put a nice taper on each to get rid of that excess shoulder. The result doesn't look nearly as ridiculous as I had anticipated. The irony, I actually rather like how this came out. Heres to hoping that they stay on and don't shear or get pounded further onto the shaft splitting it. 

Finish sanding shafting on the lathe

Finish sanding shafting on the lathe

Next up on the menu is sanding, straightening, and finishing. These shafts start fairly straight, as they were sawn from straight blanks, however have a few minor undulations from how they were spun round.

Fixing this is part of the sanding process. This is better done longitudinally, but I'm lazy and have a lathe, so we'll use that. An electric drill can be used, however this can be done manually as well and the tools and processes are the same. These arrow shafts are half an inch in diameter, and sandpaper has thickness, so I did some napkin math combining the two and drilled a long deep hole in scrap piece of wood. This is then sawn in half leaving a trough. I then held the sandpaper in said trough, and applied it to the lathe-spinning shaft. The result? High points and minor inconsistencies in straightness are removed making smooth and beautiful shafting. Once completed it is a simple matter to run up the grits to achieve final finish. Before applying finish, a little reverse bending was applied for the "final" straightening.

Arrows with a single coat of Formby's Tung Oil

Arrows with a single coat of Formby's Tung Oil

Turns out these shafts are too long for my dip tube. No matter, it is too cold out to hang lacquered arrows as well. So I reached for my old standby of Formby's Tung Oil, which is mostly varnish anyway, and wiped a coat on. Given that these are an experiment, that'll probably be sufficient. 

Shafts pointed, tapered, sanded, and finished. Ready for nocks and fletching. 

Shafts pointed, tapered, sanded, and finished. Ready for nocks and fletching. 

Final step was to cut the shafts all to length. Went with 39" on the nose, end to tip. And they clock in at ~1100 grains or 71 grams. I just can't seem to get used to these spears masquerading as arrows. 

Next up: nocks, fletching, and shooting..... probably in that order. 

Tongue Rings - Product Introduction

Silent Thunder Ordnance

Tongue rings, here showing the short and long tongue variants

Tongue rings, here showing the short and long tongue variants

A historical oddity, inaccessible to most archers until now, we're proud to present our take on the tongue ring. What is it and how does it work I hear you ask? Unusually, instead of resting the string in front of the tongue, you rest it atop said tongue. The natural curve of the ring, relative to the narrowness of the tongue, encourages the string to remain on the tongue and off the soft part of the thumb making these comfortable rings to use. Upon release, the string rolls off the tongue, and drops like an absolute hammer. If you think Ottoman style rings feel snappy and fast, you should try one of these. 

Bronze Sword Project (part1)

Silent Thunder Ordnance

Raw bronze sword blank as it came from the maker

Raw bronze sword blank as it came from the maker

Pertinent to this style of archery are the other weapons/tools/technologies used. Our interests certainly cross over. To that end, one of us recently acquired a raw cast bronze sword blank as a gift. Why not blog about the process of turning it into a finished weapon? I apologize in advance for the quality of the photography. The workshop is a place too dark for quality photography and with harsh lifeless lighting. 

SIZE UP THE PROJECT
I have the sword blank, what other parts and materials will I need to complete the project? Even more fundamentally, what are the goals of the project? Goals wise, I'd like a functional, but display quality, piece complete with handle and sheath. To that end I'll need to refinish the blank, source wood for the handle, and source pin stock. Pin holes mic out at 3/16", and I have an idea regarding contrasting colors to throw some real beauty in here against the wood. The handle is of a length that a roughly 6" wood blank will be necessary to cover it, depending on handle design. The sheath/scabbard will come later. I haven't decided yet to what extent I want to cheat and just CNC mill out the pocket for the sheath, or do it by hand. I should also add that, while the sword came with instructions, they are borderline illegible and not particularly useful diagram-wise. A to-scale pattern would have been dandy, but not strictly necessary. 
The photograph at top is the raw sword as it came. The edges clearly have been hit with an angle grinder, and it looks like someone vaguely scared the surface with a wire brush, but clearly we have a long way to go here. 

Handle layout

Handle layout

LAY OUT THE HANDLE
Lets lay out the handle blank on paper, by simple tracing, and then use some basic drafting tools (compass, protractor, square, etc) to draw what sort of finished handle design I want. I traced the sword handle a number of times, figuring I'd screw up a few. I started with just a sketch to see what sort of look I liked. From there, I went to the precision draft to get the exact pattern I'll use when cutting the handles. You'll note the holes are not well positioned, however the unevenness of the sword's surfaces conceal a secret: the handle is remarkably symmetric. The square butt of the handle isn't to my tastes, but nor are the heinous looking bulbs of a pommel which I'm told are historically accurate. I went for a mild arc which I'll keep the profile thickness of the rest of the handle. The space in between is room for a little personal flourish. Given the mysticism and magic of swords, I'm leaning toward a modern analogue of foxfire. 

Beginning the rough filing/shaping of the sword

Beginning the rough filing/shaping of the sword

ROUGH OUT THE PROFILE
File the sword to profile. This really is about as simple as it sounds, and only took me about an hour per side. Holding down the sword at its high points, so as to avoid bending it, I simply filed away the surface imperfections from casting while maintaining the cast shape. I also did some tapering toward the edges, since obviously you can't cast a thin edge readily. Historically these edges would have been forged to work harden the cuprous alloy, a double edged sword pun intended, however finding little information on how this is actually accomplished I experimented a little then abandoned it. 

Rough shaped sword, ready for finishing. 

Rough shaped sword, ready for finishing. 

Sanding out the file marks, particularly challenging in detail areas such as near the hilt

Sanding out the file marks, particularly challenging in detail areas such as near the hilt

BRING THE SWORD UP TO FINISH
Interminable sanding. Seriously. EVERY LAST FILE MARK. This takes hours, and requires quite a bit of diligence. Perhaps if I were smarter I would have covered the blade in marking fluid to make it obvious where remaining scratch marks were hiding, but I did it by simply looking in the reflections off the blade for non-aligned scratches. I cheated here and used an oscillating detail sander to make my life easier rather than doing it entirely by hand. You sand in one direction, check for any scratches reflecting light going in a different direction than the scratch pattern you left, and scrub out anything you find. You then sand 90 degrees opposed and repeat the process. When you're done, no matter the direction you sand in, all scratches should reflect light as parallel. 

Where I stopped before attaching handles, 320 grit. Heating the handle will result in discoloration, which will need to be scrubbed out, not to mention working on tools runs the risk of adding scratches. 

Where I stopped before attaching handles, 320 grit. Heating the handle will result in discoloration, which will need to be scrubbed out, not to mention working on tools runs the risk of adding scratches. 

DON'T FINISH TOO HIGHLY THOUGH......
High on the euphoria  of completion after hours work getting the file marks out, I started working my way up the grits. Seen above is where I stopped, at 320 grit, because we're about to attach the handles. This process involves heating the blade tang to form the wood scales to the complex shape. The result being you want the sword to be its finished shape, however you'll have to refinish it so no point in going to too fine a finish. Once again, for every grit, sand it entirely in one direction until the scratch pattern is parallel and then again 90 degrees opposed checking for any out-of-alignment reflections. 

That is it for now. We'll continue this project in a future blog post. Thanks for reading!

Bow Performance Project

Silent Thunder Ordnance

First though, a quick announcement: you voted, we listened, and the two new ring colors are now available in all styles. Nocturnal Blue and Silver Gray. Nocturnal Blue is a deep rich blue-purple color and has got to be one of my  favorite ring colors. Silver Gray is stunning as well, possessing an almost metallic quality which is difficult to describe and even more difficult to capture. Both make for stunning rings. 

Our Hybrid ring shown in our three standard colors: Black, Silver Gray, and Nocturnal Blue

Our Hybrid ring shown in our three standard colors: Black, Silver Gray, and Nocturnal Blue

BOW PERFORMANCE PROJECT
Similar data sets have been published, by us, on our Facebook Page before. Now though, we have a much better platform whereby to consolidate and display it. While much is straightforward, lets recap the basics of what these charts are and what they show. 

THE STABLE
-Hwarang - Supplied by Thomas Duvernay, these bows are absolute gems. 
-Grozer Turkish - Csaba Grozer requires little introduction. This is a Turkish base bow from several years ago now. To my knowledge, this bow has some of the most extreme reflex of all modern reproductions. 
-Spitfire - Made by Chris Constantine of Spitfire Horsebows, this carbon fiber bow is also a few years old now but no less snappy. It is also nicely decorated. 
-Kaya - A maker of popular and inexpensive Korean style bows, this example is decorated in paisley patterned leather. 
-AF Tatar - AF archery is a, relatively, new player on the market. With beautifully made and inexpensive Saluki-style bows (Saluki style in that they're laminated and left exposed rather than wrapped) I suspect they'll rapidly grow in popularity. Many of their new designs have also grown in price to compete with the more expensive laminated Alibow offerings. Thus far, these have been cracking fast too. 
-KTB Kingdom - Another of the carbon Korean wunderbows, this time for sale at Freddie Archery, these are advertised with poundage at 31" and no max draw length. Somewhat surprising then how this bow begins to stack as 31" is approached, as it is smooth up until that point. It also, like the Hwarang, has a beautiful convex belly. A very practical bow, and a favorite of mine to shoot. 
-AF Turk - This is one of the more "premium" members of AF archery's lineup. Clear glass laminations, bamboo core, etc. A beautiful bow, full disclosure though this one shipped with a string too long for it. Twisting a string can reduce its length, however the amount of twist required in this case also has the possibility of inducing "stretch" thus robbing performance. 
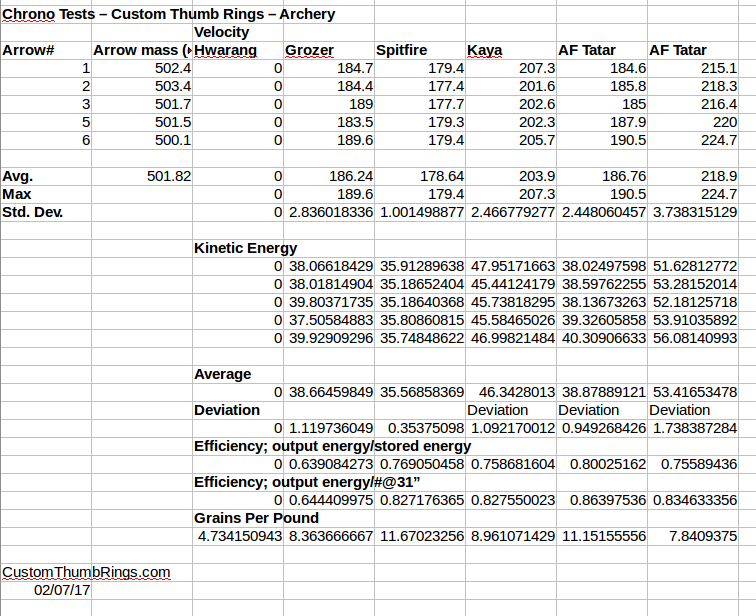
FORCE DRAW DATA
This is simply the force required to draw a given bow the listed distance. It gives you a basic look at how the draw of the bow goes, notably smoothness. At the bottom, we listed two metrics in an attempt to empirically compare stacking. They are  the slope of the F/D curve in the last two inches, and the percentage of the bow's total poundage gained in the last two inches. The slope of the F/D curve is typically a reasonable indicator and comparator between bows of similar design and poundage, however as the Hwarang clearly demonstrates bows with a greater overall poundage are destined to have steeper slopes as they simply need to gain more ground over the length of their draw. 

STORED ENERGY DATA
This data set is, at its essence, the integral of the force draw curve. You're simply looking at a bow's ability to store energy. This represents your total energy budget with which to propel an arrow. Firing an arrow of hypothetically infinite mass, you would impart this amount of energy to it. More is better, hypothetically anyway, but what is the cost of this energy storage? 

STORED ENERGY/POUNDAGE
Stored energy divided by poundage at that distance. Simple concept, but what does it mean? In essence, you're looking at the adjusted price (per pound cost) of storing energy in a bow. Quite simply, higher is better because you're getting more stored energy for the poundage you have to hold. Bows with higher brace heights and bows which stack at the end of their draws tend to suffer here because the former store less energy and the latter spike late at a higher poundage. 

CHRONO AND EFFICIENCY DATA
This is really where the rubber meets the road. How fast is an arrow spit, how efficiently does a bow use its stored energy, and how light an arrow can you safely shoot? Different manufacturers have their own cutoffs, and it is worth asking yours for this number, but when people talk about minimum grains per pound (GPP) and minimum safe spine, this is what they're talking about. All the energy you store in that bow has to go somewhere, and that which doesn't go into the arrow has to be re-absorbed by the bow. The faster the bow has to move to propel an arrow, the more energy it must expend and subsequently reabsorb accelerating itself, rather than the arrow. This is why flaccid arrows, or lightweight arrows, tend to be less efficient. This efficiency number varies greatly by bow. Lighter laminated bows tend to be more efficient, but also more delicate. Solid fiberglass bows tend to be less efficient, but without a core to fatigue and fail they tend to tolerate absorbing more energy. My personal rule of thumb, is that laminated bows should run above 70% efficient and solid fiberglass bows above 60% efficient for their own safety, however in virtually all cases you'll experience rather startling hand-shock unless you operate above somewhere around 70%. Laminated bows which require greater than 75% efficiency to operate safely according to the manufacturer, as a general rule, I try to avoid as it indicates a design in need of reinforcement. Again though, these are my rules of thumb, not hard and fast rules, so please take all of this with a grain of salt. And, of course, hypotheses like this are always subject to change. 
Why are there more bows in the stable than are listed here? Well there are a variety of reasons. The short version though is that only certain times of year, due to temperature, are conducive to testing bows. Furthermore, we like to keep things fair and balanced. Given fixed mass arrows, some bows such as the Hwarang are not necessarily safe to even test with such light arrows and even if we did it would unfairly handicap the bow. Not to mention >100# spined arrows are hard to come by. The solution to this is to be determined. We will add to this list as time and conditions permit. 


Color Survey Roundup

Silent Thunder Ordnance

Thanks to everyone who participated in our ring color survey and giveaway. The winner has been contacted. 

Two colors were overwhelmingly the most popular: silver grey and nocturnal blue. We should be adding those colors to the options menu shortly, as we bring them online. In the meantime, check out one of our nocturnal blue prototype of the popular Hybrid.

Hybrid thumb ring in Nocturnal Blue 

Hybrid thumb ring in Nocturnal Blue 

New Ring Color Survey

Silent Thunder Ordnance

Surveys, ugh, I know. We'd like to add a new color though for our standard polymer rings, and we'd appreciate your help in choosing it. We'll run the survey for two weeks, and when it is complete we'll randomly select one of the participants to get 10$ off any order over 20$. 

In the survey box below, please rank your top three choices in order of most preferred to least preferred. The email field is optional, however without a way to contact you, you also can't win. We will never share or sell your email address. 

Color options: 
-Gunmetal Gray
-Silver Gray
-Nocturnal Blue (dark blue-purple)
-Blue
-Green
-Orange
-Red
-Burgundy

All done! Thank you everyone who participated. 
 

Manchu Arrow Project (part 1)

Silent Thunder Ordnance

Rough poplar Manchu (1/2") shafting in the background. "Normal" sized rough cedar shafting in front. 

Rough poplar Manchu (1/2") shafting in the background. "Normal" sized rough cedar shafting in front. 

Perhaps this could be more accurately titled "heavy war arrow project," but I digress. This all was inspired by a for sale post from a gentleman I saw a while ago where he said he was selling his beautiful Manchu style bow because he was unable to source sufficiently heavy arrows for it. So this series of blog posts, which will only be on our website (not on our Facebook), we'll go through the trials and tribulations of making super high mass arrows. And before people ask, no, at this time we have no plans on selling complete arrows. We're really not set up to manufacture arrows large scale, so the labor, low volume materials, and thus price would be unreasonable. However, depending on how things go, we may sell raw shafting and/or a few other parts to go with it. 

So where to start? Well, given our science-forward way, lets start with a little research and some math. First off, how large do we need these arrows to actually be? I turned to two sources for this. The first is Peter Dekker's, who is an invaluable resource. THIS ARTICLE gives a fantastic overview. We find they are 92-105cm (36-41 inches) in length and can weigh as much as 100 grams or >1500 grains. These things really are more mini-spears than arrows it seems. 

For confirmation of these numbers, I ended up at Cinnabar Bow and Manchu Bows. In both cases, the Manchu bows allow a 36" draw, and given historical images a fair bit of arrow is expected to remain in front of the bow. Weight-wise Manchu Bows states a minimum grains per pound, henceforth GPP, of 12 while Cinnabar 8% higher at 13. Manchu Bows does however recommend between 13-15GPP. If 50#s were to be considered typical, a 600 grain arrow would be required, but a 750 grain arrow recommended. That said it is often suggested, but never cited, that the Manchu bow design doesn't start to generate significant benefit until one is over 80 pounds draw. That would require 1000 grain arrows, 1200 being optimal. So if we subtract off 150 grains for a point (I am assuming most people shoot targets, so want a target point not a spear head) and divide the remainder by 40 inches, we come out at 26.25 grains per inch. for optimal shooting with an 80 pound Manchu bow. Alright, that is somewhere to start. 

Researching inexpensive arrow woods, I came across poplar. Poplar has the advantage of being straight grained, durable, and comparatively inexpensive. Certainly as compared to cedar which, if purchased in something other than bulk, costs over 1$ per shaft in lumber alone for normal sized shafting. So I acquired a few relatively knot free, straight grained, good looking boards and here we go. 

Rough sawn 1/2" square poplar arrow blanks

Rough sawn 1/2" square poplar arrow blanks

Step one, align the grain, and then rough saw the boards into straight square blanks. This is the easy part. You make buckets of sawdust, but it is relatively quick and painless. Some setup is required to make sure you got the diameter just so, 1/2" in this case, but no biggie. As an added bonus, one round of this will produce enough paint stirring sticks to last you decades. 

Off-cuts (scrap) from arrow sawing. These stirring sticks will be put to use for decades to come. 

Off-cuts (scrap) from arrow sawing. These stirring sticks will be put to use for decades to come. 

From here we have to convert the shafting to round. Some people use planes, and I used to as well, but this takes forever. So I now chuck arrows up on the lathe and just spin them down. Quick, easy, glorious. It does produce simply vast amounts of sawdust though. There is another secret advantage to this. Some percentage of arrows contain a fault hidden somewhere. On your bow is not where you want to find this out. Using the lathe applies a fair amount of torque to the arrow shafts, so in general if an arrow is weak it'll die here. Think of it as a convenient early pre-screening, before you've done a ton of work to the shaft. 

Converting square blanks to round shafting on the lathe. 

Converting square blanks to round shafting on the lathe. 

So now we have a couple rough shafts, how did we do? Well weighing a few and taking an average, it seems we're clocking in right around 25.9 grains per inch. I wish I could chalk it up to skill, years of hard learned lessons apprenticing, but the reality is that it was as much dumb luck as anything else. We'll lose a little weight to sanding, but gain a little weight from a nock, fletching, wrapping, and laquer/finish. So we're right on target. 

Square arrow blanks next to rough round shafting. Square ends can either be turned into something like bulbous nocks, used to mount points, spun/planed/sanded round, or simply cut off. 

Square arrow blanks next to rough round shafting. Square ends can either be turned into something like bulbous nocks, used to mount points, spun/planed/sanded round, or simply cut off. 

Before I close out this blog post though, I want to do a little more napkin math. After all, what use beyond Manchu bows could such a heavy shaft possibly be? Well if you've followed our bow performance data series (which is about to get an update BTW), you'd know I have a ~110 pound Hwarang which I love dearly. If we return to Cinnabar bow and the Scorpius Turkish "flight bow," you'll see an 8GPP minumum. Extrapolating that to 110 pounds and you're into a 880 grain 31" arrow. Subtract off 100 grains for a point and you're just a hair over 25 grains per inch for the shaft. A 900 grain arrow though still seems impossibly heavy, right? Well, these Korean bows tend to be quite efficient at transferring their energy to arrows, typically over 75% even for the inexpensive ones. So extrapolating given stored kinetic energy, 75% assumed efficiency, and a 900 grain arrow you'd come out with over 204FPS. That is pretty terrifying if you think about it, that is huge power, and I every bit believe the bow could do it as well. I guess time will tell. How about a mere mortal's bow, like an AF Archery Tatar rated 55#s@28"? Assuming 80% efficiency, which is by no means a stretch for these bows given this arrow mass, that'd be a whisker shy of 170fps. Not the speediest arrow that ever hustled down range, but not exactly slow either. Just something to chew on. 

Stay tuned. This project, far from being over, is just beginning. In the coming days/weeks/months we'll post as this project evolves. Thanks everyone for reading. 

We've Launched!!!!!!!

Silent Thunder Ordnance

Our current five styles, from left to right: Manchu, Byzantine, Ottoman, Hybrid, and Grooved. Seen at center is the Byzantine in Bronze (the historically correct material for the ring we modeled our Byzantine from).

Our current five styles, from left to right: Manchu, Byzantine, Ottoman, Hybrid, and Grooved. Seen at center is the Byzantine in Bronze (the historically correct material for the ring we modeled our Byzantine from).

Almost a year ago, we launched a Facebook Page to offer our services making custom fitted thumb rings. We were never expecting the success which followed. As we grew, not only were ring designs added and improved, but a whole suite of other products and materials. Obviously though, we've outgrown the Facebook platform as our page has become a mess of announcements, products, information, etc. It was time for a website, overdue even. So to all our customers, testers, and collaborators, thank you! 

Welcome to our new website. In order to streamline the ordering process for our customers, and open up additional payment options, we've finally gotten one set up. This changes nothing about our products. Everything is still custom made to fit you, and lovingly hand finished. Just a better organized and more streamlined interface. 

With the launch of our website, comes the discontinuation of two products, and the addition of two new products. Our old "Standard" and "Lipped" rings are being phased out. Customers who have their size known/established in those rings can still order them if they choose, however we encourage everyone to move to our new rings which are better designed, more comfortable, more rigid, and offer improved performance. They are the Hybrid and the Grooved. The Hybrid offers an unusual dual style release. It can either hold the string like the old lipped ring, or release off the top like an Ottoman ring. A very cool design. The Grooved ring, as the name would imply, offers a groove to aid in string placement.

All four of our, for lack of a better description, non-Manchu rings also now run on a new "universal" sizing standard. What this means is, once you know your size for one style ring, we can apply it to any other ring to get your size right without having to order another set of three. Neat huh? Along with this innovation, we've launched Ring Sizers to match so archery retail fronts, shooting ranges, etc. may have a quick and easy way to place newcomers into our sizing spectrum. 

So thank you everyone for making CTR a success, and we look forward to continuing to serve you through our new website. As a special thank you, use the coupon code "LAUNCH5" to get 5% off site-wide for the next week.